

Howdy folks, Here is how you install the pod gauges onto your dash without spending a fortune on labor or the hassle from the dealership.
First off if you don't already have the parts here is what you need
83179-35020 Meter Cover
82142-35070 Wire Harness
83290-35081 Meter Assembly
83297-35050 Bracket
90080-17191 Nut (2 required)
90467-07138-B2 Clip (2 required)(optional will explain further down)
I ordered mine from an online dealership and with shipping for me up to Canada i payed just under $460 for everything above, PM me if you want to know which dealer it was
Ok once you have all that, and your tools of course you are ready
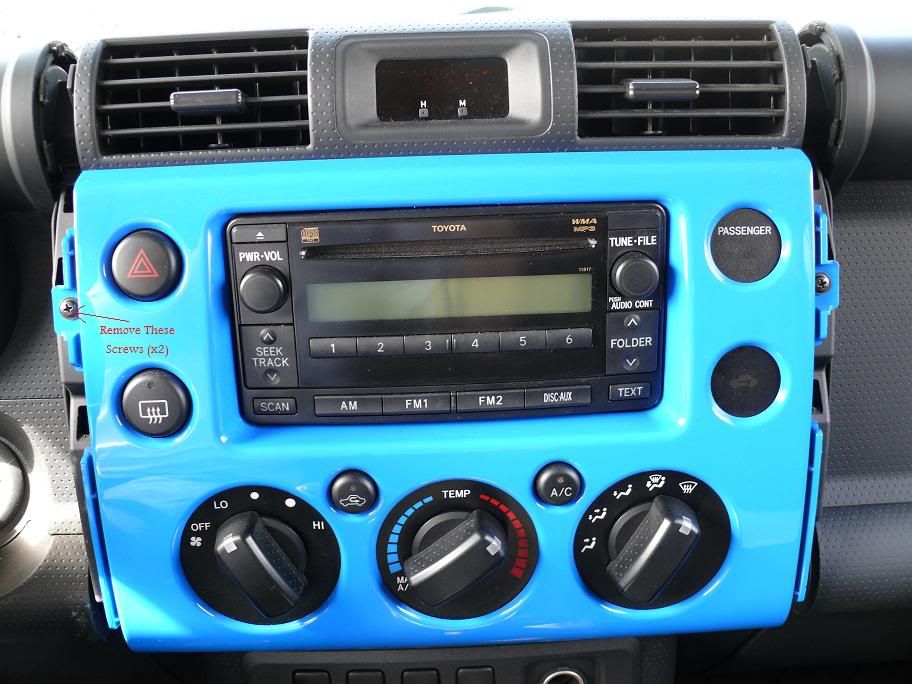
Step One: Remove the trim pieces around the colored information panel where the radio and temperature controls are x2 Philips screws. Then remove the two Philips screws on the information panel shown in the pic.
![Image]()
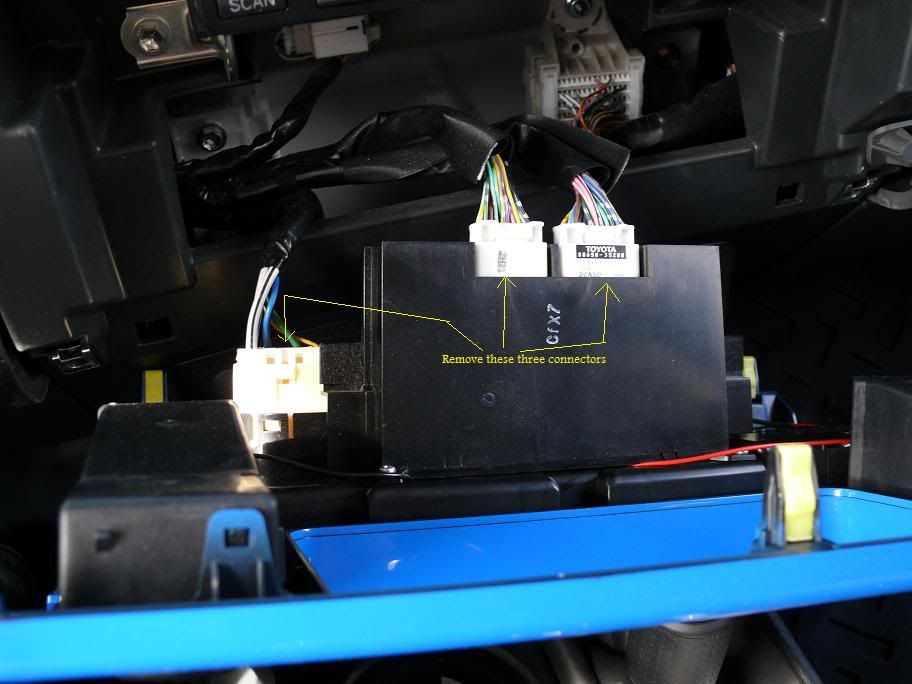
Step Two: Remove the three wire connectors from the above piece
![Image]()
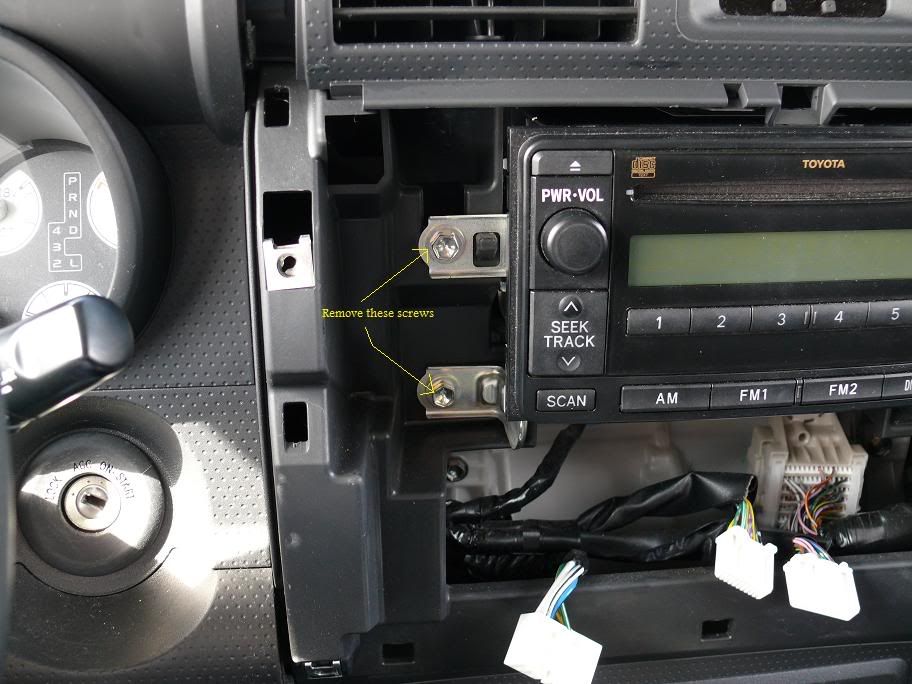
Step Three: Remove the radio by unscrewing the bolts shown in the picture there are four in total. Unplug the wire connectors and antenna, plugs vary on your sound options.
![Image]()
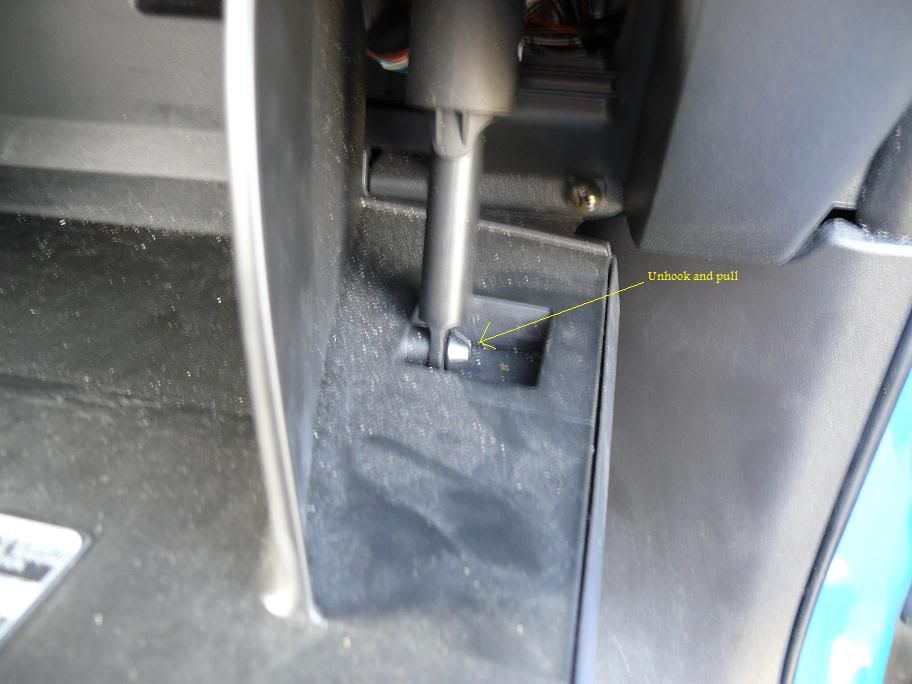
Step Four: Open up the glove box and pinch the sides of it to release it from its home position. On the passenger side of the box is the piston, pinch the split piece and pull the piston rod towards the passenger side door.
![Image]()
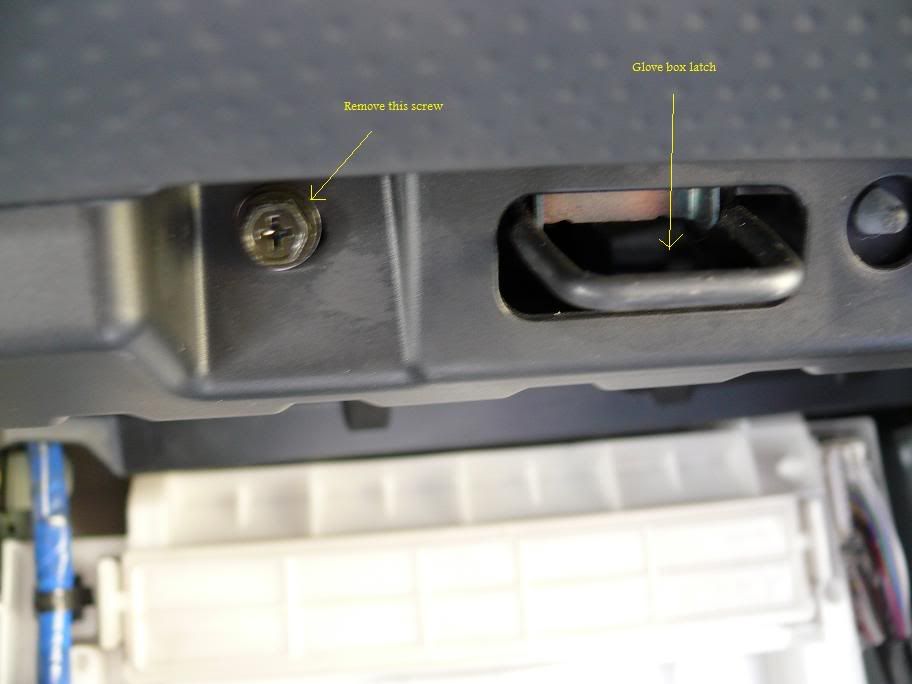
Now find the screw near the glove box latch and remove it
![Image]()
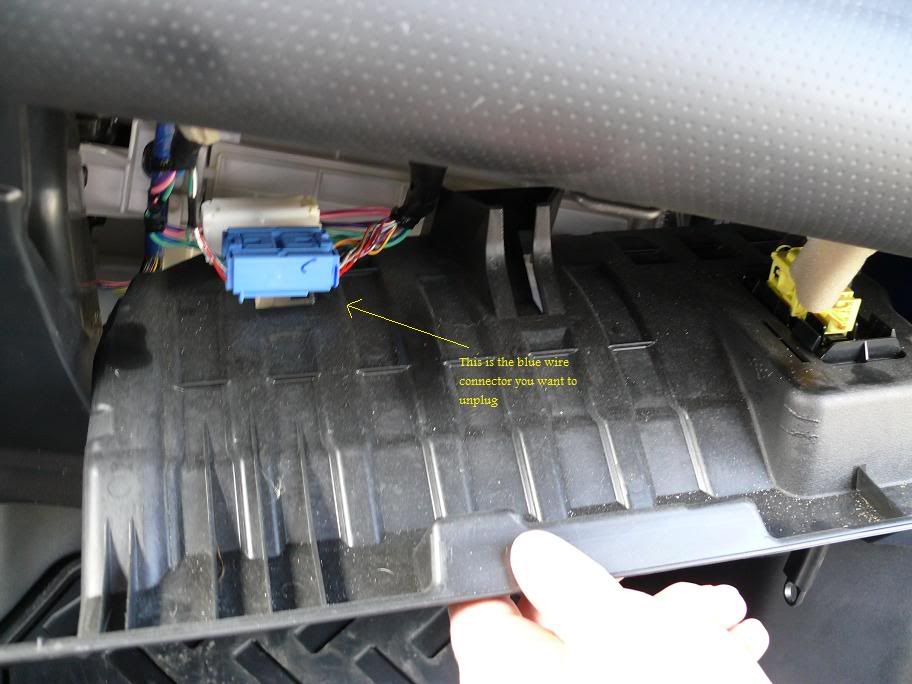
Step Five: Gently remove the upper glove box piece which had been screwed on to reveal three connectors you want to leave the yellow and white one alone for this project. Remove only the stock blue connector.
![Image]()
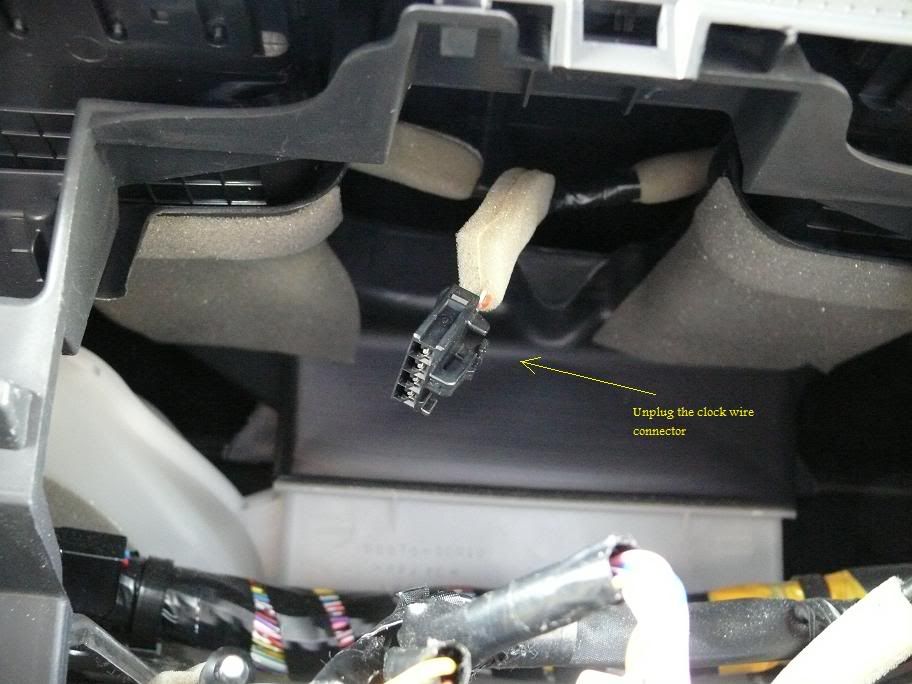
Step Six: reach behind the clock and disconnect the clock wire connector, here is what it looks like
![Image]()
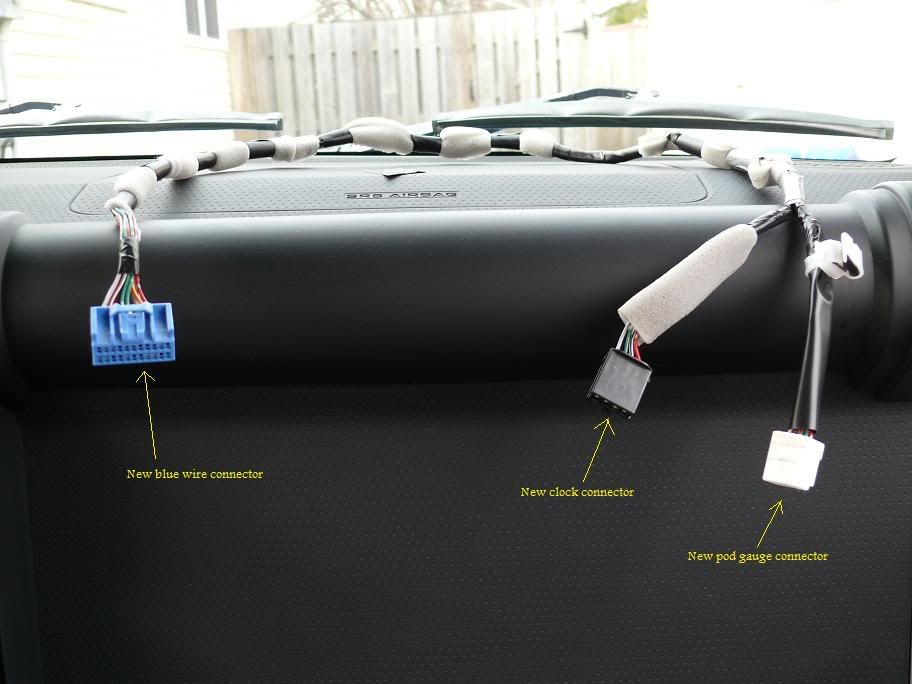
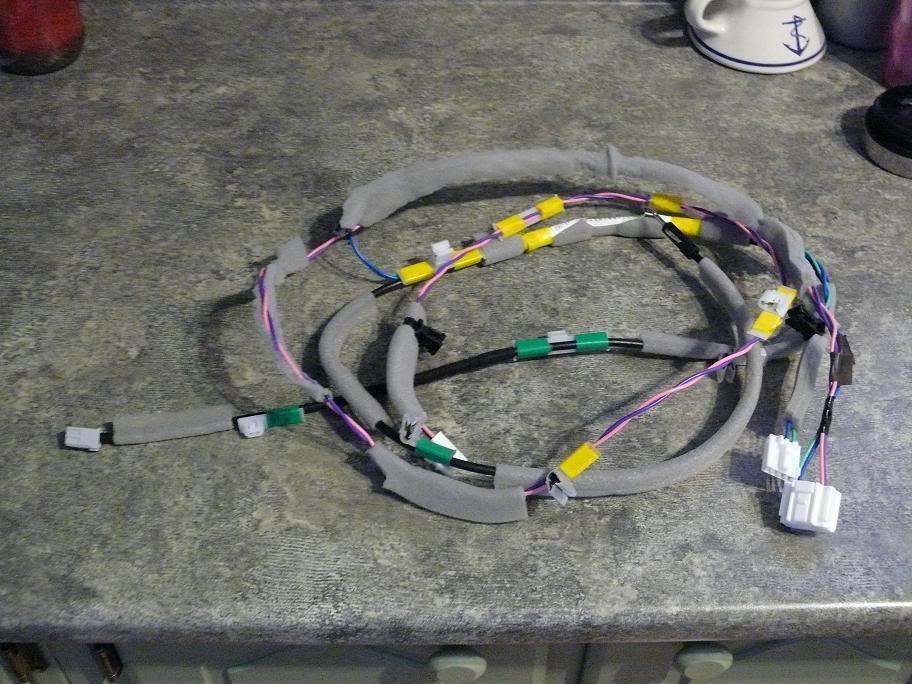
Step Seven: Pull the harness out of your new parts box and find the blue connector on it follow it along until you get to the clock & gauge connector. I decided to remove all the other stuff and just have what i needed, if you'd like you can just stuff it all in behind the radio and just run the blue connector to last steps location, don't worry its a somewhat clear path to that plug. Here is what i had after i "modified" the new harness
![Image]()
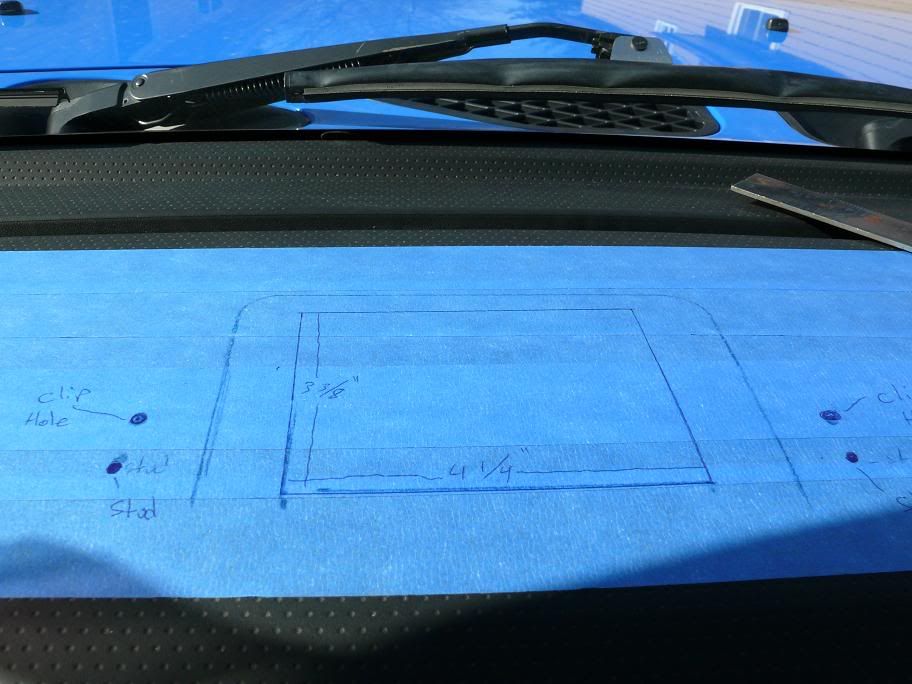
Step Eight: Tape up the dash where the pod will sit, I used blue painters tape so i could draw out what i planned on cutting and drilling, and keeps scratches and damage to a minimum. I fully measure the dash along the ridge just forward or the top dash "pipe" and found the middle, drew out a sketch of the bracket and mounting holes, the big hole needed for the pod's wire harness was 3 3/8" x 4 1/4".
![Image]()
I made a bit of a mistake with my clip holes and they weren't centered so i didn't bother using the clips at the end, which is why i said they are optional at the start, you don't "need" them but its up to you, the two nuts and the anchors on the underbelly of the pod are sufficient.
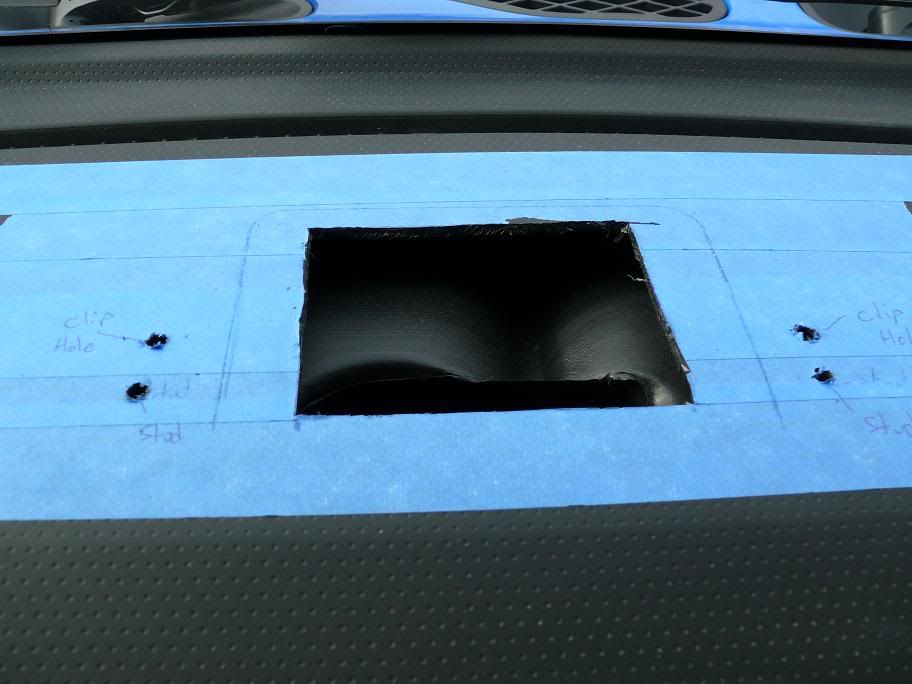
Step Nine: The long hard part...after measuring three times and double checking things i made the cut, you can just use a utility knife remember to only cut the 3 3/8" x 4 1/4" hole, then drill out the mounting holes with a 1/4" drill bit, be careful not to drill too deep your vents are right under the holes you need to make, just enough to break through. When you are done it should look something like this.
![Image]()
Step Ten: Take the mounting bracket and get it under the dash, this part is tricky you kind of have to angle and fineness it over the vent tubes and over existing wires, once its there push the studs through, when doing this the rounded edges on the bracket should be facing the front of the truck. No pic on the one folks, its hard to see when its in position so i figured wasn't worth trying.
Step Eleven: Once the bracket is in place and your "big" hole is cut, look under the gauge pod and find the two hook anchors on the back of it, these slide under the dash when you place the pod on the dash, push the bracket studs through the mounting holes on the pod and use the two flange nuts that came with your parts. If you opted for drilling the clip holes place them in the holes and screw the top piece down to flange out the clip bottom.
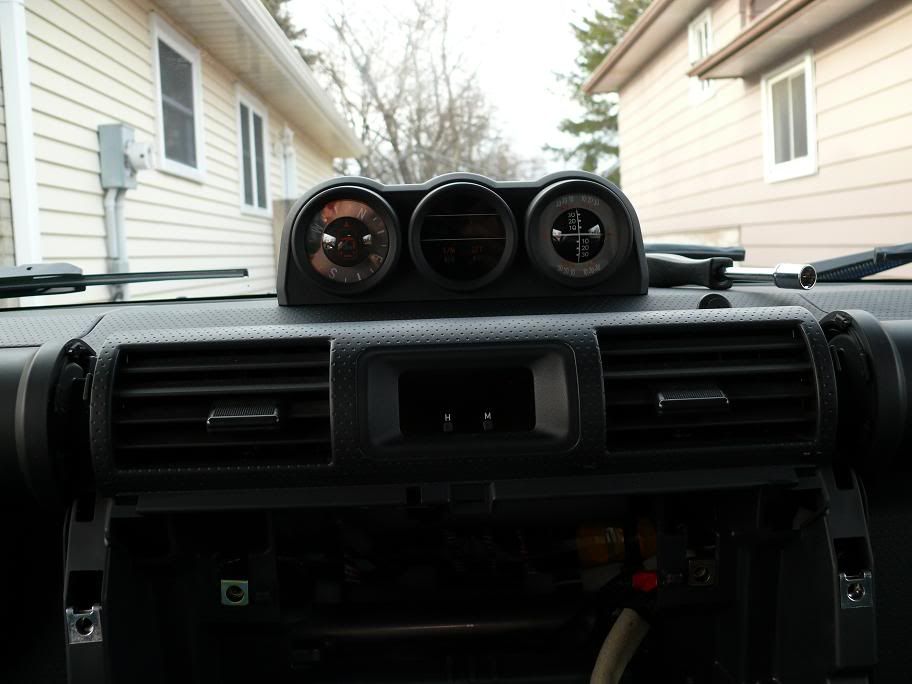
This was my test fit
![Image]()
Step Twelve: When you have the pod secured down, plug the connector into it, plug the new clock connector in and put everything (radio, glove box, etc...) back into place.
![Image]()
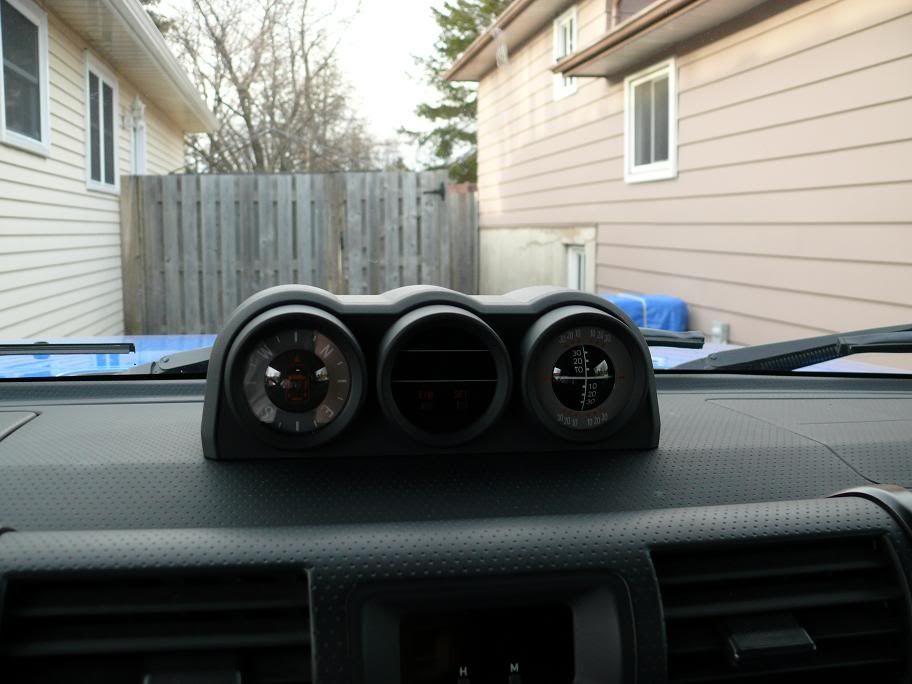
Step Thirteen: Place the hood onto the pod, reset your clock, radio stations, and follow the instructions in the owners manual for setting your compass to your region.
VOILA you are done :bigthumb:
just to give you an idea how much of the harness you DON'T need here is a picture of what i have after i took what IS needed.
![Image]()
Step Fourteen: Enjoy your new Pod gauge cluster.
I would like to thank all the folks on this forum that helped me with info, steps to follow and pictures, prior to my install :bigthumb: :cheers:
First off if you don't already have the parts here is what you need
83179-35020 Meter Cover
82142-35070 Wire Harness
83290-35081 Meter Assembly
83297-35050 Bracket
90080-17191 Nut (2 required)
90467-07138-B2 Clip (2 required)(optional will explain further down)
I ordered mine from an online dealership and with shipping for me up to Canada i payed just under $460 for everything above, PM me if you want to know which dealer it was
Ok once you have all that, and your tools of course you are ready
Step One: Remove the trim pieces around the colored information panel where the radio and temperature controls are x2 Philips screws. Then remove the two Philips screws on the information panel shown in the pic.
Step Two: Remove the three wire connectors from the above piece
Step Three: Remove the radio by unscrewing the bolts shown in the picture there are four in total. Unplug the wire connectors and antenna, plugs vary on your sound options.
Step Four: Open up the glove box and pinch the sides of it to release it from its home position. On the passenger side of the box is the piston, pinch the split piece and pull the piston rod towards the passenger side door.
Now find the screw near the glove box latch and remove it
Step Five: Gently remove the upper glove box piece which had been screwed on to reveal three connectors you want to leave the yellow and white one alone for this project. Remove only the stock blue connector.
Step Six: reach behind the clock and disconnect the clock wire connector, here is what it looks like
Step Seven: Pull the harness out of your new parts box and find the blue connector on it follow it along until you get to the clock & gauge connector. I decided to remove all the other stuff and just have what i needed, if you'd like you can just stuff it all in behind the radio and just run the blue connector to last steps location, don't worry its a somewhat clear path to that plug. Here is what i had after i "modified" the new harness
Step Eight: Tape up the dash where the pod will sit, I used blue painters tape so i could draw out what i planned on cutting and drilling, and keeps scratches and damage to a minimum. I fully measure the dash along the ridge just forward or the top dash "pipe" and found the middle, drew out a sketch of the bracket and mounting holes, the big hole needed for the pod's wire harness was 3 3/8" x 4 1/4".
I made a bit of a mistake with my clip holes and they weren't centered so i didn't bother using the clips at the end, which is why i said they are optional at the start, you don't "need" them but its up to you, the two nuts and the anchors on the underbelly of the pod are sufficient.
Step Nine: The long hard part...after measuring three times and double checking things i made the cut, you can just use a utility knife remember to only cut the 3 3/8" x 4 1/4" hole, then drill out the mounting holes with a 1/4" drill bit, be careful not to drill too deep your vents are right under the holes you need to make, just enough to break through. When you are done it should look something like this.
Step Ten: Take the mounting bracket and get it under the dash, this part is tricky you kind of have to angle and fineness it over the vent tubes and over existing wires, once its there push the studs through, when doing this the rounded edges on the bracket should be facing the front of the truck. No pic on the one folks, its hard to see when its in position so i figured wasn't worth trying.
Step Eleven: Once the bracket is in place and your "big" hole is cut, look under the gauge pod and find the two hook anchors on the back of it, these slide under the dash when you place the pod on the dash, push the bracket studs through the mounting holes on the pod and use the two flange nuts that came with your parts. If you opted for drilling the clip holes place them in the holes and screw the top piece down to flange out the clip bottom.
This was my test fit
Step Twelve: When you have the pod secured down, plug the connector into it, plug the new clock connector in and put everything (radio, glove box, etc...) back into place.
Step Thirteen: Place the hood onto the pod, reset your clock, radio stations, and follow the instructions in the owners manual for setting your compass to your region.
VOILA you are done :bigthumb:
just to give you an idea how much of the harness you DON'T need here is a picture of what i have after i took what IS needed.
Step Fourteen: Enjoy your new Pod gauge cluster.
I would like to thank all the folks on this forum that helped me with info, steps to follow and pictures, prior to my install :bigthumb: :cheers:
")


