

Hi Boys and Girls, Swiss here with another “DRL” thread.
I know a number of you are saying: “Gosh Swiss haven’t we beat this one to death?” And/or … “you’ve been around long enough to know better!”
My answer to you is (3) fold:
1) You are 100% correct
2) I read all (well, mostly all) existing DRL threads this morning and I just thought there was a slightly better way and it might be worth posting for those like me that are finally getting around to this
3) If I added this to an existing DRL post, no one will make it that far
This mod is basically just adding a switch to the DRL’s with a little different tap location, so if you have been through this before, you may wish to bail here!
Ok, before I get going, I want everyone to know that I firmly believe DRL’s save lives and they should be on. However, there are a few exceptions (when I am not driving on an open road) when I need them to be off and you have read most of the exceptions before so I don’t need to elaborate.
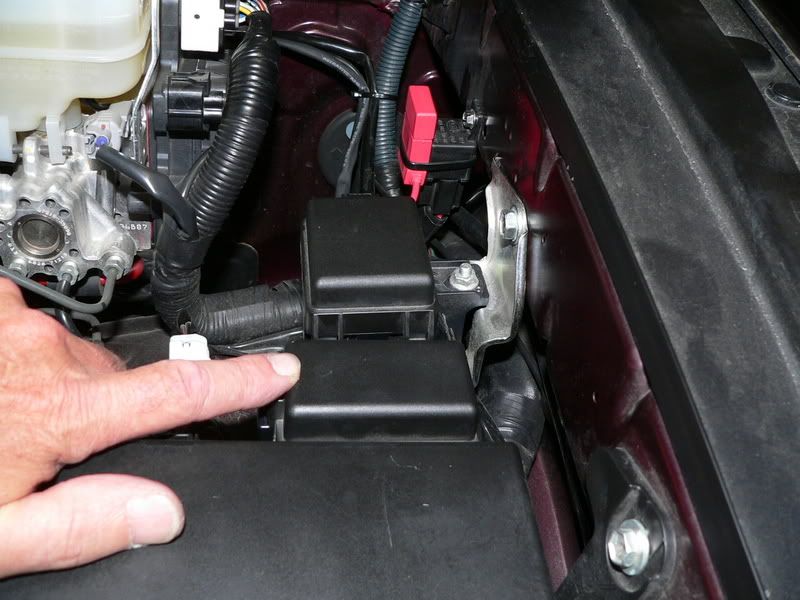
The other threads tend to make the DRL switch tap right up at the front lights where it is very tight and hard to get to or they instruct on removing a number of body pieces. I chose to work in a simpler location. Right under the hood where the DRL relay is.
This is it
![Image]()
Remove the relay box next to it to ease access
![Image]()
Remove the cover from the DRL box and insert a flat blade screwdriver into the locking tab to release the tabs. Lift straight up on the DLR box and it comes free from its mounting tabs. (that one took me a while to figure out)
Note: I used a 3/16" screwdriver. Wedge it down into the area shown (look carefully where I have the screwdriver positioned). Once inserted, tilt the handle of the screwdriver towards the windshield (i.e. flexing the relay box towards the firewall slightly). Once flexed, you can lift upwards on the relay box and it will release. It comes off hard and you need to work at it.
![Image]()
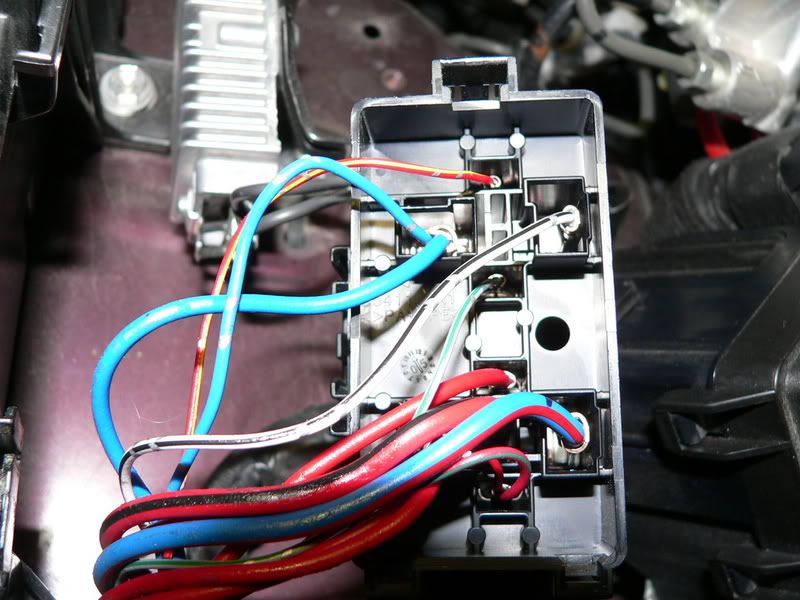
Remove the bottom cover on the box and strip back the tape on the wires
![Image]()
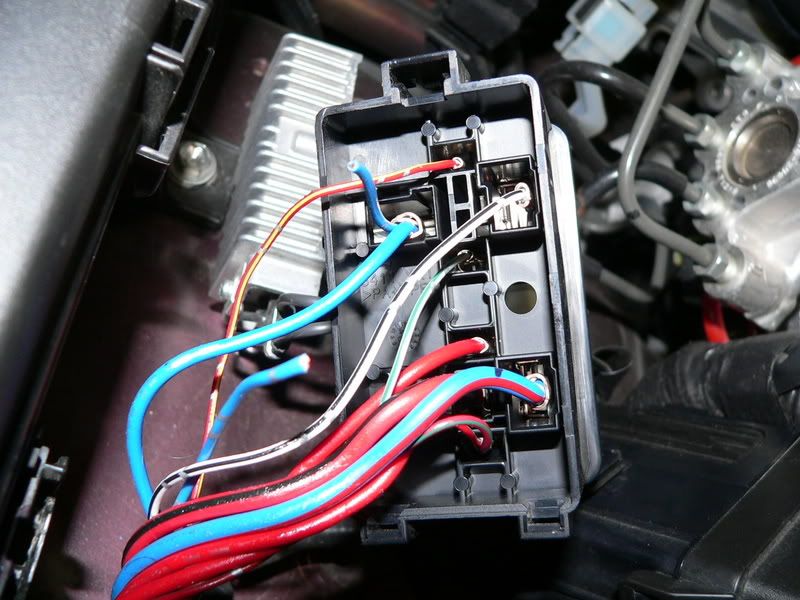
Locate the (2) blue lead wires connected to a single terminal
![Image]()
Cut the smaller of the (2) blue lead wires about 1 ¼” from the terminal
Note: The smaller of the (2) blue leads has little grayish dots on it and the bigger one does not, make sure you cut the correct one
![Image]()
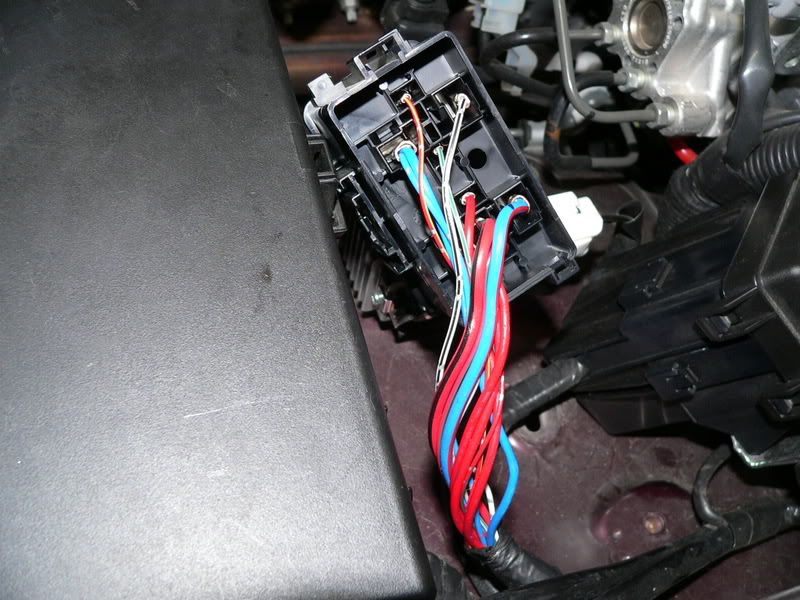
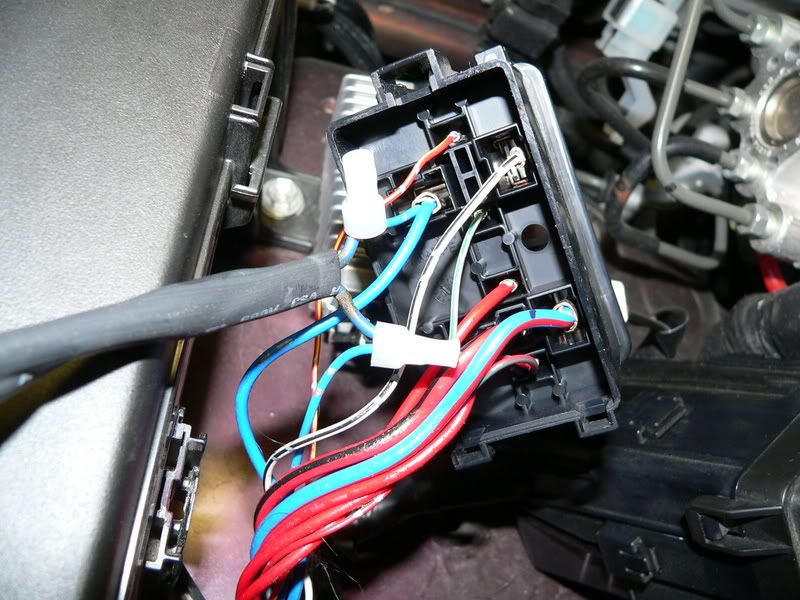
Make up a (2) lead mini-harness to run into the cab and attach to a switch. Attach (1) lead to each of the cut wires.
Note: When I do a crimp joint like this, I always use a little anti-oxidant grease on the leads prior to crimping on the terminal
![Image]()
Tuck in your splices into the relay box, re-tape the lead harness, and snap the covers back on
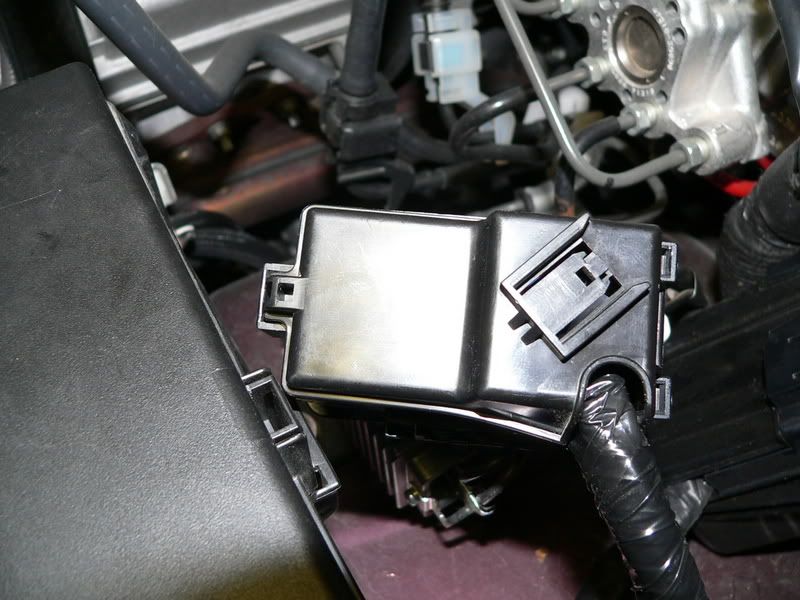
![Image]()
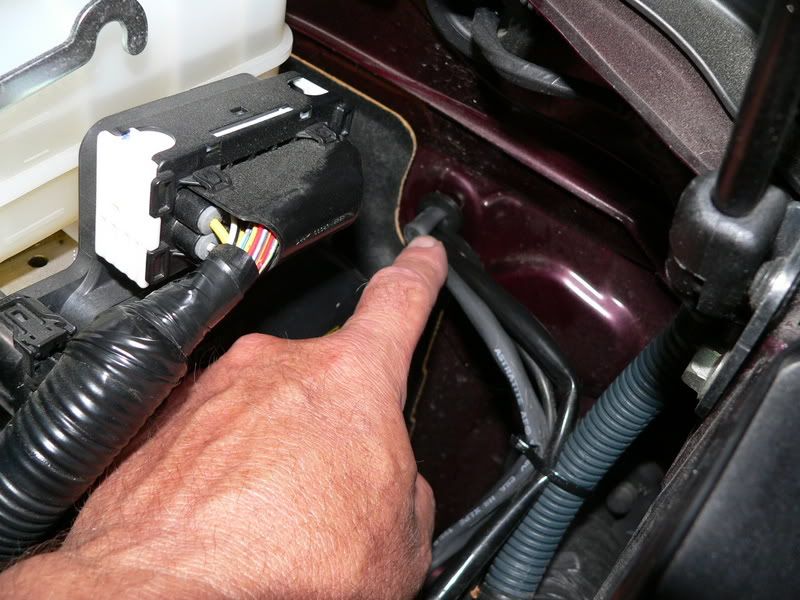
Remount the (2) removed relay boxes and run the new 2-wire harness through a grommet in the fire wall
![Image]()
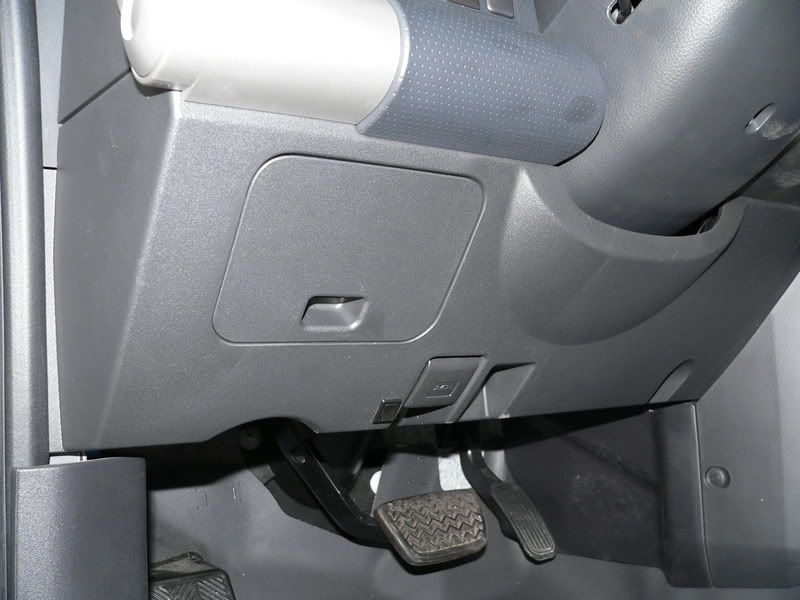
Mount a switch, hook up the wires, and you are done. I chose a small 2 position switch and mounted it in an obscure location since I intend to really not turn the DRL’s off very often. This way I will not accidentally turn them off. Can you spot the switch?
![Image]()
Sorry about “another DRL thread” but this one seems like it would be a lot easier for folks to do.
Hope you enjoyed the project.
I know a number of you are saying: “Gosh Swiss haven’t we beat this one to death?” And/or … “you’ve been around long enough to know better!”
My answer to you is (3) fold:
1) You are 100% correct
2) I read all (well, mostly all) existing DRL threads this morning and I just thought there was a slightly better way and it might be worth posting for those like me that are finally getting around to this
3) If I added this to an existing DRL post, no one will make it that far
This mod is basically just adding a switch to the DRL’s with a little different tap location, so if you have been through this before, you may wish to bail here!
Ok, before I get going, I want everyone to know that I firmly believe DRL’s save lives and they should be on. However, there are a few exceptions (when I am not driving on an open road) when I need them to be off and you have read most of the exceptions before so I don’t need to elaborate.
The other threads tend to make the DRL switch tap right up at the front lights where it is very tight and hard to get to or they instruct on removing a number of body pieces. I chose to work in a simpler location. Right under the hood where the DRL relay is.
This is it
Remove the relay box next to it to ease access
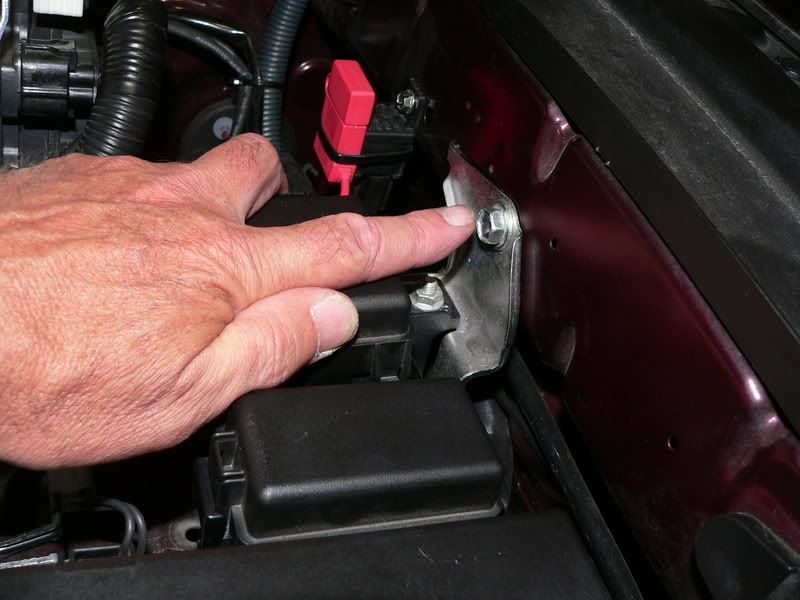
Remove the cover from the DRL box and insert a flat blade screwdriver into the locking tab to release the tabs. Lift straight up on the DLR box and it comes free from its mounting tabs. (that one took me a while to figure out)
Note: I used a 3/16" screwdriver. Wedge it down into the area shown (look carefully where I have the screwdriver positioned). Once inserted, tilt the handle of the screwdriver towards the windshield (i.e. flexing the relay box towards the firewall slightly). Once flexed, you can lift upwards on the relay box and it will release. It comes off hard and you need to work at it.
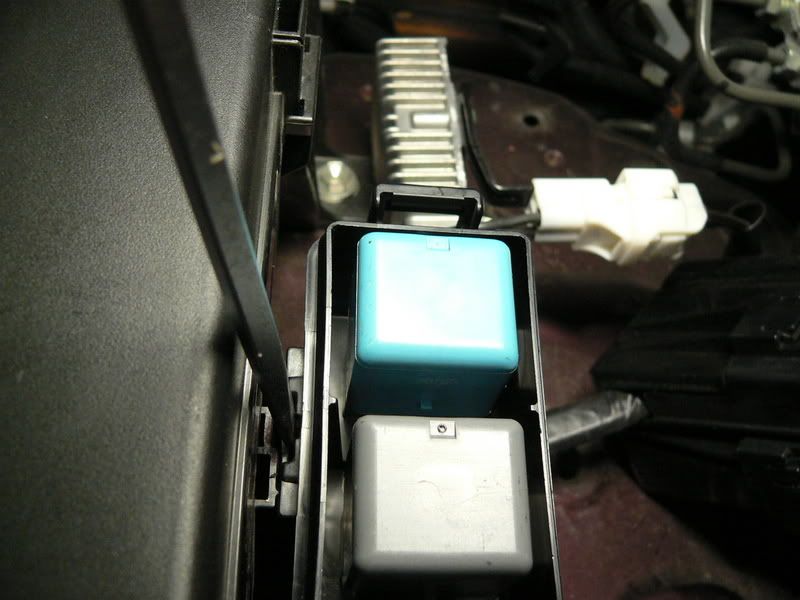
Remove the bottom cover on the box and strip back the tape on the wires
Locate the (2) blue lead wires connected to a single terminal
Cut the smaller of the (2) blue lead wires about 1 ¼” from the terminal
Note: The smaller of the (2) blue leads has little grayish dots on it and the bigger one does not, make sure you cut the correct one
Make up a (2) lead mini-harness to run into the cab and attach to a switch. Attach (1) lead to each of the cut wires.
Note: When I do a crimp joint like this, I always use a little anti-oxidant grease on the leads prior to crimping on the terminal
Tuck in your splices into the relay box, re-tape the lead harness, and snap the covers back on
Remount the (2) removed relay boxes and run the new 2-wire harness through a grommet in the fire wall
Mount a switch, hook up the wires, and you are done. I chose a small 2 position switch and mounted it in an obscure location since I intend to really not turn the DRL’s off very often. This way I will not accidentally turn them off. Can you spot the switch?
Sorry about “another DRL thread” but this one seems like it would be a lot easier for folks to do.
Hope you enjoyed the project.
")


