

I am no mechanical guy, but I am learning. So I am counting of the Forum to share their mechanical wisdom. Here is how my living posts work. Everyone is encouraged to post their comments, suggestions and improvements to my root post. I will update the root post with everyones improvements. Hopefully this will save readers from having to read and decipher hundreds of posts.
__________________________________________________________
TOOLS
Air Tools are VERY helpful
12mm socket and wrench
14mm socket and wrench
17mm socket and wrench
19mm socket and wrench
Torque wrench
Long stout flat head screwdriver
Spring Compressors (Air tools are a must if you choose this approach)
At last 2 floor jacks
2 Jack Stands
1 or more very strong buddies
Front (Approx 2 hours)
Step 1: Put Car on Jack Stands and Remove Front Wheels.
There is a good jack point at the base of the front skid plate
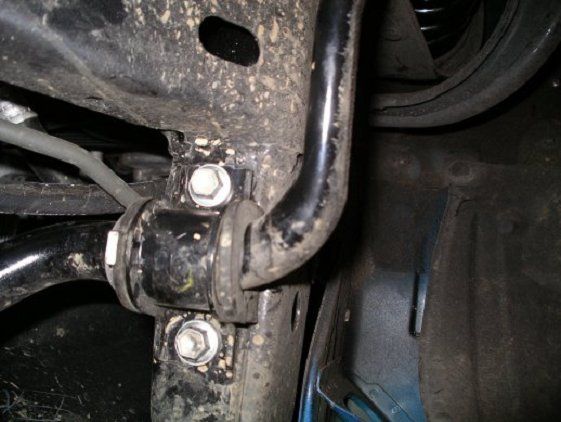
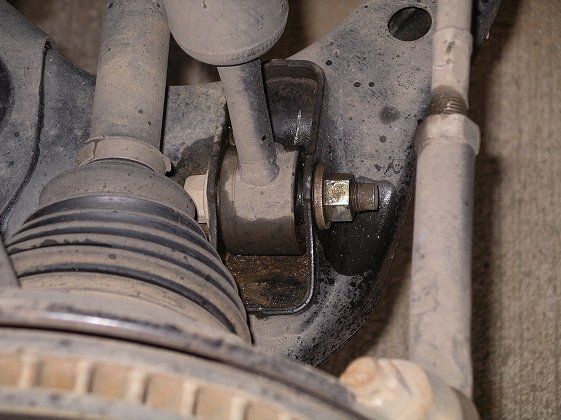
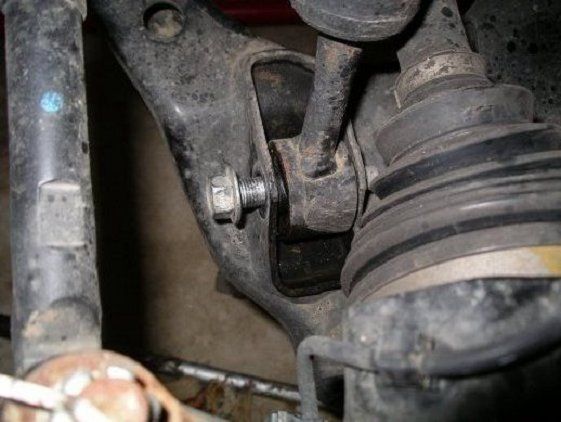
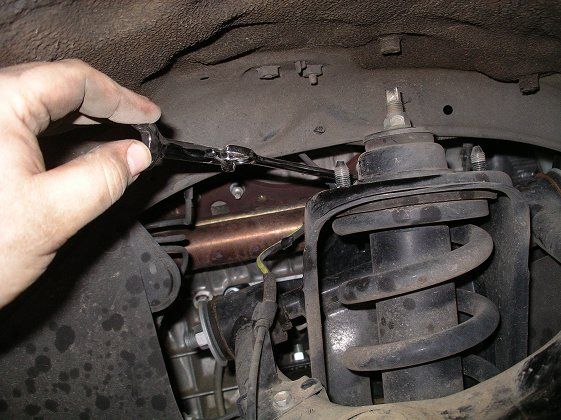
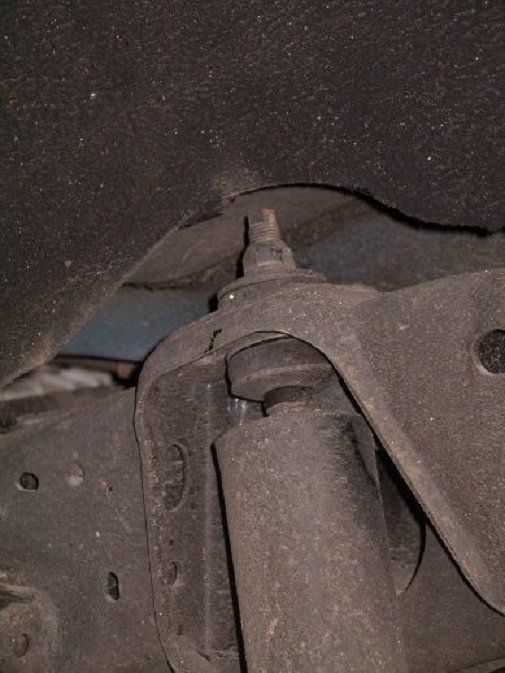
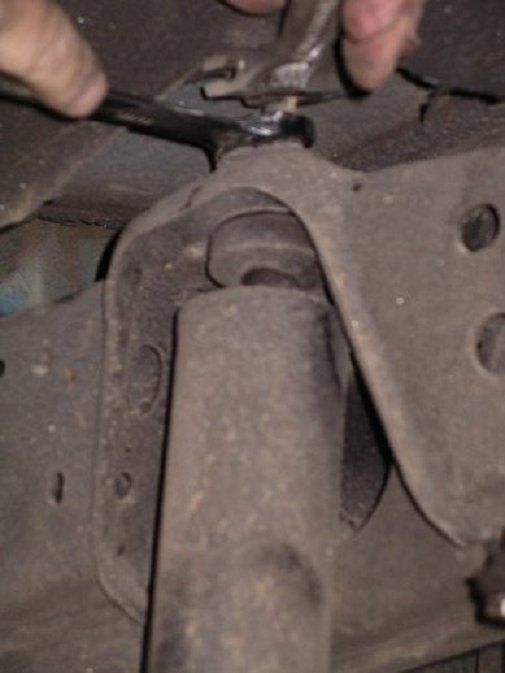
Step 2: Remove the nut and disconnect the swaybar link from the steering knuckle
HINT: Requires a 17 mm socket and wrench
![Image]()
![Image]()
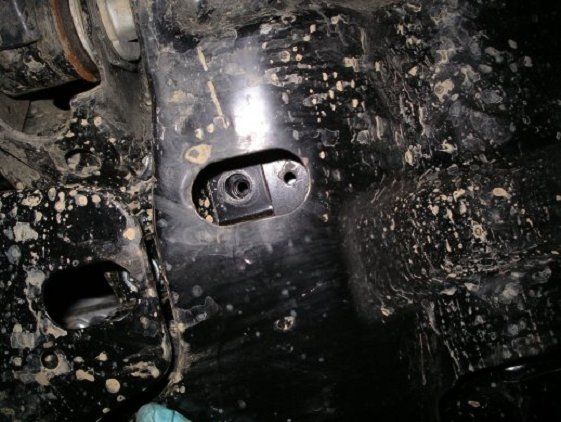
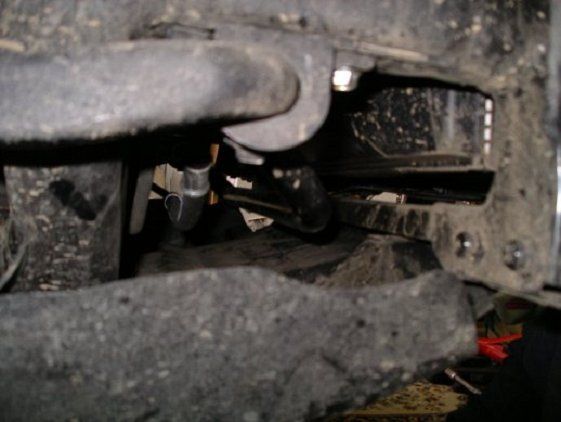
Step 3: Remove front skid plate
HINT: Requires a 12 mm deep sock or extension
![Image]()
![Image]()
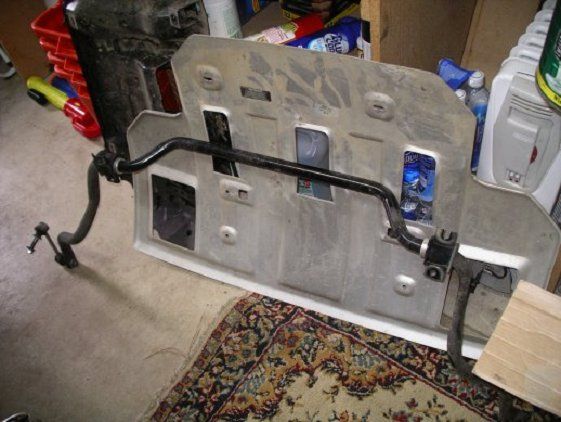
Step 4: Remove the front swaybar brackets.
HINT: The front of the bracket has a slotted hole. Remove the bolt on the back of the bracket on the RH and LH side, and then just loosen the front bolt on the bracket on RH and LH side. Now you can slide the brackets back and remove the stabilizer bar. If you take the front bolts out all the way, the stabilizer bar is unsupported when you take out the last bolt making the job more difficult.
HINT: Requires a 14 mm sock
![Image]()
![Image]()
![Image]()
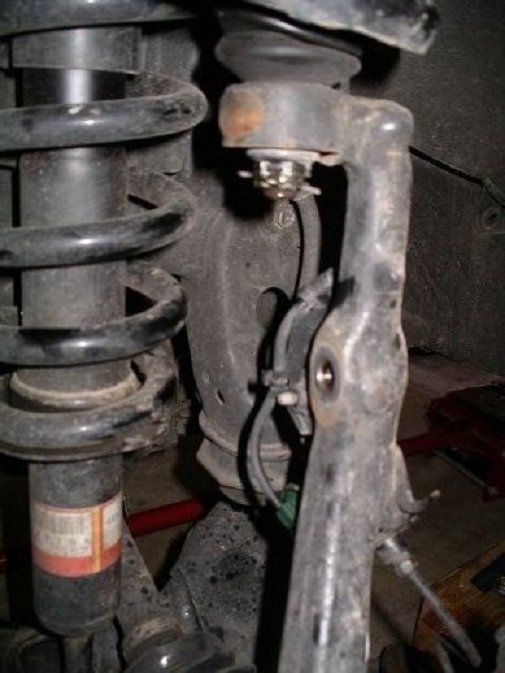
Step 5: Remove the lower bolt on the front shock absorber and coil spring assembly on LH and RH side of vehicle
HINT: Requires two 19 mm sockets or wrench. When you reinstall the torque specifications for strut bolt is 52 ft*lb
![Image]()
Take note of the direction the strut bolts were installed. The picture below has the bolt in backwards
![Image]()
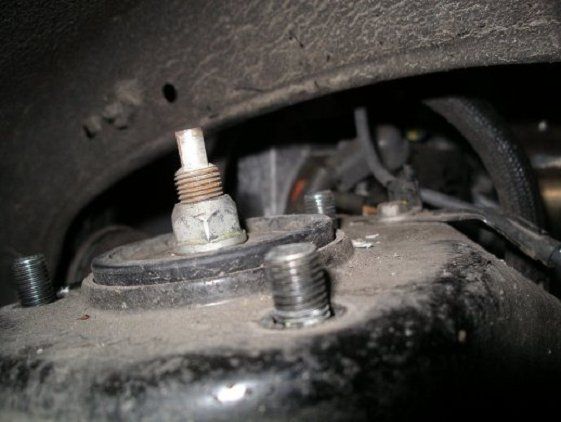
Step 6: Remove the 3 nuts on the top of the front struts on LH and RH side of Vehicle
HINT: Requires 14mm socket or wrench for the front 2, the rear can only be reach by a wrench
![Image]()
![Image]()
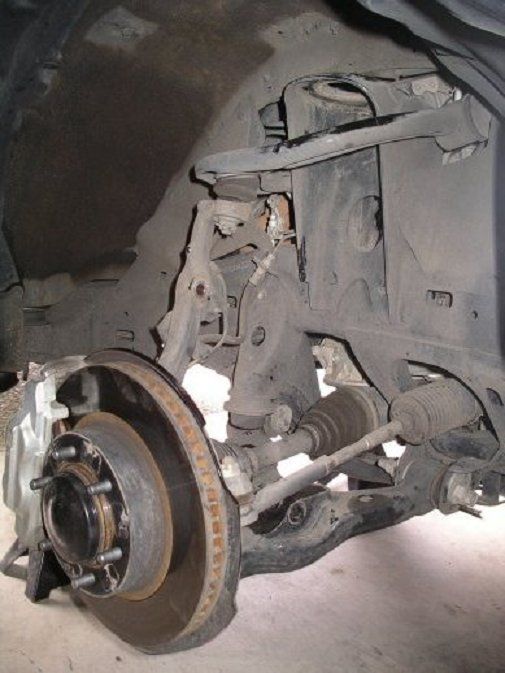
Step 7: Remove the front strut assembly
HINT: To make this job easier you can remove the 2 spindle bolts where the spindle connects to the Lower A-arm. Requires a 19mm socket or wrench. The lower A-arm can now be moved out slightly to make room for removing the strut. This will allow the strut to be "un-screwed" through the steering arms. Line up the coil spring and gradually "un-screw" it down through the steering arms. Installing the new coil-over strut using the same technique. Be careful not to pull out too much on the lower A-arm or the half-shaft will pull out of the wheel assembly. When you reinstall the torque specifications for these bolts is 100 ft*lb
HINT: You can use a 18" crescent wrench and open it up to the thickness of the lower A arm and push down on the A arm while getting the bottom of the shock into position
![Image]()
After Strut is Removed
![Image]()
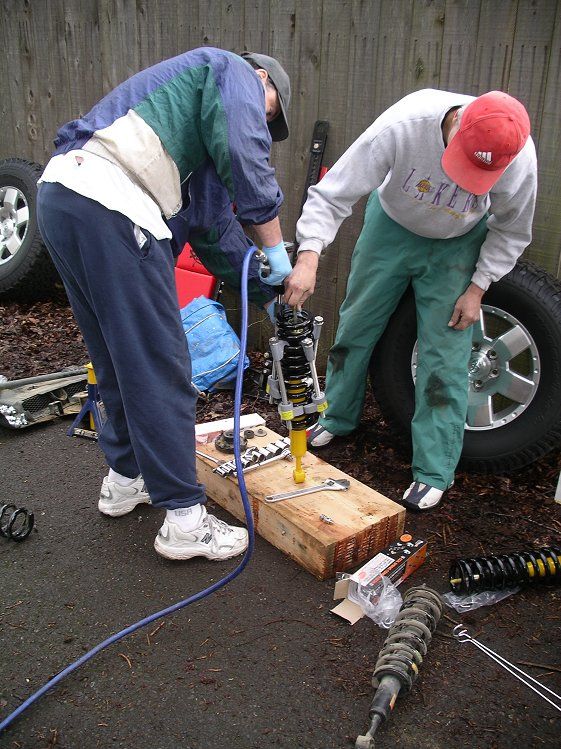
Step 8: Changing springs
HINT: You shouldn't stand over a spring compressor (see pic below). If it breaks pieces are going to fly and YOU'RE going to get hurt. Recommend throwing a moving blanket over the strut as you compress the springs. If the spring compressor breaks, the part will go into the blanket and not you.
HINT: Make sure the alignment of the strut bolt hole and the 3 bolts on top are the same old strut.
HINT: Air Tools and at least 4 good spring compressors are critical for this step.
HINT: You can choose to skip this step by taking the old Struts and the new struts and springs to a Tire Shop. The will normally setup the new OME Struts for $20 to $30.
![Image]()
Step 9: Install the new shock absorber and coil spring assembly.
HINT: Initially mount the strut with one loose bolt at the top
HINT: You may need to use a large screwdriver to help pry the strut in place
HINT: Torque specifications for the strut mount nut is 52 ft*lb
Step 10: Re-install stabilizer bar
Step 11: Re-install skid plate
Step 12: Re-install wheels
REAR: (45Min-1 Hour)
Step 1: Put Car on Jack Stands, Remove Rear Wheels.
Step 2: Support the rear axle housing:
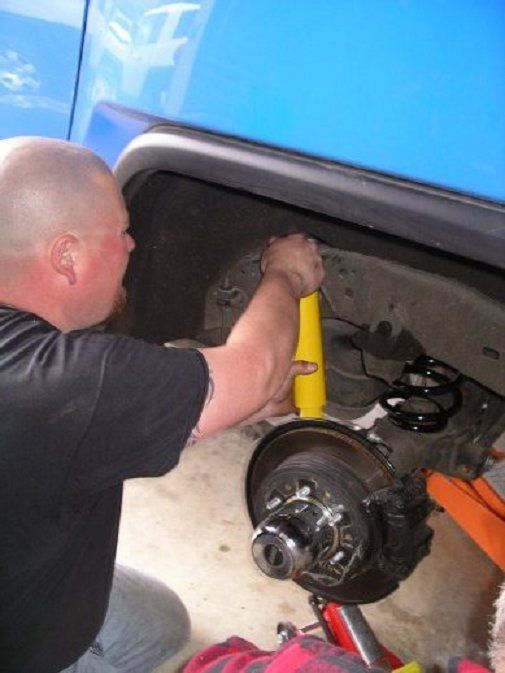
Step 3: Remove Shock Absorber bottom bolt on LH and RH side of vehicle
![Image]()
Step 4: Remove the nut, cushion retainers, cushions, and shock absorber on LH and RH side of vehicle.
HINT: A strap wrench around the sheet metal dust cover of the shock worked great and immobilized it much easier than trying to hold the top of the shock stud.
![Image]()
![Image]()
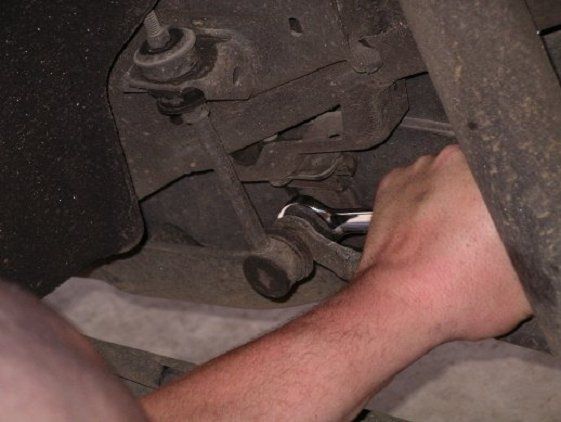
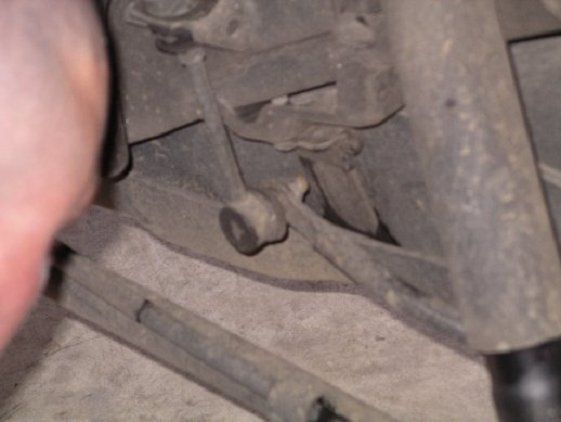
Step 5: Remove rear stabilizer link by removing the nut and disconnecting the link from the stabilizer bar on LH and RH side of vehicle
![Image]()
![Image]()
Step 6: Start to lower the rear axle, be careful of the brake lines
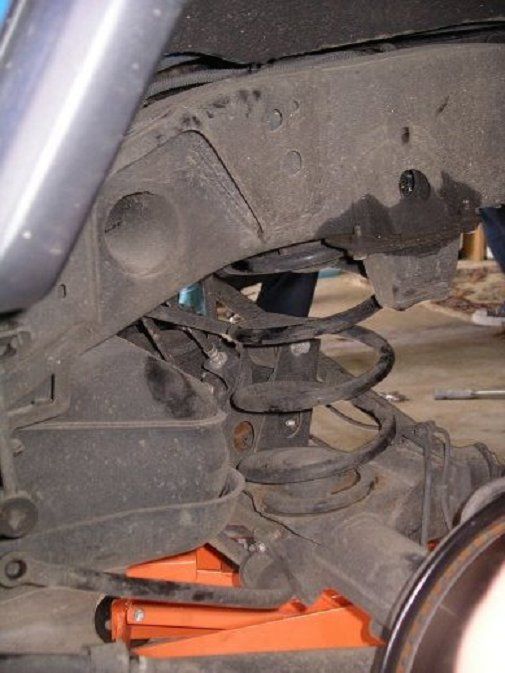
Step 7: Remove the coil springs.
HINT: You may want to use a jack to apply upward pressure on the opposite side axle making it easier to install the coil spring.
![Image]()
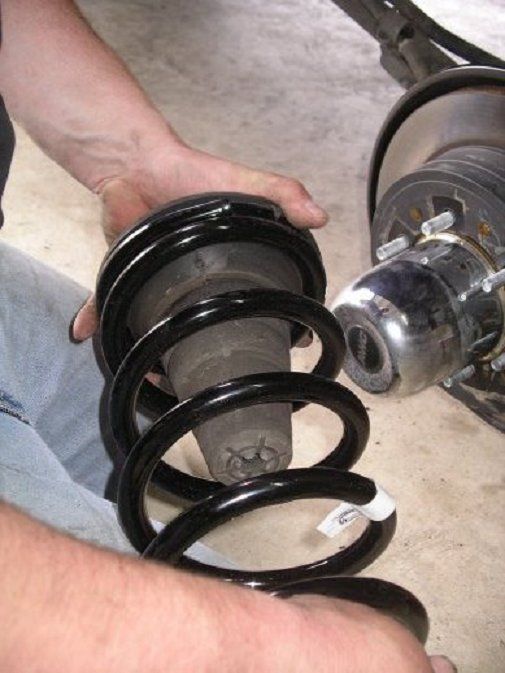
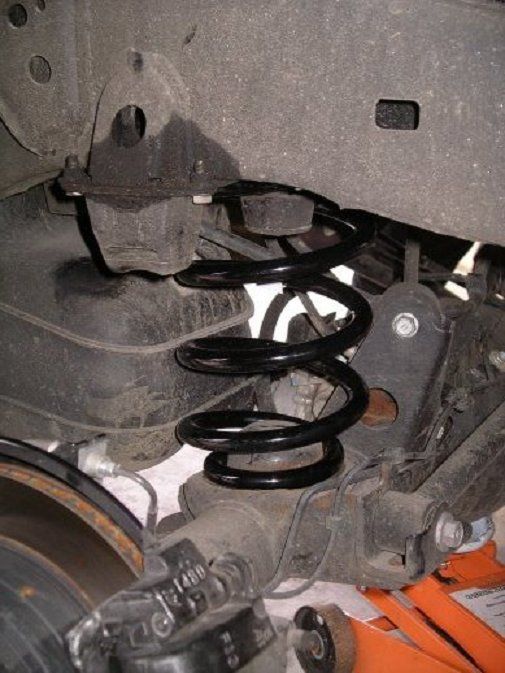
Step 8: Install the new coil springs.
HINT: You may want to use a jack to apply upward pressure on the opposite side axle making it easier to install the coil spring.
![Image]()
![Image]()
Step 9: Re-assemble the stabilizer link. Torque: 52 ft lb
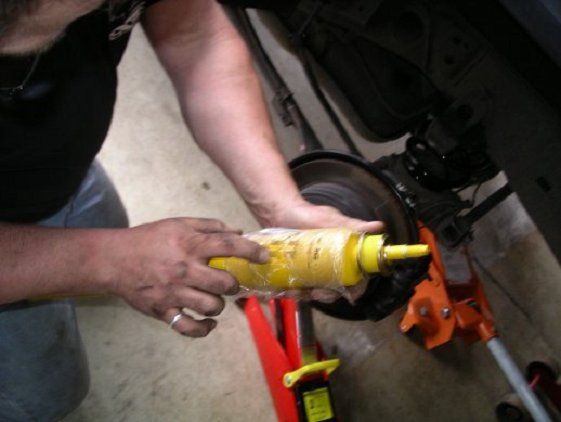
Step 10: Install the new shock absorbers, the nut, cushion retainers, cushions, on LH and RH side of vehicle
Order of Rear shock assembly Torque: 72 ft lb[/B]
1. Nylock nut
2. Washer
3. Yellow poly bushing
4. Frame of truck (shock mount)
5. Centering washer (black)
6. Yellow poly bushing
7. Washer
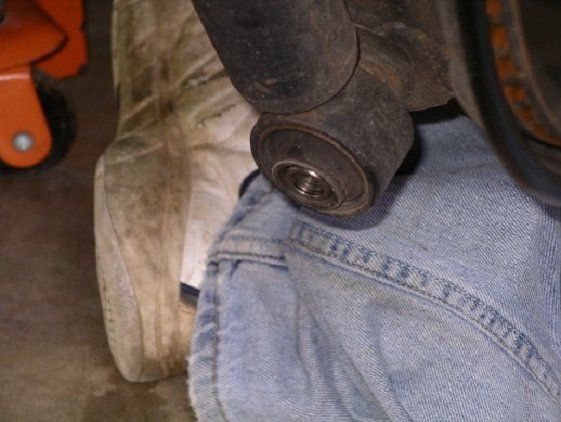
![Image]()
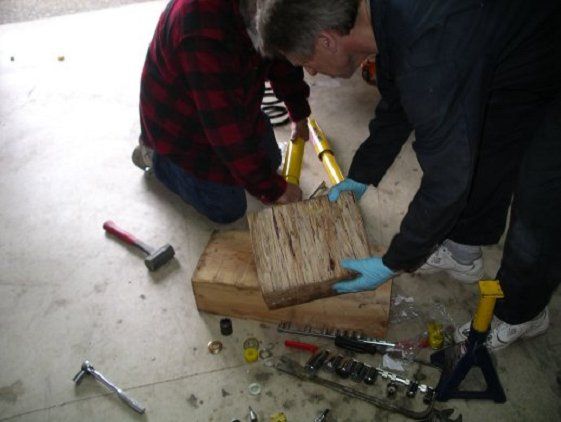
Hint: Use a Vice to insert bushing into the shock. Jump on two blocks of wood work if you have nothing else J
![Image]()
![Image]()
Step 11: Install rear wheels
CRITICAL: Get an alignment soon, allowing time for the springs to settle
__________________________________________________________
TOOLS
Air Tools are VERY helpful
12mm socket and wrench
14mm socket and wrench
17mm socket and wrench
19mm socket and wrench
Torque wrench
Long stout flat head screwdriver
Spring Compressors (Air tools are a must if you choose this approach)
At last 2 floor jacks
2 Jack Stands
1 or more very strong buddies
Front (Approx 2 hours)
Step 1: Put Car on Jack Stands and Remove Front Wheels.
There is a good jack point at the base of the front skid plate
Step 2: Remove the nut and disconnect the swaybar link from the steering knuckle
HINT: Requires a 17 mm socket and wrench
Step 3: Remove front skid plate
HINT: Requires a 12 mm deep sock or extension

Step 4: Remove the front swaybar brackets.
HINT: The front of the bracket has a slotted hole. Remove the bolt on the back of the bracket on the RH and LH side, and then just loosen the front bolt on the bracket on RH and LH side. Now you can slide the brackets back and remove the stabilizer bar. If you take the front bolts out all the way, the stabilizer bar is unsupported when you take out the last bolt making the job more difficult.
HINT: Requires a 14 mm sock
Step 5: Remove the lower bolt on the front shock absorber and coil spring assembly on LH and RH side of vehicle
HINT: Requires two 19 mm sockets or wrench. When you reinstall the torque specifications for strut bolt is 52 ft*lb
Take note of the direction the strut bolts were installed. The picture below has the bolt in backwards
Step 6: Remove the 3 nuts on the top of the front struts on LH and RH side of Vehicle
HINT: Requires 14mm socket or wrench for the front 2, the rear can only be reach by a wrench
Step 7: Remove the front strut assembly
HINT: To make this job easier you can remove the 2 spindle bolts where the spindle connects to the Lower A-arm. Requires a 19mm socket or wrench. The lower A-arm can now be moved out slightly to make room for removing the strut. This will allow the strut to be "un-screwed" through the steering arms. Line up the coil spring and gradually "un-screw" it down through the steering arms. Installing the new coil-over strut using the same technique. Be careful not to pull out too much on the lower A-arm or the half-shaft will pull out of the wheel assembly. When you reinstall the torque specifications for these bolts is 100 ft*lb
HINT: You can use a 18" crescent wrench and open it up to the thickness of the lower A arm and push down on the A arm while getting the bottom of the shock into position

After Strut is Removed
Step 8: Changing springs
HINT: You shouldn't stand over a spring compressor (see pic below). If it breaks pieces are going to fly and YOU'RE going to get hurt. Recommend throwing a moving blanket over the strut as you compress the springs. If the spring compressor breaks, the part will go into the blanket and not you.
HINT: Make sure the alignment of the strut bolt hole and the 3 bolts on top are the same old strut.
HINT: Air Tools and at least 4 good spring compressors are critical for this step.
HINT: You can choose to skip this step by taking the old Struts and the new struts and springs to a Tire Shop. The will normally setup the new OME Struts for $20 to $30.
Step 9: Install the new shock absorber and coil spring assembly.
HINT: Initially mount the strut with one loose bolt at the top
HINT: You may need to use a large screwdriver to help pry the strut in place
HINT: Torque specifications for the strut mount nut is 52 ft*lb
Step 10: Re-install stabilizer bar
Step 11: Re-install skid plate
Step 12: Re-install wheels
REAR: (45Min-1 Hour)
Step 1: Put Car on Jack Stands, Remove Rear Wheels.
Step 2: Support the rear axle housing:
Step 3: Remove Shock Absorber bottom bolt on LH and RH side of vehicle
Step 4: Remove the nut, cushion retainers, cushions, and shock absorber on LH and RH side of vehicle.
HINT: A strap wrench around the sheet metal dust cover of the shock worked great and immobilized it much easier than trying to hold the top of the shock stud.
Step 5: Remove rear stabilizer link by removing the nut and disconnecting the link from the stabilizer bar on LH and RH side of vehicle
Step 6: Start to lower the rear axle, be careful of the brake lines
Step 7: Remove the coil springs.
HINT: You may want to use a jack to apply upward pressure on the opposite side axle making it easier to install the coil spring.
Step 8: Install the new coil springs.
HINT: You may want to use a jack to apply upward pressure on the opposite side axle making it easier to install the coil spring.
Step 9: Re-assemble the stabilizer link. Torque: 52 ft lb
Step 10: Install the new shock absorbers, the nut, cushion retainers, cushions, on LH and RH side of vehicle
Order of Rear shock assembly Torque: 72 ft lb[/B]
1. Nylock nut
2. Washer
3. Yellow poly bushing
4. Frame of truck (shock mount)
5. Centering washer (black)
6. Yellow poly bushing
7. Washer
Hint: Use a Vice to insert bushing into the shock. Jump on two blocks of wood work if you have nothing else J
Step 11: Install rear wheels
CRITICAL: Get an alignment soon, allowing time for the springs to settle
Code:
2007 FJ Cruiser 4x4 Alignment Specs.	Min	Max
Front	Caster	Left	2.32	3.32
		Right	2.32	3.32
	Camber	Left	-0.35	0.65
		Right	-0.35	0.65
	Toe	Left	0.03	0.09
		Right	0.03	0.09
		Total	0.06	0.18
")


