Toyota FJ Cruiser Forum banner

KC Cyclone V2 amber in mirrors

14K views 39 replies 18 participants last post by  farley224  
#1 ·
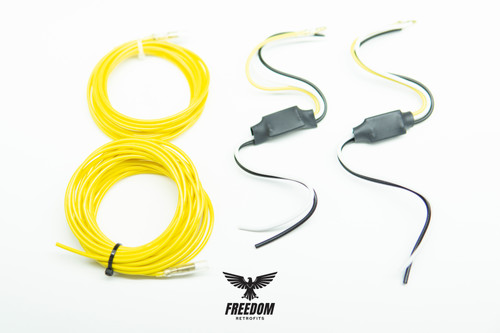
Pretty simple install, about 30 mins total. I used a 2” rubber grommet to get a snug fit and just wired them to the existing mirror lights. It looks so much better now both on and off.

Next I’m going to try figuring out the wiring to reduce the power and hook them up to the blinkers so they’re dimmer when on and brighter as turn signals.
Image

Image

Image
 
#6 ·
Here is the actual light I used. You need to get two.
Cyclone V2 LED - Single Light - Amber Lens - 5W Flood Beam
https://a.co/d/6Pf1w5D

Here is the rubber grommet.

2grommet__77314.1605040120.380.380.jpg
[URL='https://www.raneystruckparts.com/rubber-grommets-black-2-round/']Rubber Grommets Black 2" Round
raneystruckparts.com
[/URL]
After disassembly of the mirror (remove mirror, black housing, unplug actual light and remove the entire piece), the most time consuming part is squeezing the cyclone light into the grommet. Easiest way I found was to fit the grommet into the mirror hole first, then push the light into the grommet and keep adjusting until flush.

After this, I just spliced the + and - into the existing wiring. Both look identical so just use a meter to find out which is +.

I think it a bit too bright, so im trying to find out how to dim this now.

Can I just splice in a resistor? Is that how it works?
 
#7 ·
Thanks. I’ve ordered a pair. I’ll have to find an alternate source for the grommets as they want $45 to ship two rubber bits to Canada.

For dimming, you can try a resistor, but some LEDs are full brightness or off so require a PWM dimmer to reduce brightness. There are cheap small 12V LED PWM dimmers on Amazon that would do the trick and fit inside the mirror housing. Another option maybe some black spray on tint to the glass/plastic lens of the light. It’s called “lens tint spray” and it comes in a spray paint can.
 
#9 ·
I got mine, but I’ve decided I’ll sell them. They are too yellow for my taste. I should have noted that from the pics in this thread :(

I did hook them up to my bench power supply and they are dimmable down to 7V or so… a resistor should work to lower the brightness. They are insanely bright at 13v.

I prefer a more orange look which I am currently getting with amber replacement LEDs in the stock housing.
I’ve painted over my mirror light lenses with a smoked lens spray paint for a blacked out look when the lights are off and it also subdues the light output so they are not overly bright.

Image

Image
 
#10 ·
I agree, I think they’re too yellow. I’m wondering if I can stick on some red clear vinyl to make them more orange. I might do that on the inside of the lense cover. I also got a kit that I will wire to make them turn signals.

Do u have any more pics of ur truck? Looks really nice from what I can see!
 
#11 ·
I agree, I think they’re too yellow. I’m wondering if I can stick on some red clear vinyl to make them more orange. I might do that on the inside of the lense cover. I also got a kit that I will wire to make them turn signals.

Do u have any more pics of ur truck? Looks really nice from what I can see!
Sure… here are a couple more… before the sliders went on…

Image

Image
 
#13 ·
I ended up testing with a piece of clear red vinyl and it fixed it - now it’s orange like the orange parking lights and it matches nicely. I’m going to stick it on the inside of the lens this weekend so the outside still looks orange.
 

Attachments

#18 ·
Where did you find this red vinyl?

I've resurrected my own project... I've got the grommets and I bench tested a number of resistors to reduce the brightness. It seems around 500Ohms inline with the positive lead does the trick. I've also got some wedge bulb pigtails to use to tap into the wiring for the existing mirror light socket. I'm not going for turn-signal integration. My next task is to figure out how to make them orange so the red vinyl is the next thing I need.
 
#16 ·
 
#22 ·
I got my lights installed today. I tried two different types of grommets and they were both incredibly tight. I had to use a heat dun to soften the rubber to get them in. No concerns about water ingress or them coming out LOL :)

Thanks @ScoobyFJ for the inspiration and tips.

Besides that, it was relatively smooth once I had all the parts (including red vinyl to make them orange).

Here’s the light with the resistor inline and the bulb socket connector soldered on... I used a 680 Ohm resistor which cut the voltage to the light roughly in half.

Image


Here’s the lights installed…

Image


In this shot you can see I still had to work the right side of the light onto the grommet a bit better. It required patience which is not my forte :)
Image

Image

Image