

(Sorry, but lots of pics.)
![Image]()
I began planning this project about a month before I even bought my FJ. And, it was about two months in the designing and actual building stage (a lot of hit & miss) when time permitted.
I wanted a rear storage unit that would meet this criteria:
Cost under $200 total. (I was too cheap to go out and buy something already built. Plus, there were no aftermarket systems that provided exactly what I wanted and needed.)
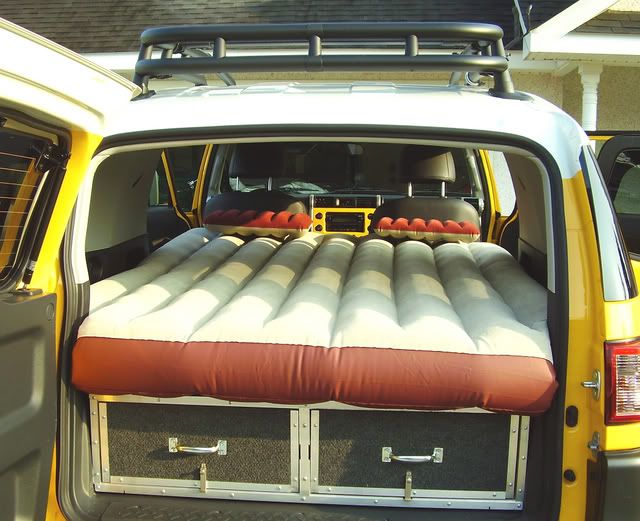
Be a modular system that could either be used as a rear cargo area storage box only, or a full-length system that could occupy the back seat area as well. (Since I had no use for the back seats, I removed them completely shortly after the FJ’s purchase. However, the cargo area only module could be used for those wishing to retain their back seats.)
Be sturdy enough to carry anything from off-road recovery equipment, to tools and parts, to camping gear, to miscellaneous supplies and gadgetry.
Be completely removable and returned to stock configuration if desired.
Use existing OEM bolt and mounting holes without any cutting, drilling or otherwise molesting the FJ’s original state.
Follow the contours of the FJ’s interior design.
Be professionally-built looking (even though I’m not a professional, nor do I play one on TV).
Supplies required:
Two 4x8 sheets of ¾” plywood.
About 40 feet of ¾” aluminum angle.
2 sets of 24” heavy-duty drawer sliders.
One and a half 6’ x 8’ rolls of gray indoor/outdoor carpeting (from Home Depot @$15.95 a roll).
Carpet adhesive.
Miscellaneous hardware and screws.
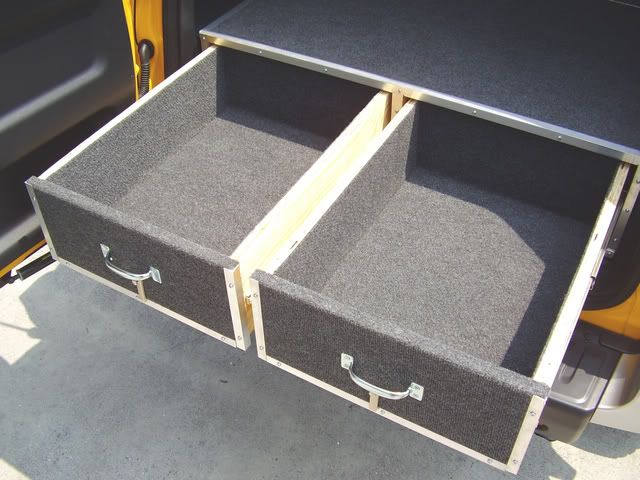
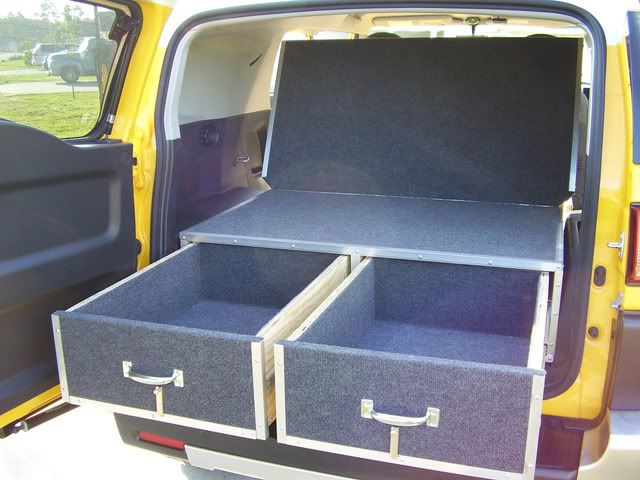
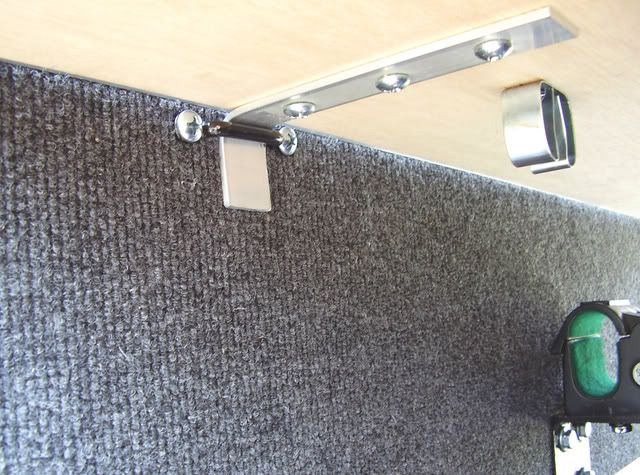
I began by building the rear drawer storage box with a center divider and pre-installed the drawer sliders. The box was carpeted prior to installation in the truck. Aluminum angle iron was installed along all edge surfaces and filed smooth. (I used 3" L-brackets to set up the shape of the box until the actual 2" wood screws were installed from the outside.)
![Image]()
![Image]()
![Image]()
![Image]()
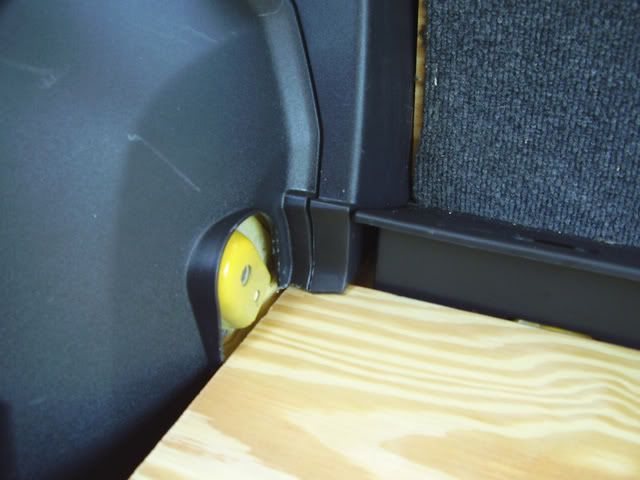
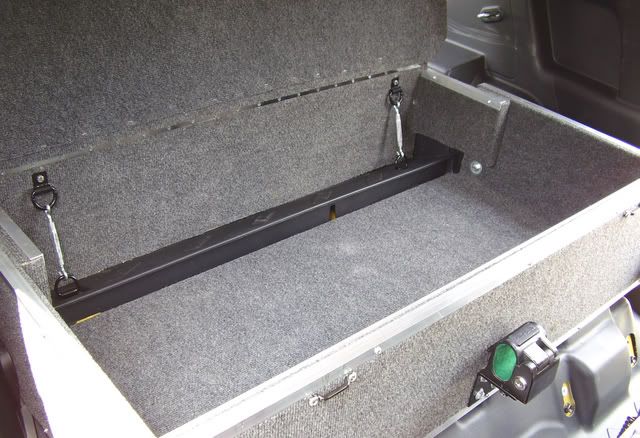
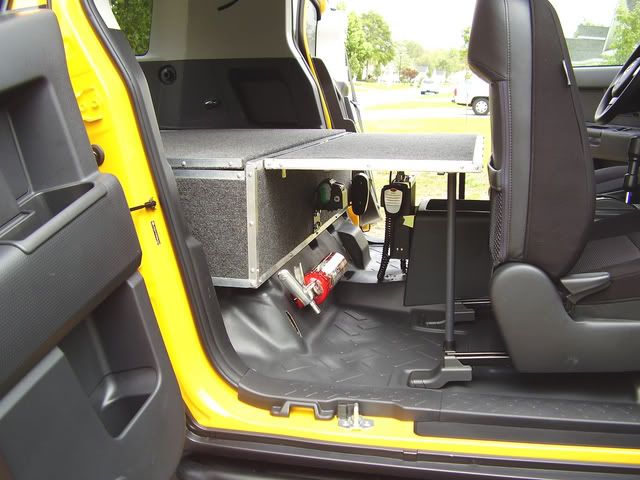
I removed the rear tie-down hooks and used their holes as the rear attachment points for the box. (I installed the previously removed tie-down hooks on the forward section of the box to secure it with a pair of turnbuckles to the other set of tie-down hooks.)
![Image]()
Two drawers were built, carpeted, and aluminum angled.
![Image]()
![Image]()
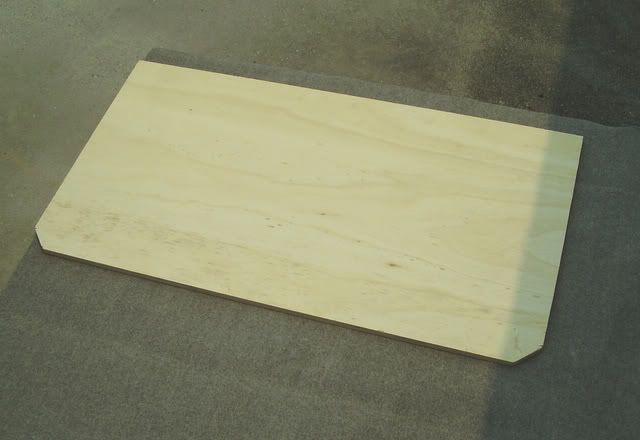
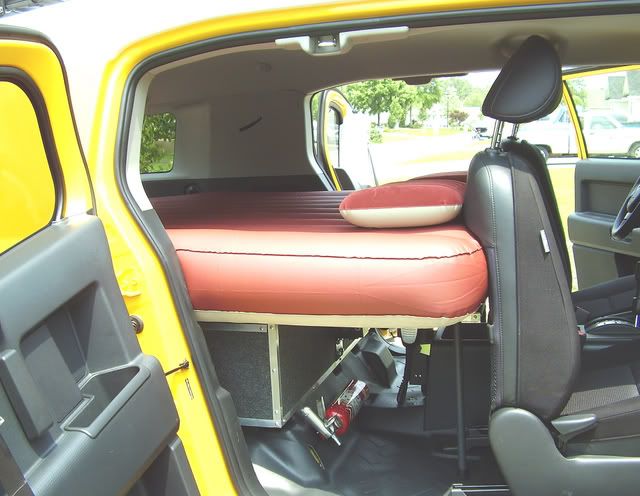
The forward module was created by first cutting to size a base platform that slid snugly up against the rear divider wedge. To level the platform perfectly, I attached pedestal shims along its front base.
![Image]()
![Image]()
![Image]()
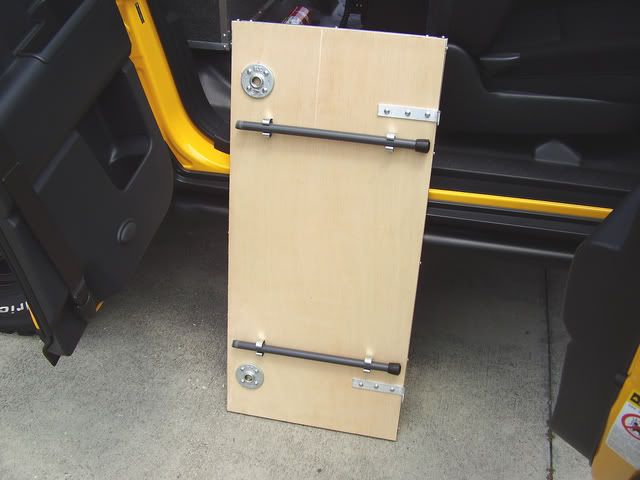
The sides of the forward module were installed to meet the height of the rear box, and the front face panel was attached. Upon completion of the structure, I removed the entire forward module to carpet and aluminum angle the edges.
![Image]()
The forward module was re-installed and secured to the side bolt holes that were previously occupied by the back seat attach points. The front of the forward module was secured to existing bolt holes under where the back seats once were. (Eventually, a pair of filler panels were built to fill the spaces between the rear and forward storage boxes.)
![Image]()
The forward module top surface area was measured and a top was created, notched for contour, carpeted and aluminum angled.
![Image]()
![Image]()
![Image]()
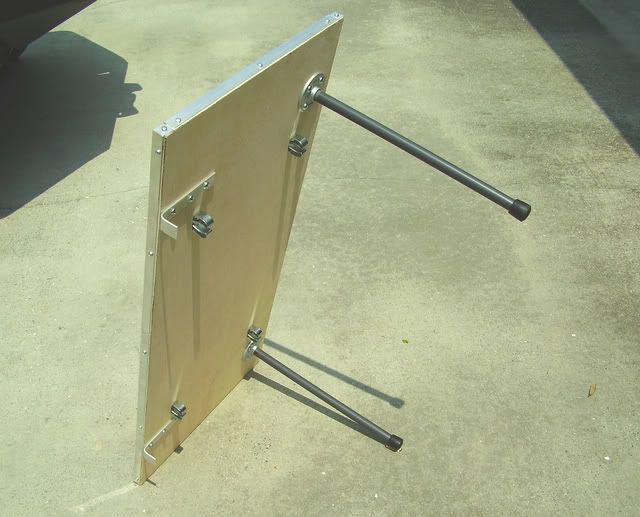
The open-able top was attached to the face of the rear storage box with a 45” heavy-duty continuous “piano hinge.” (I’m awaiting the arrival of a flush-mounted lockable latch handle for securing the forward lid when closed, and a pair of hatch struts to hold the lid open when in use.)
![Image]()
![Image]()
![Image]()
(More to follow . . . I ran out of allotted picture space in this post.)

I began planning this project about a month before I even bought my FJ. And, it was about two months in the designing and actual building stage (a lot of hit & miss) when time permitted.
I wanted a rear storage unit that would meet this criteria:
Cost under $200 total. (I was too cheap to go out and buy something already built. Plus, there were no aftermarket systems that provided exactly what I wanted and needed.)
Be a modular system that could either be used as a rear cargo area storage box only, or a full-length system that could occupy the back seat area as well. (Since I had no use for the back seats, I removed them completely shortly after the FJ’s purchase. However, the cargo area only module could be used for those wishing to retain their back seats.)
Be sturdy enough to carry anything from off-road recovery equipment, to tools and parts, to camping gear, to miscellaneous supplies and gadgetry.
Be completely removable and returned to stock configuration if desired.
Use existing OEM bolt and mounting holes without any cutting, drilling or otherwise molesting the FJ’s original state.
Follow the contours of the FJ’s interior design.
Be professionally-built looking (even though I’m not a professional, nor do I play one on TV).
Supplies required:
Two 4x8 sheets of ¾” plywood.
About 40 feet of ¾” aluminum angle.
2 sets of 24” heavy-duty drawer sliders.
One and a half 6’ x 8’ rolls of gray indoor/outdoor carpeting (from Home Depot @$15.95 a roll).
Carpet adhesive.
Miscellaneous hardware and screws.
I began by building the rear drawer storage box with a center divider and pre-installed the drawer sliders. The box was carpeted prior to installation in the truck. Aluminum angle iron was installed along all edge surfaces and filed smooth. (I used 3" L-brackets to set up the shape of the box until the actual 2" wood screws were installed from the outside.)


I removed the rear tie-down hooks and used their holes as the rear attachment points for the box. (I installed the previously removed tie-down hooks on the forward section of the box to secure it with a pair of turnbuckles to the other set of tie-down hooks.)

Two drawers were built, carpeted, and aluminum angled.

The forward module was created by first cutting to size a base platform that slid snugly up against the rear divider wedge. To level the platform perfectly, I attached pedestal shims along its front base.


The sides of the forward module were installed to meet the height of the rear box, and the front face panel was attached. Upon completion of the structure, I removed the entire forward module to carpet and aluminum angle the edges.

The forward module was re-installed and secured to the side bolt holes that were previously occupied by the back seat attach points. The front of the forward module was secured to existing bolt holes under where the back seats once were. (Eventually, a pair of filler panels were built to fill the spaces between the rear and forward storage boxes.)

The forward module top surface area was measured and a top was created, notched for contour, carpeted and aluminum angled.


The open-able top was attached to the face of the rear storage box with a 45” heavy-duty continuous “piano hinge.” (I’m awaiting the arrival of a flush-mounted lockable latch handle for securing the forward lid when closed, and a pair of hatch struts to hold the lid open when in use.)

(More to follow . . . I ran out of allotted picture space in this post.)


")


