

I recently needed to change my passenger side wheel bearing. I was changing tires and noticed when tugging on the tire @ the 12 and 6 O'clock positions there was a good amount of movement. My hub was still in great condition so I chose not to replace the hub.
There were a few parts needed to start this job. Part #'s below are for one side.
The items you will need to do this job:
1.Wheel bearing assembly: part # needed through auto parts stores 515040
2. O-ring 90301-92003 Toyota part #
3. Oil Seal 90312-96001 Toyota part #
4. Pair of needle nose pliers to remove cotter pins
5. Long breaker Bar (pipe extension optional)
6. 12mm socket
7. 17mm wrench and a 17mm socket
8. 1/2 drive wrench
9. 35mm socket
10. Bungee strap
11. Thread locker (blue or red your choice) I chose blue.
12. Gear grease
13. Latex or Nitrile gloves ( to keep from getting messy) :lol:
14. A jack of course and something to remove your lug nuts
15. A hammer along with a screw driver or small chisel
16. Optional- 90316-A0001 - Spindle seal-- best to have on hand in case it's needed.
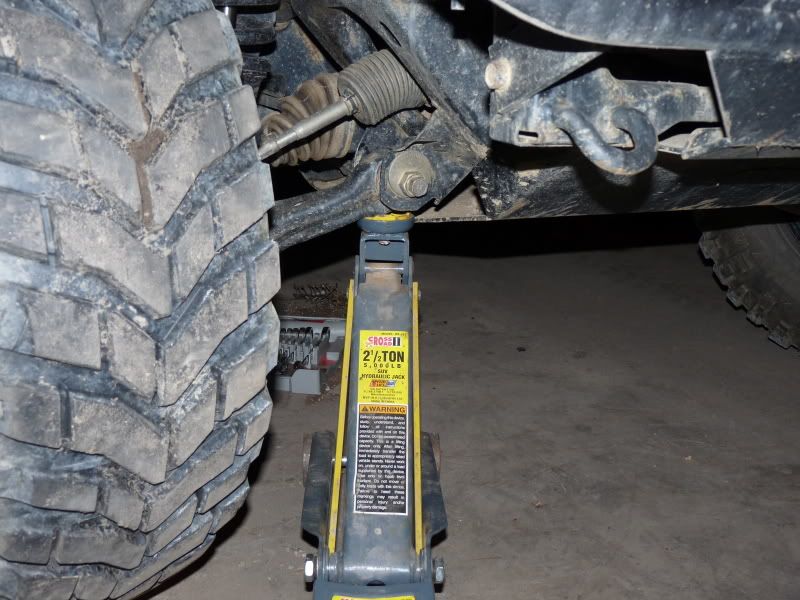
Do this change one side at a time. Put the FJC in 4wd leaving one wheel on the ground which will keep the hub assembly from spinning when removing the axle nut later. Once you get your tire loose and ready jack your vehicle up...... I chose the LCA as my jack point and then placed a jack stand on the frame. Pull the tire off and roll it out of the way.
![Image]()
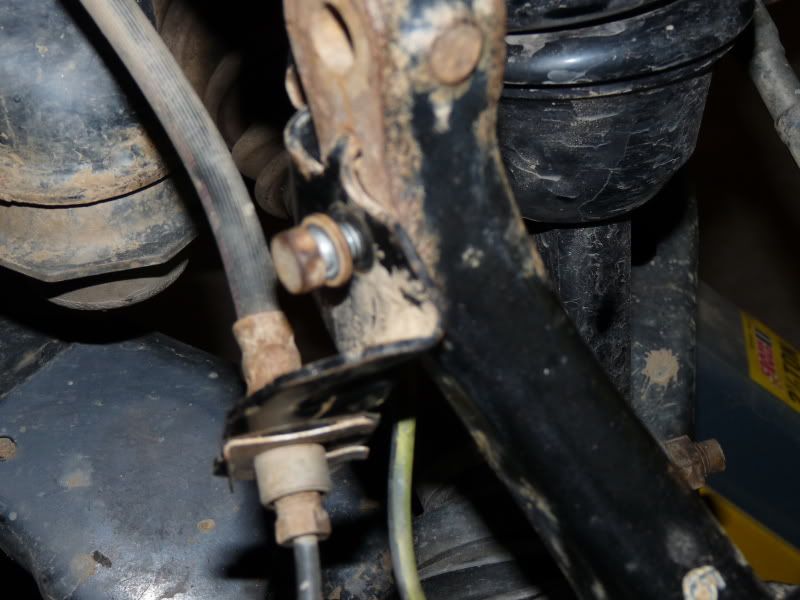
1. Begin the process by using the 12 MM socket to disconnect your ABS wiring..... Pic below:
![Image]()
2. Grab your 17MM socket and begin loosening the two bolts that retain your caliper (have your bungee strap within arms reach).... Pic below:
![Image]()
3. Once you remove the caliper bolts pull the caliper off of the rotor. Be careful not to compress the brake pads when doing this. Then take the bungee cord and slide it into the caliper and connect both ends around the UCA to secure the caliper......otherwise your ABS wiring will not like u!
Notice the bungee cord holding the caliper:
![Image]()
4. Pull the rotor off of the hub.
5. Then u will need to remove the dust cover off of the hub. Use your hammer and screwdriver here. Wedge the screw driver into the edge of the dust cover and hammer away. Move around the dust cover hammering and it will eventually release and pop out.
Black piece in the pic below is the dust cover:
![Image]()
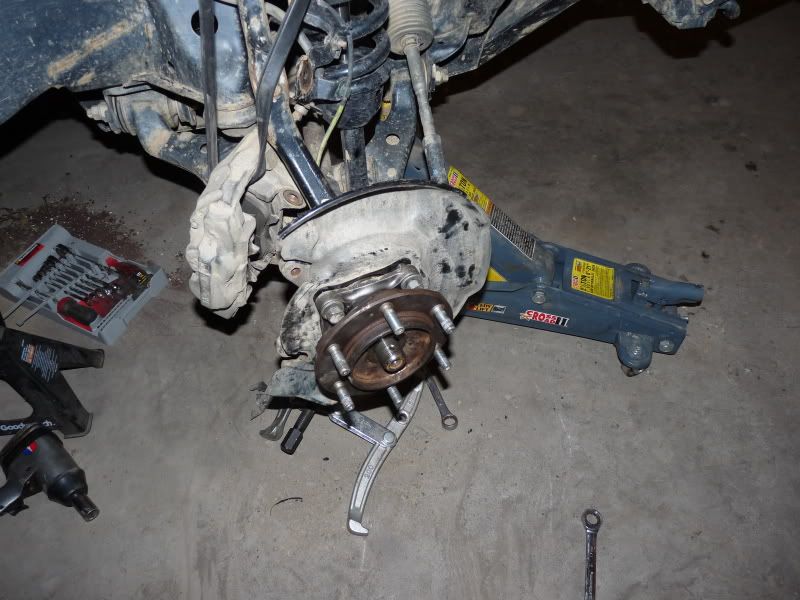
6. Once the dust cover is off you will see the axle nut and cotter pin. Using your needle nose pliers remove the cotter pin. Then use the breaker bar along with the 35mm socket to break the axle nut free and remove it. A breaker bar may not be enough here. So, u may need a pipe to slide over the breaker bar as an extension. This will allow you to gain more leverage to break the axle nut free.
![Image]()
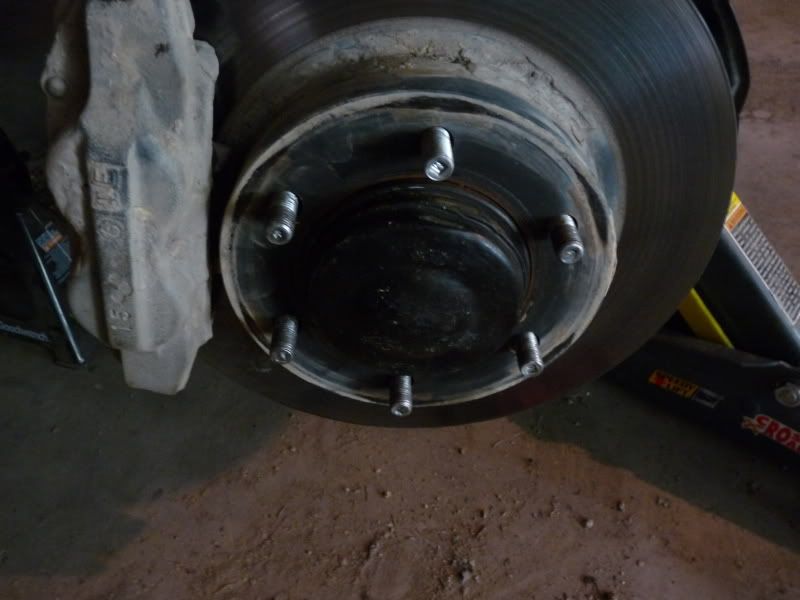
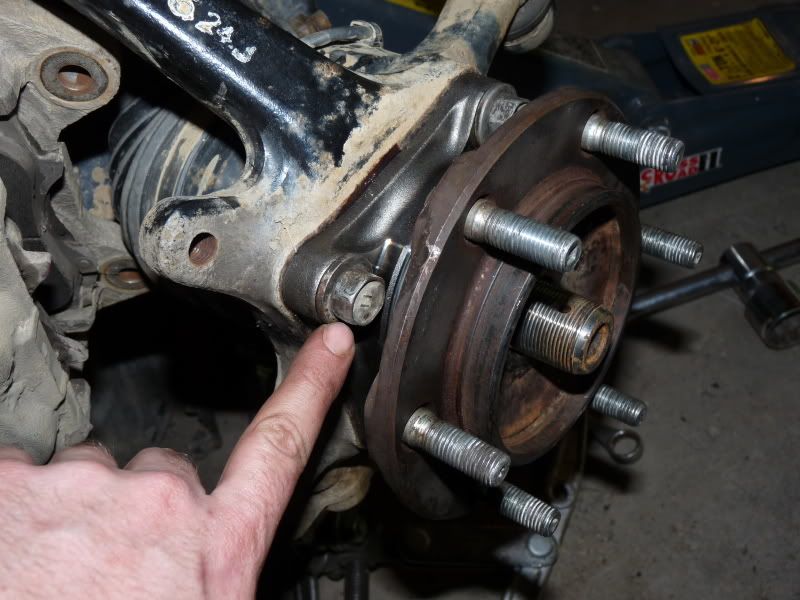
7. Next remove the 4 bolts that retain the bearing assembly to the knuckle/spindle. A 17mm wrench is used here. These bolts will not fall out. So, loosen the bolts one turn at a time (otherwise your wrench will get stuck between the hub and bearing). :rofl:
![Image]()
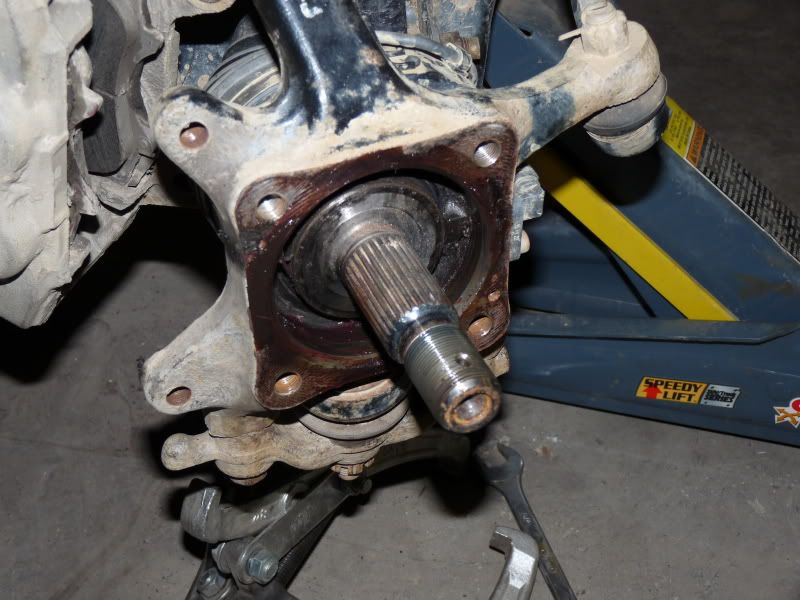
8. Once the bolts are loose it is time to remove the bearing and hub assembly from the knuckle. There is a seam where the bearing assembly attaches to the knuckle. Take your screw driver/chisel along with a hammer and hit this seam to release the assembly. This should release pretty easily but I have seen times when a little finesse will need to be used as well. Pull the hub and bearing off of the knuckle. The break dust cover will come off as well. Take notice of the orientation of this piece and remember to reinstall later.
After everything is off this is what you should see:
![Image]()
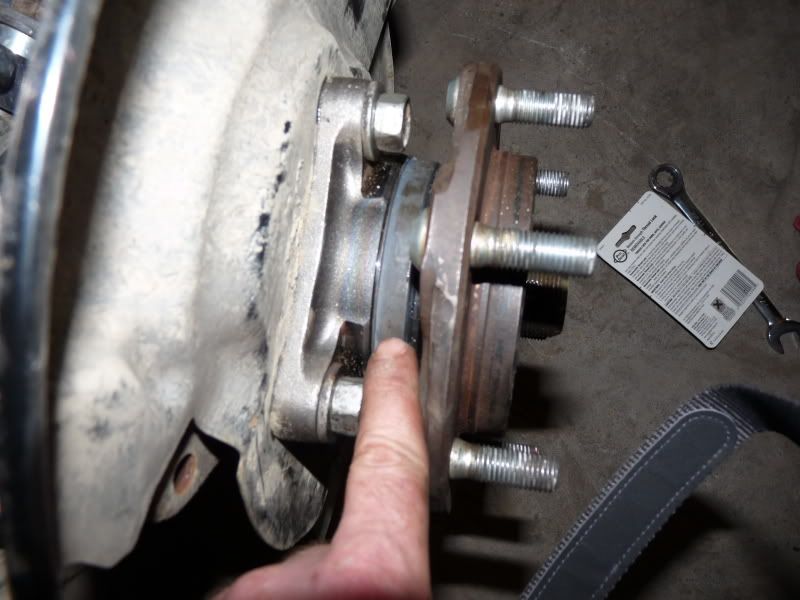
9. Do yourself a favor and take the seals and new bearing assembly to a machine shop with a hydraulic press. A machine shop will charge $30-40 to press the old bearing off of the hub and reinstall the new one. (Otherwise you will be working for a few hours to remove the bearing from the hub) The important thing is to remember to install the new seals and then place the retaining bolts into the new hub assembly. The oil seal goes onto the bearing assembly end that is closest to the hub. The O-ring goes on the other end that is pushed back into the knuckle.
Pic of the Oil Seal placement:
![Image]()
10. Remove any dirt or debris from the knuckle. Apply some new gear grease into the knuckle and spread a little on the outside as well.
11. Line the brake dust cover up with the new bearing assembly and re-apply to the knuckle.
From this point just reinstall everything that was taken off throughout the process. Remember to apply your thread locker to the bolts as you re-apply. :bigthumb::bigthumb::bigthumb::bigthumb::bigthumb::bigthumb:
There were a few parts needed to start this job. Part #'s below are for one side.
The items you will need to do this job:
1.Wheel bearing assembly: part # needed through auto parts stores 515040
2. O-ring 90301-92003 Toyota part #
3. Oil Seal 90312-96001 Toyota part #
4. Pair of needle nose pliers to remove cotter pins
5. Long breaker Bar (pipe extension optional)
6. 12mm socket
7. 17mm wrench and a 17mm socket
8. 1/2 drive wrench
9. 35mm socket
10. Bungee strap
11. Thread locker (blue or red your choice) I chose blue.
12. Gear grease
13. Latex or Nitrile gloves ( to keep from getting messy) :lol:
14. A jack of course and something to remove your lug nuts
15. A hammer along with a screw driver or small chisel
16. Optional- 90316-A0001 - Spindle seal-- best to have on hand in case it's needed.
Do this change one side at a time. Put the FJC in 4wd leaving one wheel on the ground which will keep the hub assembly from spinning when removing the axle nut later. Once you get your tire loose and ready jack your vehicle up...... I chose the LCA as my jack point and then placed a jack stand on the frame. Pull the tire off and roll it out of the way.
1. Begin the process by using the 12 MM socket to disconnect your ABS wiring..... Pic below:
2. Grab your 17MM socket and begin loosening the two bolts that retain your caliper (have your bungee strap within arms reach).... Pic below:

3. Once you remove the caliper bolts pull the caliper off of the rotor. Be careful not to compress the brake pads when doing this. Then take the bungee cord and slide it into the caliper and connect both ends around the UCA to secure the caliper......otherwise your ABS wiring will not like u!
Notice the bungee cord holding the caliper:
4. Pull the rotor off of the hub.
5. Then u will need to remove the dust cover off of the hub. Use your hammer and screwdriver here. Wedge the screw driver into the edge of the dust cover and hammer away. Move around the dust cover hammering and it will eventually release and pop out.
Black piece in the pic below is the dust cover:
6. Once the dust cover is off you will see the axle nut and cotter pin. Using your needle nose pliers remove the cotter pin. Then use the breaker bar along with the 35mm socket to break the axle nut free and remove it. A breaker bar may not be enough here. So, u may need a pipe to slide over the breaker bar as an extension. This will allow you to gain more leverage to break the axle nut free.

7. Next remove the 4 bolts that retain the bearing assembly to the knuckle/spindle. A 17mm wrench is used here. These bolts will not fall out. So, loosen the bolts one turn at a time (otherwise your wrench will get stuck between the hub and bearing). :rofl:
8. Once the bolts are loose it is time to remove the bearing and hub assembly from the knuckle. There is a seam where the bearing assembly attaches to the knuckle. Take your screw driver/chisel along with a hammer and hit this seam to release the assembly. This should release pretty easily but I have seen times when a little finesse will need to be used as well. Pull the hub and bearing off of the knuckle. The break dust cover will come off as well. Take notice of the orientation of this piece and remember to reinstall later.
After everything is off this is what you should see:
9. Do yourself a favor and take the seals and new bearing assembly to a machine shop with a hydraulic press. A machine shop will charge $30-40 to press the old bearing off of the hub and reinstall the new one. (Otherwise you will be working for a few hours to remove the bearing from the hub) The important thing is to remember to install the new seals and then place the retaining bolts into the new hub assembly. The oil seal goes onto the bearing assembly end that is closest to the hub. The O-ring goes on the other end that is pushed back into the knuckle.
Pic of the Oil Seal placement:
10. Remove any dirt or debris from the knuckle. Apply some new gear grease into the knuckle and spread a little on the outside as well.
11. Line the brake dust cover up with the new bearing assembly and re-apply to the knuckle.
From this point just reinstall everything that was taken off throughout the process. Remember to apply your thread locker to the bolts as you re-apply. :bigthumb::bigthumb::bigthumb::bigthumb::bigthumb::bigthumb:
")


