Toyota FJ Cruiser Forum banner

2011 Audio Mod

126K views 131 replies 30 participants last post by  FJ Florida  
#1 · (Edited)
2011 Audio Mod - Part 1 of 7

Part 1 of 7

Part 1: Goal, budget, and component selection

I have completed my upgrade to my 2011 FJ's sound system, and I am happy with the results.

My goal was to retain the stock single CD head end unit, not add a subwoofer(s), and not add an amplifier. (Edit: I changed my mind later and added a modded factory sub and a small amp under the driver's seat to power it.)

The sound quality is very good in my opinion, and I only spent about $125 on speakers, $100 on undercoating, and $75 on Dynamat. It isn't Earth-shaking sound, but is is good, clean sound with enough solid and punchy bass for most people as well as very nice midrange and treble too.

I started with the basic 2011 FJ 6 speaker sound system, which consists of:

Single disc in-dash head end unit
Steering wheel audio and bluetooth controls
One pair of 2 inch "sort-of" tweeters in the dashboard
One pair of dual cone plastic frame (yes, plastic) 6x9's in the front doors
One pair of vibrating "exciters" making unbelievably bad sound by vibrating the headliner

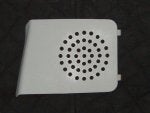
Ouch. Look at the attached pics of the factory 6x9's. What on Earth is Toyota doing? It's a paper dual cone speaker with a fabric surround glued onto a plastic frame! I have never seen anything like it. The magnet is about the size of a quarter.

The construction of the 2" dashboard tweeters isn't so horrible, and Toyota even put crossover capacitors on them. They don't sound so good though.
The vibrating headliner "exciters" are garbage in my opinion. Since I have no speakers in the rear pillars, I can fade all the way to the rear and hear only these headliner vibrators. They are awful.

I cut and capped the wires in the A pillar to kill the "exciting" headliner vibrators (junk). Be aware that in the 2011 one red wire in the A pillar powers the +12 volt for the map and dome lights while the other (twisted in a pair) is the vibrating exciter piece of junk. When in doubt, nick the insulation and test for +12 volts. If +12 volt is there, you can carefully tape up the nick with professional quality electical tape and you have not cut the wrong wire. Update: On the 2011 basic six speaker system, you can simply unplug them from the back of the in-dash unit.

New speakers:

Rockford Fosgate Punch P1692 6x9 coaxials - $64.99 per pair - front doors

Rockford Fosgate Punch P132 3-1/2 coaxials - $39.99 per pair - in dash

Why did I choose these speakers? Short answer: they are very well built and well engineered at a very good price. Long answer (read on): that means they have things like durable rubber surrounds, heavy frames, rubber anti-rust protectors around the magnets, decent efficiency that is not overstated by super bright tweeters driving up the sensitivity rating, and the attention to detail to run the tweeter wires around the magnet and through the center pole piece rather than piercing the 6x9 cone to get power to the tweeters. I also knew that not only was this wire routing good engineering, but that it would allow me to cut the tweeter wires easily if I wanted to (and I did), leaving me with what pretty much is just a 6x9 mid-bass driver. Also significant in my choice it that the tweeter is reasonably small and will have little effect just from being physically present. Compare that to some 6x9's where there is a 2 inch "mid" and maybe one or two more "super tweeters" in the center almost completely obstructing the 6x9. That's not just physics, it's a no-brainer. All of these advantages and benefits come at a very reasonable price with the Rockfords.

I also knew from previous experience (and a little physics) that they would not be overly bright. They definitely do not lack highs, but they are not bright. With an interior as reflective as the rubber and plastic FJ, you don't want screaming highs bouncing all over the place.

I knew the Rockford 3 1/2's would match the Rockford 6x9's in timbre due to their almost identical construction. Timbre matching is important. I also knew I could engineer the crossovers and attenuation properly while still maintaining a suitable impedence (above 4 ohms total).

-FJ Florida-
 

Attachments

#2 · (Edited)
2011 Audio Mod - Part 2 of 7

Part 2: Front door panels

First, remove the door panels and set them aside. I brought them inside to work on them on a soft, carpeted surface to avoid any possible scratches. You have to really rip the panels off. The clips on mine were unbelievably strong. Take out the screw behind the door pull handle and the screw behind the door open handle. Then punch the center of the plastic retaining clip at the front of the door panel to release it, and remove the clip. Now get ready to pull - hard. There are 9 plastic clips on the inside of each door panel. Be careful. Using your hands, pull the bottom of the door panel away from the door. The clips will begin to pop. Work your way up until all of them are free. On one side of my 2011, two clips were missing from the factory, and all but one of the rest shattered. Lovely. However, the other side was fine! The Toyota dealer provided me with a set of replacement clips since one side obviously was defective. Once you have the door panel loose, reach behind it and and gently pull the lock and door handle cables out of their sockets by rotating them forward a little until they slip up out of their sockets through the grooves, which you will see. The last thing you need to do to release the door panel is to disconnect the power window and lock switches. I found that the easiest way was to press the clip that holds the entire switch assembly into the door panel, push the assembly up and out of the door panel, and then disconnect the wiring harness.
I took the opportunity to add a little more sound control to the insides of the plastic door panels. Pic attached.

Fiberglass insulation is a popular audio sound absorbing material. I have been using it in cars for years. Because fiberglass insulation can produce dust that is irritating to the skin and nose, I cover it with polyester fiber batting that is available at any craft shop or the craft section of Wally*Smart. Although this step is not strictly required, I have found it to be beneficial in reducing dust over the life of the vehicle, and for anyone particularly sensitive to fiberglass dust, I definitely recommend the extra protection against the possibility of dust.

When I cut my fiberglass to the size and shape I need, I then cut a layer of polyester fiber batting to the same size and attach it to cover the exposed fiberglass with a little hot glue. I also used a few dabs of hot glue to stick the fiberglass to the plastic door panel. On the upper piece in the pic, I gently pulled the fiberglass apart to make 1/2 the thickness because there is not much gap at the top. Update: I removed the fiberglass I originally had inside the door panel. Too much fiberglass was overdamping the speakers.

If you choose to use fiberglass insulation anywhere in your truck: NEVER install it in locations where it may get wet, like inside the doors behind the speaker. Wet fiberglass smells awful, grows mold, and causes rust very quickly. It is safe to use it in sealed dry places like under the rubber floor liner in the interior, above the headliner (oh I wish I could drop that headliner easily to put some insulation up there for thermal protection - this is Florida - and to kill some additional wind noise too).

I was having a bit of a problem with the door panel inserts vibrating and rattling with all the bass from the new Rockford Fosgate 6x9 speakers in the doors. In the pic, you will see an outline of the door panel insert and a fabric sound control mat that the factory installed over the back of it. I gently pulled the fabric mat loose from the bottom and folded it upward to expose the clips and three screws that hold the insert in place. I cut to fit and installed a layer of polyester batting between the door panel insert and the door panel and reinstalled it. Make sure you cut slits in the poyester batting to allow the door panel insert clips to push the batting all the way through the clip holes. I did not do this the first time, and the rattle continued. I had to cut new pieces of polyester, slightly larger, and make sure the clips caught them and pushed them through, resulting in a much tighter fit and preventing the clips and the panel insert from vibrating. I reattached the fabric sound control mat exactly as it was from the factory with two dabs of hot glue.

I did apply a little Dynmat, but not much. I put a little around the metal cutouts for the 6x9’s, and I put a little on the plastic door panels as well. It did make a difference, but it was not a huge difference.

Cut the wires to the tweeters in 6x9's to turn them into bass/mid drivers only. To do this on the Rockford Fosgate P1692's, gently remove the rubber seal that surrounds the magnet. Gently peel the Rockford Fosgate stickers off the back of the magnet to expose the wires. Cut the wires and tape the ends to make sure they are insulated. Replace the Rockford Fosgate stickers. Replace the rubber seal that surrounds the magnet. Perfect. I could not even tell I had done it. Like it matters when they are in the doors, LOL. Update: The highly restrictive and reflective opening of the grille in the FJ door panel is a pain in the neck. Reflections and pressure bounce right off of it and right back to the speaker and there is nothing to absorb any of it. Plus, the 6x9 being converted to a mid/bass only still leaves the tweeter sitting in the middle, which is not a big deal at all, but it isn't optimal either. The 6x9 has no benefit from a phase plug or dust cap because of the tweeter. None of these are large issues, and they can be addressed pretty easily. Get a piece of the 1/2" green colored foam rubber that I am using for the daming pads in the dashboard (see later posts) and put a tiny bit of damping in the center of the speaker between the speaker and the grille. I traced 1-3/4" circles on the foam rubber and cut them out. Then I did the same on a small piece of the same heavy, dark, soft upholstry fabric. A little hot glue applies the fabric to the foam. A little hot glue applies the round damping pad to the tweeter housing. Works like a charm! See pic. Use heavy soft black fabric or black felt over the foam rubber if you prefer black, but you cannot see the deep blue color I used through the factory grilles.

The next step is to remove the crummy factory 6x9's and use the mod listed here to convert them to a mounting adapter for aftermarket 6x9's. http://www.fjcruiserforums.com/foru...ms/stereo-electronics-electrical/108215-how-install-new-6x9-speakers-doors.html However, if you are not into drilling into your doors, I saw a pair of Toyota Tacoma 6x9 adapters that looked like an exact fit to attach aftermarket 6x9's with no drilling on ebay, after I did the drilling of course. If you use the factory speakers to manufacture your own brackets, just be sure not to overtighten the 2.5" screws that mount the new speakers to the sheet metal of the door. Overtightening could distort the speaker frames. Oh, and make sure you do hit the sheet metal with all four screws - I had to angle mine out a few degrees to make sure all four screws hit metal.

I didn't use aftermarket wiring harnesses. I did observe, online, the polarity of the Crutchfield wiring harness though, to make sure which side of the Toyota factory plug I should solder to the + terminal on the new speaker. I ran a + and a - wire from the terminals on the Toyota plastic speaker frame to the new speakers' terminals so I could use the Toyota factory plug to plug the new speakers back in. If you don’t want to do this, just buy the Crutchfield wiring harness adapters, but be aware that the plugs may have changed in the 2011 vs prior years. The rear speaker plugs definitely changed for 2011, but I am not sure about the front door plugs.

Mounting the new 6x9's was easy. Just follow the pictures and directions in the post. http://www.fjcruiserforums.com/foru...ms/stereo-electronics-electrical/108215-how-install-new-6x9-speakers-doors.html However, when I was finished installing the speakers in the doors, the door panels would not go back on. Toyota has molded an oval-shaped flange onto the inside of the door panel that I guess is supposed to fit snugly against the factory 6x9. The Rockford Fosgate 6x9's I put in had a thicker face plate on them, so I had to remove about 3/8" of this oval flange using a Dremel cutting wheel. See attached pic. I used masking tape to guide my cutting to keep it even all the way around, and I cleaned up the cut edge with a little sandpaper. Yes, the trimming was on the inside of the door panel where no one would ever see it, but I wanted it nice and clean anyway. After timming and a little clean up with sandpaper, this time the door panels fit back in place perfectly. Whew!

So, I turned on the system and I realized just how bad the dashboard speakers are. Very little from the dashboard. So, out came the dashboard "sort of" tweeters and their associated mounting brackets.

-FJ Florida-
 

Attachments

#114 ·
Re: 2011 Audio Mod - Part 2 of 7

Part 2: Front door panels

The highly restrictive and reflective opening of the grille in the FJ door panel is a pain in the neck. Reflections and pressure bounce right off of it and right back to the speaker and there is nothing to absorb any of it. Plus, the 6x9 being converted to a mid/bass only still leaves the tweeter sitting in the middle, which is not a big deal at all, but it isn't optimal either. The 6x9 has no benefit from a phase plug or dust cap because of the tweeter. None of these are large issues, and they can be addressed pretty easily. Get a piece of the 1/2" green colored foam rubber that I am using for the daming pads in the dashboard (see later posts) and put a tiny bit of damping in the center of the speaker between the speaker and the grille. I traced 1-3/4" circles on the foam rubber and cut them out. Then I did the same on a small piece of the same heavy, dark, soft upholstry fabric. A little hot glue applies the fabric to the foam. A little hot glue applies the round damping pad to the tweeter housing. Works like a charm! See pic. Use heavy soft black fabric or black felt over the foam rubber if you prefer black, but you cannot see the deep blue color I used through the factory grilles.

-FJ Florida-
Hi FJ Florida
This is the one part of your Mod that I'm not sure if I understand fully. Is the damping pad intended to be "wedged" between the (disconnected) tweeter and the door panel? Acting almost like a brace to reduce vibrations?
Thanks and great post!
 
#3 · (Edited)
2011 Audio Mod - Part 3 of 7

Part 3: Dashboard speakers

I chose Rockford Fosgate 3 1/2" coaxial speakers for the dashboard to match the 6x9’s. Timbre matching is important, and I thought they would match well. They do match, and with very slight modification, I got them to fit perfectly in the dash. This setup becomes a quasi-three way system with the 6x9's providing the bass and part of the mid, naturally rolling off in the upper mids and highs due to the wires to the tweeters on the 6x9's being cut, plus being off axis near the floor, plus the natural inductance of the 6x9's voice coil.

I did have to grind a slight arc into the plastic of the dash to get the 3-1/2’s to sit down far enough in the dashboard to clear the factory grill covers. See pic. Oh, you will need to pry off the rings of plastic that are attached to the back of the factory grilles. They are melted to the grills on the back with three melted plastic tabs. Just pry/cut them loose. You can see what they look like in the attched pic. Once they were off, I decided to put a little black speaker cloth over the back of the grill to keep out any debris and to provide a bit of sun protection for the speakers - this is Florida.

Once you get the 3-1/2” speakers to sit down in the holes far enough, you can twist the mounting tabs on the speakers a little so you can reuse one factory screw hole and the other side can be screwed very securely to the thick plastic in the dashboard to get a nice secure installation. See pic. You can move the second metal screw clip from the factory over to your new hole for an even more secure mount. Also, you will need some sound absorbing material to put in the dashboard behind the speakers. Update: Originally, I used a piece of fiberglass insulation to put behind the dash speakers. This absorbing material turned out to be wrong for this application. What worked much better was two layers of very heavy upholstry fabric on each side of 1/2" thick foam rubber cut to 6" x 8-1/2". I used dabs of hot glue to hold layers together. I got the thick soft upholstry fabric at a local fabric shop from the remnant section - 45 square feet for less than ten bucks. I will keep the extra for future installs. Sound absorbing (damping) material behind the new dash speakers is critical to help control the back wave from the speaker and to help control the speakers' transient response. No damping material = bad sound. Overdamping (fiberglass) = bad sound. If you don't want to make damping pads similar to what I am using, you can try using an old soft bath towel cut into 1 inch wide strips. It may settle and compact itself after a while though, especially if you do a lot of pounding off road. When installing damping material of any kind, do not crowd the back of the speaker. Always use identical amounts of damping material on the left and right sides. I have been asked about the foam "baffles" that fit behind speakers, almost like an enclosure of sorts. I have used them in the past, promptly removed them and thrown them in the trash, and I do not recommend them at all.

I got some tough black fabric tape ('gaffer' tape = strong durable stuff), and I used it to create a better seal around the dash speakers. I carefully trimmed pieces of it to cover up the odd shaped holes in the dash and then cut a circle in the middle just barley large enough to allow the magnet to go through. The black cloth tape is not an ideal seal by any means, but it was easy and inexpensive (more money for other FJ toys), and it works fine.

Update: Sealing the odd-shaped factory opening in the dashboard is absolutely critical to the sound. I redid this seal 4-28-2011, and I will post how to do it right along with pics in a new post because I am out of room for more pics with this post.

At this point, I turned on the system and I figured out pretty quickly that it needed two tweaks. 1) Solder a 3.3 ohm audio-grade power resistor to the + terminal on the dash speaker. You can get these resistors online at PartsExpress.com. 2) The other end of the resistor was soldered to a PAC brand bass blocker which then connected to the factory + wire, as identified on the back of the factory tweeter. After a few weeks, I noticed the image drifting left to right, and I determined that the PAC brand bass blockers were not close to each other in value. I only used the PAC bass blockers because I was in a hurry and they were available locally. I will never use them again. So, I went to PartsExpress.com and ordered a high quality pair of electrolytic crossover capacitors to replace the PAC bass blockers. I also bypassed the new electrolytic crossover capacitors with a 1 microfarad film capacitor, which is an old trick to get better sound from an electrolytic capacitor.

The total impedence of the dash speaker unit at this point is 7.3 ohms (4 for the speaker plus the 3.3 ohm resistor). I chose 68 microfarad capacitors, so the rolloff begins at about 320 Hz. The resistor provides about 5.25 dB attenuation for the dashboard speakers to match their level to the 6x9’s.

The resistor/speaker/crossover matching turned out to be perfect, but only after five or six tweaks that I need not go into here – a variety of capacitor and resistor combinations just did not come out accurate. Now it really sounds very good considering I am still using the factory in-dash unit. I intend to keep it actually. I am not using any bass or treble adjustment at all.

-FJ Florida-
 

Attachments

#4 ·
I have a 2011 also, but mine has the UP upgrade. I'm reading the spec sheet for the 2011 FJ.

Here is toyota's description for the regular and upgrade.

AM/FM CD player with MP#/WMA playback capability, six speakers (two in headliner), xm radio, auxiliary audio jack, usb port with ipod connectivity and hands-free phone capability and music streaming va Bluetooth wireless Technology.

JBL am fj 6 disc CD Changer with mp3/wma playback capability 11 speakers including subwwfer, XM radio, auxiliary audio jack, usb port with ipod connectivity and hands-free phone capability and music streaming va Bluetooth wireless Technology.

Neither list the output of the head unit. I have the JBL, and it really sounds pretty good. I'm still trying to understand exactly where all of these speakers are. I've seen in a previous post that there are possibly 4 in the headliner now.
 
#5 · (Edited)
2011 Audio Mod - Part 4 of 7

Part 4: Killing road and engine noise

The next step was to kill some road noise. I looked underneath the rear bumper of my 2011 FJ, and to my surprise, Toyota had applied no undercoating to the sheet metal. There were a number of things under there that I didn't want to spray with aftermarket undercoating to deaden the noise, so I decided to do it from the inside (changed my mind later and did it anyway - see below).

Remove the five screws from the trim piece that holds the cargo area liner in place at the bumper and gently pull it loose with your hands. It is clipped in place firmly even without the five screws. Next, use a socket wrench to remove the two bolts holding the front cargo tie downs and the plastic bar that holds the front of the cargo area liner in place right behind the back seat. Be aware that there is another plastic clip, which of course shattered, in the center of the plastic bar that runs behind the seats.

Carefully slide the carge area liner over the rear cargo tie downs (or remove them) and remove the liner. You will see that Toyota did put shredded fabric padding under the cargo area liner, but it does very little to kill the road and rear axle and exhaust noise in my opinion.

Fortunately, you are now down to the sheet metal. Apply eight square feet (2 pieces) of Dynamat Extreme to the sheet metal and press it tightly into all of the contours of the metal to get full contact. I paid $52 for the pair of Dynamat sheets at a local car audio shop, which was a good price considering some online stores want $80.

Reinstall everything and enjoy the quiet! I was shocked at how much noise was coming from the cargo area.

I didn't really like the Toyota cargo area carpet mat and I certainly didn't want to pay for it. I found a nice rubber-backed black carpet mat that was almost the perfect size at Homer's Despot. It does not slip because of the rubber backing, and it has a ridged pattern side-to-side that helps keep anything back there from sliding around. I trimmed a little bit off one side, and now it fits perfectly. Cost about $18. The rubber-backed carpet mat also helped kill more road noise. It actually looks quite nice I think. The only thing missing is the FJ logo and the associated price tag, LOL.

I put some DynaMat in the doors, and it made a little difference, but not a huge one. What did make a huge difference was my other project - undercoating.

A friend and I put my new FJ on a lift, dropped as much stuff as we could from underneath it, papered and masked off what we could not drop (like the brake lines, drive train, fuel tank, and some wiring), and sprayed the whole underside with heavy rubberized undercoating. We managed to get about 98% of the sheet metal coated, except behind the fuel tank of course.

I am very disappointed that Toyota did not undercoat the sheet metal of the FJ. It definitely is much more quiet now, and less road noise means I hear more of my music more accurately.

Now, if I just had the time and energy to drop the headliner to DynaMat the roof. Rain drops sound like marbles hitting the roof. Ugh.

-FJ Florida-
 

Attachments

#7 · (Edited)
2011 Audio Mod - Part 5 of 7

Part 5: Testing and evaluation

I am very happy with the sound. It isn't very loud, but what is there is good. Peak sustained SPL with music is 90 dB with 8 dB of dynamic headroom. The highest instantaneous peak SPL I can achieve is 98 dB near the driver's listening position. 90 to 95 dB sustained exposure can result in hearing damage. The system is efficient enough to work fine without an added amp, unless I want hearing damage.

I would do this system exactly the same way again if I had it to do over again. I fluctuate some days between wanting to attenuate the dash speakers more or less with different resistor values. This fluctuation is due to the recordings, not the system. The system illustrates that some of my recordings stink while others are great. That's what accurate systems do. They play what is on the disc, like it or not. Bad disc = bad sound. Good disc = good sound. For truly bad recordings, fortunately I can use my studio monitors and my PC to fix them up a little and make them sound more like what the audio engineer intended to put on the disc. Really, seriously, did the audio engineer intend to have a complete hole in the frequency response caused by ... crummy studio equipment ... a bad day at work ... ear wax ... a band that insisted that the cymbals be removed after the recording was made ... or any of the other options that result in a bad recording that gets sent to disc anyway. My favorite test recordings are the direct to two-track audiophile recordings. No mixing. No monkey business. Just good mics going through good equipment going straight to disc. Gee, if a direct path like that isn't accurate for testing, then what is? Well, I do have my set of spot and warble frequency test discs and my sound pressure meter to measure the frequency response of my systems, but without a good recording ... garbage in = garbage out.

I am certain that I could do better with an aftermarket head end unit and a quality amplifier, but if I were going to do that, it would be a complete re-engineering job, and I would probably want at least one subwoofer. My goal was to get something reasonably accurate from the stock 2011 head end unit without spending a whole lot of money. The 2011 stock head end unit isn't going to win any awards, but it isn't garbage either. I did not set out to build a perfect system. I set out to build a reasonably accurate one on a budget using the stock head end unit. It is do-able, but it definitely is not easy. I considered it a challenge.

I just did my final set of measurements on the system. I was pleasantly surprised. As it stands now, I have ended up with about 3 db of bass lift centered at about 80 Hz to help combat engine and road noise. The -3 db point is about 45 Hz. The rest of the response curve is reasonably flat but not perfect, approximately + or - 2 db from 160 to 16,000 Hz, with no real nulls or spikes. There is a 2 dB dip centered at 2kHz, but it isn’t too bad.

As far as listening rather than measuring, the snare drum has a nice sharp transient crack. The bass drum has the proper balance between the "thump" of the drum and the "pat" from the beater compared to the real thing. String bass is smooth across its range - no holes on certain notes. Trombone has an appropriate bite. Both male and female voice are OK. Cymbals are silky, not tinny. The insanely high treble is there, but it isn't in your face or fatiguing.

I don't have any rear speakers (yet). That rear pillar location looks like an awfully tight fit. I don't want to pay for the Bazooka brand speaker kit. I may try to squeeze another pair of the Rockford Fosgate 3 1/2" coaxials in there.

Total cost for this project was around $300, including the speakers, Dynamat, the undercoating, and renting a hydraulic lift for three hours to do the undercoating job.

Here are links to the parts:

Cargo area carpet mat: Enviroback Charcoal 60 in. x 36 in. Recycled Rubber/Plastic Rib Door Mat - 60-443-1902-30000500 at The Home Depot

Rust-oleum 248656 “professional grade” undercoating: Rust-Oleum/15 oz. professional undercoating (248656) | | AutoZone.com

68 microfarad electrolytic capacitors: 68uF 100V Non-Polarized Capacitor

1 microfarad film capacitors: 1.0µF 250V 10% Metal-film Capacitor - RadioShack.com

3.3 ohm resistors: Dayton DNR-3.3 3.3 Ohm 10W Precision Audio Grade Resistor

A pic of how to wire the crossovers is attached. You can just hot glue the crossover components to the back of the speaker. One end of the resistor is soldered to the positive (+) terminal of the speaker. The other end of the resistor is soldered to one end (which end is irrelevant) of the large electrolytic capacitor. The other end of the large electrolytic capacitor is soldered to the positive (+) wire of the factory speaker wiring harness. The small film capacitor is soldered to both ends of the larger electrolytic capacitor (again, which end is which is irrelevant). Finally, the negative (-) terminal of the speaker is soldered to the negative (-) end of the factory speaker wiring harness. See attached pic.

Rock on! :rocker:

-FJ Florida-
 

Attachments

#8 · (Edited)
Anyone ever use a product called Peel & Seal? It's an aluminum-faced self-adhesive asphalt/rubber sheet that many people online say is almost identical to the original version of DynaMat. However, a 6" x 25 foot roll of Peel and Seal is only about $17 at my local Lowes store. Hmmmmm ... that's quite a bit less than the over $50 I paid for 8 square feet of Dynamat last week.

Update: I got a roll of Peel & Seal at Lowes, cheap. I thermally tested it in a 300 degree oven. It eventually curled and shrank, but it never melted or softened. I installed a little in test locations in the FJ to see how it holds up over time. It is rubberized and seems almost identical to the original Dynamat from way back when.

Update: As of 2/26/2013: After almost 2 years, I have had no problems with the Peel & Seal that I stuck in various places for testing, like the backs of the plastic door panels.

-FJ Florida-
 
  • Like
Reactions: daltondrose
#12 · (Edited)
Here ya go. It's hard to see in the pic, but it has ridges that run left to right. Those ridges help keep stuff from sliding around. The rubber backing keeps the mat from slipping around. Add a black "milk crate" from Wally Smart, and for about 14 bucks you have a nice mat and a place to toss miscellaneous junk, and both match the interior color very well. If I had "FJ" embroidered on the carpet, I would have the ultimate carpeted cargo area mat. Gee, maybe I can get that embroidered ... LOL!

I deliberately cut the carpet mat larger than the factory mat to cover more area, including the plastic angled piece that runs parallel to the back seat. The more area covered the better for me. When I trimmed it to fit, I rounded the back corners to look better than just a raw square edge.

I also deliberately did not cut out holes for the four cargo tie down hooks on the floor of the cargo area. If I need to use them, I'll take out the mat. Otherwise, they might scratch something I am transporting.

-FJ Florida-
 

Attachments

#11 ·
No problems with it melting in the summer? Geez, it rained today, and the sound of the rain beating on the roof has me wanting to disassemble the entire interior trim to get the headliner out and DynaMat the whole roof.

I used DynaMat extreme in the cargo area, and it made a huge difference but it cost a huge price (IMHO) to match.

-FJ Florida-
 
#17 ·
haha, it won't budge 1/16" in any direction. it's removable with a sawzall and that's about it. i'd considered not doing it for that very reason, but in the end, i can still fit my air compressor and full sliding compound miter saw/stand in there like this if needed. at that point i'll probably just grab the work truck though. It's very much worth it to nearly double my storage space. heck, it's nice being able to throw a 4-foot level back there now and have it sit flat. for me, the trade off is so worth it.
 
#18 ·
In the 07-09's the right rear was white/neg.--red/pos. the left rear was yellow/neg.--black/pos. I can't tell you on the newer model, but maybe they left the wiring the same at least.

I'm in the process of doing an aux. speaker for a CB and putting in the center console with it perforated to allow sound through. I think I decided on cutting out an 'FJ' logo instead and backing that with a black fabric so you couldn't see the speaker. Your rear pillars may be too high profile for this kind of advertising though. I'd probably go with a 5.25" or 6.5" speaker that comes with their own grill in the rear pillars. Paint the grill to match the interior and you have great full range sound from a protected speaker that doesn't stand out too much. I've read in a few areas where people have done this and there seems to be room but you need the stock blank panels to cut out for the larger speakers.
 
#19 ·
My 2011, the right rear D Pillar speaker cables are as you've indicated...red/+ and white/-. The only problem is when I connected a 4" Polk speaker and power on the head unit, nothing comes out. No sound. I've checked the fader and verified the connection but nothing. I think Toyota left the cable but may have not connected it to the head unit. Can anyone else verify this on their 2011 6 speaker unit?
 
#24 · (Edited)
For now I am running this from the stock 2011 head end unit. Yes, I am getting decent sound, volume, and clarity out of it. I am certain that I could do better with an aftermarket head end unit and a quality amplifier, but if I were going to do that, it would be a complete re-engineering job, and I would probably want at least one subwoofer. My goal was to get something reasonably accurate from the stock 2011 head end unit without spending a whole lot of money. Update: See part 7 regarding upgrading to 8 AWG power and ground. More power, cleaner tighter bass, louder, etc.

Since my FJ had not really even had a chance to get dirty, I didn't have to do any sanding or cleaning or rust removal prior to undercoating it. I did not feel the need to undercoat the frame since it is (from what I read) electro-deposit coated or something like that. The sheet metal took seven cans of the "professional" quality undercoating from Rust-o-leum. It was about seven bucks per can I think. It is rubberized, and it actually dried to a tough rubbery coating pretty quickly, as I discovered trying to remove it from my skin. :lol:

-FJ Florida-
 
#26 · (Edited)
In fairness to PAC, I probably should not have said one went "bad" and explained the problem. It was a crummy capacitor IMHO.

I noticed the image drifting left to right, and I found out with a tester that one capacitor was about 20% different in value from the other one, so I trashed them both and replaced them with high quality ones from Parts Express online. Now they are matched properly and the image stays centered where it belongs.

If both of the PAC brand capacitors were + or - 10% each, technically they were in specification, but 20% is audible. So, out they went. I never would have bought them if I had not been in a hurry and didn't want to wait for better ones via mail order. I will never use them again.

The speakers themselves are very well built in my opinion. If they were not well built, I would have returned them without installing them. Even with me driving the head end unit into clipping during tests, the tweeters still have not blown.

-FJ Florida-
 
#27 · (Edited)
Have you looked into alternate woofers that might work?

It seems silly to install the coax 6x9s just to clip the wires that drive the tweeters unless there is really no other good solution.

I also wish there was a no-Dremel speaker solution. :-(

Also could you update your first post with a full parts list and how-to, e.g. Parts Express part numbers and a description of which caps go where?
 
#28 · (Edited)
There are other 6x9's out there. MB quart makes a component 6x9, and I could have used it without the tweeter, but they are $150 and I only paid $64.99 for the Fosgate 6x9's, and cutting the tweeter wire on the Fosgates is very easy. Leaving the tweeter there but disconnected does not hurt anything, otherwise I would have removed it. I also like that Fosgate did not puncture the 6x9 cone to get the tweeter wires to the tweeter. A lot of manufacturers do puncture the cone. I also like the mineral (usually mica) impregnated cone material that Fosgate is using and the butyl rubber surrounds. I have had many positive experiences with this combination over the years from various manufacturers.

MB Quart 6x9 components:

Amazon.com: MB QUART RVF 269 6 x 9" 2-way Car Component Speaker System: Electronics


There are others out there also.

MB Quart usually makes good stuff, but I knew I wanted more than a two way system because I did not want all of my midrange at the floor location. Legs interfere, steering wheel interferes, soundstage on the floor is not something I wanted, etc. Plus the MB Quart system was more expensive, and I would have just thrown away the MB Quart tweeters and crossovers. I suppose I could have tried to match the MB Quart 6x9's (without their tweeters and crossovers) to a set of MB Quart 3.5's ... but the engineering on my part would be different I am sure. If you try the MB Quart 6x9's and MB Quart 3-1/2's I am sure they can be made to sound great, but the crossover/attenuation values I am providing for the Fosgates almost certainly would change if I were using MB Quart. I also cannot find the efficiency ratings on the MB Quart speakers, and therefore I don't know if they would be efficient enough to work with the stock head end unit. For example, I found some Tang Band 6x9 drivers, but they were only 87 dB efficient, requiring more than double the power of the Fosgate 91 dB efficient 6x9's.

Bottom line: If I had it to do over, I would stick with what I have since I know it works and since the drivers seem to be of very good quality, especially for the price. I chose the Fosgate woofers knowing that I had the option of cutting the tweeter wires, which I ultimately did because of too much treble with all four tweeters running. If you want a whole lot of tweet, you could even leave them connected I suppose. I wanted to stick with the Fosgate brand for both door and dashboard for timbre matching. They do match very well. Mixing different brands, or even different product lines within a brand, can lead to unpredictable results.

As for the "Dremel job" on the 6x9 ring molded into the door panel, I am not sure there is any way around it unless you want to downsize to a 5-1/4 or 6-1/2 with an adapter. A sharp knife might work for trimming, but it would be difficult to get the cut even I think. There might be some 6x9's out there with thinner face plates, but it seems like Toyota has made it a snug fit up against the speaker, and I had to trim it. The door panel was not even close to clipping back into place without the trimming. I love my Dremel too. I have had it for years, and I have used it hundreds of times for different jobs around the house. I also used it both in the dash and in the doors of the FJ to make quick work of the required trimming. If I ever decide to put speakers in the rear pillars, I have a feeling that I will be using it back there too.

-FJ Florida-
 
#29 ·
By "Dremel job" I actually meant the modifications you needed to make for the front 3.5"s:

I chose Rockford Fosgate 3 1/2" coaxial speakers for the dashboard, and with very slight modification, I got them to fit perfectly. I just had to grind a slight arc into the plastic of the dash to get them to sit down far enough in the dashboard to clear the factory grill covers. See pic. Oh, you will need to pry off the rings of plastic that are attached to the back of the factory grilles. They are melted to the grills on the back with three melted plastic tabs. Just pry/cut them loose. You can see what they look like in the attched pic.
 
#30 ·
Oh, that's not too bad actually. You can find a way to do it without a Dremel tool. I think a very sharp pocket knife and some persitence would do. However, a Dremel would make the job a lot easier because the plastic is a bit thick there. I used a coarse sanding attachment.

Originally, I just screwed the mounting screws into the plastic in the ground down location, but I moved the metal screw clips that slip over the plastic to the new drill hole locations during the last tweak.

-FJ Florida-
 
#32 · (Edited)
I think the single biggest improvement, which is free, is to cut the wires to the vibrating headliner "exciter" thingies. I cut the wires in the driver's side A pillar. Edit: I later found out than on a 2011 base 6 speaker they can be unplugged from the back of the in dash unit.

I do think that replacing the factory rear speakers, which are pretty bad, would help add some nice rear fill. I think with a little effort just about any 3-1/2" coaxial should fit behind the grill. Right now I am running front only. You can always fade all the way to the front to kill the rear speakers, or unplug them, both free and easy options.

-FJ Florida-
 
#35 ·
I'll try looking for them later today. I plan on dynamatting the headliner one day, maybe I can just unplug them. Unless of course they wire all the way to the kickpanel, in that case i'll just cut them.

Thanks for the info
 
#36 · (Edited)
There is a thread here (somewhere) that describes the kick panel wires. My dealer offered to drop the headliner and disconnect them, but when I looked at it, I decided I didn't want them disassembling everything required to do the job. Update: In the 2011 6 speaker system, you can simply unplug them from the back of the in dash unit.


Dropping the headliner is a pain. I REALLY want to put some Dynamat up there. Rain sounds like marbles hitting the roof!

-FJ Florida-
 
#37 ·
So you can disconnect them from up there. Thats probabably what I'll do when I get more dynamat. I hate that sound of rain hitting too!

Taking off the light grey plastic wasnt that hard when I did the rear cabin, it's the bottom dark grey plastic that gave me trouble. Because of the seats. ...I still have to replace some broken white clips from the dealer. :p
 
#38 ·
PLEASE post a detailed description of how to drop the headliner, preferably with pics. I am sure a lot of people here want to put some noise control up there, as do I.

Yeah, I know all about the plastic clips - on the driver side door panel almost all of them broke when I removed it. Ugh.

-FJ Florida-
 
#42 ·
Oh my gosh! That's a whole lot of work! I especially do not like the part about cutting and splicing the wires to the lights. It seems like they would just unplug?

Fortunately, I have almost no wind noise because I don't have the roof rack, but the rain sounds like marbles hitting the roof.

Everyone concerned about noise should consider undercoating I think. It helped kill some noise, and it's extra protection underneath. It's also pretty inexpensive if you DIY. I did have to rent a lift for 3 hours to do it though.

-FJ Florida-
 
#43 ·
Another option is to get your roof line-x'ed, I hear that takes away sound. But I dont think the headliner will be too hard to do if you're careful with everything and have another helping hand. I plan on doing the whole car.

I'll look into undercoating.
 
#44 · (Edited)
2011 Rear Pillar Speaker Install Guide

This post is part six of a seven part series in which I use the stock 2011 FJ Cruiser basic six speaker head end unit, no amplifier, no equalizer, and no subwoofer to upgrade the factory six speaker system to something reasonably accurate … on a budget. This post describes how to install 3-1/2" speakers in the rear pillars of the 2011 FJ.

I chose a pair of Rockford Fosgate P132 3-1/2" coaxial speakers for the rear pillars to match my dashboard speakers exactly.

In the 2011 basic six speaker system, it is necessary to run new wires to the rear pillars because the factory wires are connected to an amplifier somewhere in the “premium” audio system. This amplifier is not present in the basic six speaker system, which comes with no rear speakers at all. So the rear pillar wiring harnesses from the factory are not connected since there is no factory amplifier, and the rear channels of the head end unit only drive the headliner vibrator exciter thingies, with no speakers in the rear pillars. So, cut and splice into the wires in the driver’s A pillar, which is the easiest location I could find. See attached picture of the A pillar splice. I like to solder and heat shrink my connections to assure the connection is solid, permanent, and well insulated.

Wire colors:

Right rear positive (+) = red
Right rear negative (-) = white

Left rear positive (+) = black
Left rear negative (-) = yellow

Update: I have discovered that on the 2011 six speaker system, the headliner vibrators can bu unplugged from the rear of the in dash unit. That might be a better place to splice than in the A pillar, although the A pillar is easier to access.

Pulling the wires to the rear was the least painful wire pull I have ever done, and that includes dozens. With a thin, flexible piece of piano wire to help me fish the wires, I only had to remove three trim pieces – the plastic that runs along the bottom of the door sills, the driver’s side kick panel, and the plastic trim that runs across the cargo area just above the rear bumper.

The door sill trim pieces popped right off with my hands with no broken clips or any other problems. Then I removed the driver’s side kick panel. It screws in place with a plastic finger screw next to the “dead pedal” footrest. For the cargo area trim, there are five obvious screws in it. Remove them and it pops right off.

There is plenty of room to drop the wires down from the A pillar to the kick panel. From there, I found wire clips/guides underneath the removed door sill trim, and I placed the new pair of wires in those wire clips/guides. When I got to the large plastic side panels in the rear seat, I used the piano wire to fish the wire instead of removing the panels. When using piano wire, remember that the ends are sharp. It’s easy to tear a headliner or pierce your hand. To protect you and more importantly :)lol:) your FJ Cruiser, remember to keep a little tape on both ends at all times. I taped a strong string to the piano wire, and I fished the string inside the panels back to the rear compartment where the jack is stored. In a number of places I was able to just tuck the string under the edge of the plastic side panels, and it went right on in. There is apparently a lot of air space behind the panels. Once I had the string pulled through inside the panels, I used the string to pull the pair of wires back to the jack storage location. Almost there!

From the jack storage compartment, I removed the two little panels that provide access to the tail light wiring on both sides. They pop right out with a screwdriver. I used the piano wire to fish the string up the driver’s side rear pillar - first to the tail light opening and then the rest of the way up to the speaker location. The wire for the passenger’s side rear pillar speaker crosses the FJ underneath the removed cargo area trim. There is plenty of room for it. Then I used the piano wire and string to fish the wire up to the passenger's side speaker location just like the driver’s side.

The next problem was the sheet metal behind the factory blank panels where the speakers mount. 1) It has several welds and some of the joining pieces were bent inward, toward the outside of the vehicle, giving less mounting depth and presenting a very uneven mounting surface. 2) The opening in the sheet metal is a bizarre shape that is far away from the round shape of the speakers.

I straightened the sheet metal very easily in a few places with a pair of channel lock pliers. Big improvement, almost no effort. The next step is to figure out the best place to drill the two screw holes for the speakers to get maximum mounting depth. Mine are rotated at a bizarre angle – see the attached picture. The magnets do touch the back of the pillar. Just to make sure there were no problems with that, I applied felt covering to the back of the magnets.

To deal with the odd shape of the opening, I found a great product called “Stick’rz Felt” that is a self-adhesive, stiff felt at a local fabric store. I cut pieces of this stuff to cover the entire opening, and I cut a round hole in the felt to fit nicely around the speakers. Experiment with paper templates first so you don’t waste the felt. After a few minutes of trimming templates, the felt was cut to fit and ready to go into place, but before sticking on the felt, first stuff some sound damping material into the pillars. I used fabric-backed foam rubber pads made from 1" thick foam rubber and heavy soft upholstry fabric glued to it with hot glue (same as I used behind the dash speakers). See pic.

Once the sound damping material is in the pillar behind the speakers, apply the felt. I peeled off the paper backing, cut it into eight pieces, and reapplied it to the sticky side of the felt. These cuts allowed me to hold the felt in place with the two speaker mounting screws while I pulled off the paper backing one piece at a time to make sure the alignment was correct as one section at a time stuck to the metal. See the attached picture for the fully prepared speaker mounting area.

The felt worked so well, I also added it to the dashboard locations, which required several paper templates to get the size and shape right, but it was worth it. The better you get the seal between the speaker and the baffle (mounting surface) the better the sound. You can spend a thousand dollars on a pair of high end speakers and install them without attention to detail and get a poor result – much less than you paid for. On the other hand, a decent set of speakers meticulously installed can sound fantastic. Do not ever skip the details thinking that it will not make a difference! Note: The dash speakers need to sit as low as possible to clear the grilles, so I trimmed the felt around the speaker mounting tabs so they would sit as low as possible. They just barely clear the grilles.

Next I prepared the speakers. I soldered a 400 microfarad capacitor to the positive terminal of each speaker to block frequencies below 100 Hz. The capacitors are available from Parts Express:

400uF 100V Non-Polarized Capacitor

Super glue (hot glue failed) holds them securely to the sides of the speaker magnets. Heat shrink tubing insulates the wires to avoid any possible shorts. I also applied foam rubber weather stripping to the edges of the speakers to get a better seal with the uneven sheet metal in the pillars. See the attached picture.

Solder the speaker wires that you pulled into the rear pillars onto the minus (-) speaker terminals and onto the crossover capacitors (+) carefully observing positive (+) and minus (-) polarity of the wires. Do not make a mistake here. If you get these wires connected wrong you will get bad sound. Check twice before soldering. I left enough speaker wire attached to work with the speakers on the floor of the cargo area. When I mounted the speakers, I just pulled the extra wire down into the little compartments that provide access to the tail lights. I used a small plastic cable tie to secure the speaker wire to the frame of the speaker to prevent any stress from the wire jiggling over time. Screw the speakers in place and test them. With luck, they will both work properly. Make sure you get left and right correct before you pull the wire over to the passenger’s side.

So now you can enjoy your speakers for a while as you decide what to do about grilles for them. There is a thread on this forum with a great picture of a stock blank cover (like mine) that someone perforated all over and covered with black speaker fabric. It looks great, but I didn’t want to deal with the fabric. I also think the factory grilles, which you can order online for about $50, are outrageously priced and seriously ugly. So I did a perforation job. I could have had a local car stereo shop do it, I am sure, but I did it myself. I don’t have a perf tool, so it took a lot of work on my part – about an hour per side, plus creating my own custom perforation template.

First I made a template in a computer graphics program. I can post the template if anyone wants it. I measured the plastic panels very carefully to make sure the template would end up centered exactly over the speaker. To get the perforation job centered exactly over the speaker, the measurements turned out to be centered vertically on the blank cover and the center hole is indented 2-1/8 inch from the outer edges of the blank panels. I drilled the center hole with a 1/16 inch bit first to align the template and taped the template in place on the panel securely. I used the 1/16 bit to drill a pilot hole for each perforation location. Then I removed the template and used three progressively larger drill bits in the pilot holes to make sure the holes were in the precise positions. The final bit size is 1/4 inch. I could have used a larger size, but 1/4 inch works fine for this application. The outer ring of holes is 3 inches on center with 18 degrees between holes (20 x 18 = 360 degrees). The next ring of holes is 2 inches on center with 22.5 degrees between holes (16 x 22.5 = 360 degrees). The inner ring of holes is one inch on center with 8 holes at 45 degrees.

The result of the 1/4 inch bit is very rough. You will think at first that you have ruined the panel. You have not. You just have a lot clean up work to do. Use the back of a finger nail to press any stuff sticking up on the outside of the panel back into each hole. The plastic is very soft. Take the 1/4 inch drill bit in your hand and pass it straight through each hole several times, picking off as many plastic shreds as you can from the back side. Use pliers to rip off the plastic ribs on the back of the panel. They come right off. Always push the drill bit through by hand from front to back, and it will progressively remove more and more shredded plastic from each hole. After a few passes, use a blow torch (or you could carefully use a butane cigarette lighter) to quickly flame off stubborn shreds of plastic from the back of the panel. The front will be very clean after this, and the back will be fairly clean. Keep at it with the drill bit and the flame until it is all clean. Be patient. See the result in the attached pictures.

Or take it to a local car audio shop and have the perforation done. :lol: I really like the clean appearance of the perforation job compared to other grille options. Plus, I know it is centered properly over the speaker.

Regardless of the grille option you choose, there is one more problem that needs to be addressed, and that is the large void space between the grille and the speaker. You don’t want this void space open. After installing the speakers, I cut sheets of half inch thick foam rubber to fit to fill this void space. Make sure the foam rubber isn’t touching the speaker. It does not have to be perfect. See the attached picture. Also, do not forget to put some sound absorbing (damping) material in the rear pilars. I cut 1" thick foam rubber to fit and covered the back of it with the same thick upholstry fabric that I used for the dash speaker damping pads. See attached pic.

Sound: Anyone who tells you that the rear pillar speakers are useless or that you cannot hear them either isn’t listening or needs to have the ear wax removed from their ears. In fact, I have them faded two notches to the front to turn them down a bit.

One last thing. If you have done the Rockford Fosgate 6x9" and 3-1/2" mod in the front, you may want to change the crossover capacitor value on the dashboard 3-1/2” speakers. I used four identical 3-1/2" inch speakers for timbre matching and to prevent image shifting from front to back. I had the fronts crossed at 320 Hz in the original post. Important note: If I were not installing the rear pillar speakers, I would recommend using the 320 Hz crossover point in the front. However, when installing the identical 3-1/2" rear pillar speakers, I changed the front value to approximately 100 Hz with 200 microfarad capacitors to more closely match the timbre of the rear pillar speakers. The front-to-rear image shifting I was experiencing stopped when I changed the front capacitors, which are available from Parts Express:

http://www.parts-express.com/pe/showdetl.cfm?Partnumber=027-366

The sound really is very accurate, and I met my goals of using the factory head end unit, no amplifier, no equalizer, and no subwoofer. I also did it on a budget. The rear pillar speakers are providing nice rear fill, and I have converted my six speaker stock system with headliner vibrator “exciters” (junk) into a high quality 10 speaker upgraded system.

Speaker count (10): 6x9 coaxials in the front doors with the wires to their tweeters cut to leave only mid-bass = 2 … plus 3-1/2” coaxials in dashboard = 4 … plus 3-1/2” coaxials in rear pillars = 4 … total 10.

Update: For those who are installing the rear pillar speakers as described here and also are doing the 8 AWG power and ground wire mod listed below: The 8 AWG power and ground mod changed the sound so significantly that I had to tweak the system again. If (and only if) you also are using the 3-1/2" P132's in the rear pillars and also doing the 8 AWG power and ground mod, then change the dashboard speaker resistor value to 4.3 ohms and the capacitor to 220 microfarad at the same time you install the 8 AWG power and ground wires to cut the dashboard 3-1/2's down another dB or so while keeping the crossover near 100 Hz.

Note: All electrolytic capacitors should have a small film capacitor in parallel to improve sound quality. See previous parts of this thread.

Rock on! :rocker:

-FJ Florida-
 

Attachments

  • Like
Reactions: carelo.koekemoer
#45 ·
Re: 2011 Rear Pillar Speaker Install Guide

Pics of perforation job and final install.

Rock on! :rocker:

-FJ Florida-
 

Attachments

#46 · (Edited)
Merged content into this thread.

-FJ Florida-