Toyota FJ Cruiser Forum banner

37" LED Roof light bar install

23K views 21 replies 8 participants last post by  1945 Mouton  
#1 · (Edited)
I installed a 37" LED light bar on a Tuffy roof mount this past weekend. The roof mount bolts right onto the OEM roof rack. I decided on a 37" LED light bar instead of a 40" or longer bar because I prefer the light bar to be within the width of the roof rack for aesthetics reasons. I also chose a LED bar with a single row of 20 CREE 10W LED's since the garage's ceiling at my office is only 6'8" high. This light bar with the Tuffy rack sits slightly lower than the highest point of the roof rack.

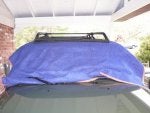
I started out with a couple of moving blankets to protect the roof and windshield.


The following pic shows the Tuffy mount on the rack. It is a relatively inexpensive (I paid $90 incl. shipping) mount but is quite sturdy, although there is a few spots where the paint has chipped off. No powder coating here, but still a very good value.


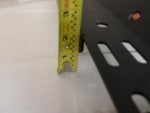
Sorry for the blurry picture, but it's good to check the height from the roof to the base of the Tuffy mount on both ends of the mount to make sure it's installed levelly. Don't use a bubble level to check as the truck might not be standing on level ground.


The LED light bar comes with a 5-foot cord which just happens to be long enough to reach the connector in the A-pillar, at least in my case. It will depend where you put the hole. Note the 20-LED light bar has 4 flood LED's on each end and 12 spot LED's in the middle. You can see the two different kinds of CREE LED's in the pics.


... to be continued.
 
#2 ·
37" LED Roof light bar install - Part II

... continued

Oh boy, time to drill a hole on the roof. I decided on drilling a hole through the roof instead of running the wires through the outside A-pillar cover (the non-drilling method) as I prefer not to have exposed wires. I also didn't want to drill a hole under the front foot of the roof rack because (1) I just successfully (meaning no leaks) installed a used roof rack a month ago I bought from a forum member and didn't want to push my luck, and (2) I figured if the hole-on-the-roof ever leaks, I would rather try to fix it without having to uninstall the roof rack. I used a 3/4" Rotobroach cutter with some tap oil to drill the hole. The cutter went through the sheet metal without batting an eyeslash. I did put a towel under the hole after dropping the left front corner of the headliner to catch the metal filings. The Ancor marine quality wire seal (same as a typical cable gland) was secured to the roof with a fiber washer and rubber washer on the top and a fiber washer under the roof. I used a rubber washer and a fiber washer since the roof is not perfectly flat. I thought the rubber washer would help press the fiber washer down on the sheet metal surface. Liberal RTV silicon was used on both the top and bottom of the connector. I also put a nice dollop of Butyl rubber on the cable and entry into the connector. BTW, the drops you see on the connector and the roof were raindrops as I took this and the next picture this morning, three days after the install.


I put a cable tie to the light bar end of the electrical cable (hefty 14-2 with rubber or neoprene jacket) to act as a strain relief so the wind wouldn't be tugging at that end of the cable. I will be attaching a cable loom to the wire and cable tie it at both ends to further protect the wire. The camera angle makes it look like the cable is pretty tight from the light to the connector, but in reality it has a nice loop to it.


With the LED light bar mounted, wire run through the roof connector and sealed, I was pleasantly rewarded with the fact that the cable was just long enough for me to connect the light to the connector in the A-pillar via a couple of two-wire Weather Pack connectors. I had previously installed a factory OEM working lights switch in the switch panel, plugged in the already-wired switch connector and installed a relay and a fuse in the fuse box in the engine compartment. In the next photo you can see how the light bar lies nice and low on the roof.


Time to hit the switch, the following pic was taken with a lower exposure setting to compensate for the LED roof light. But if you compare the luminance levels of the stock headlights, the PIAA Ion Black fog lights and the LED light bar, you can see the LED light bar is really bright!


Many thanks for the collected wisdom of all the other forum members in helping me make this installation. The forum archives are an absolutely invaluable resource for any FJ newbie like me to accomplish any mods.
 
#21 ·
Re: 37" LED Roof light bar install - Part II

... continued

Oh boy, time to drill a hole on the roof. I decided on drilling a hole through the roof instead of running the wires through the outside A-pillar cover (the non-drilling method) as I prefer not to have exposed wires. I also didn't want to drill a hole under the front foot of the roof rack because (1) I just successfully (meaning no leaks) installed a used roof rack a month ago I bought from a forum member and didn't want to push my luck, and (2) I figured if the hole-on-the-roof ever leaks, I would rather try to fix it without having to uninstall the roof rack. I used a 3/4" Rotobroach cutter with some tap oil to drill the hole. The cutter went through the sheet metal without batting an eyeslash. I did put a towel under the hole after dropping the left front corner of the headliner to catch the metal filings. The Ancor marine quality wire seal (same as a typical cable gland) was secured to the roof with a fiber washer and rubber washer on the top and a fiber washer under the roof. I used a rubber washer and a fiber washer since the roof is not perfectly flat. I thought the rubber washer would help press the fiber washer down on the sheet metal surface. Liberal RTV silicon was used on both the top and bottom of the connector. I also put a nice dollop of Butyl rubber on the cable and entry into the connector. BTW, the drops you see on the connector and the roof were raindrops as I took this and the next picture this morning, three days after the install.
View attachment 193433

I put a cable tie to the light bar end of the electrical cable (hefty 14-2 with rubber or neoprene jacket) to act as a strain relief so the wind wouldn't be tugging at that end of the cable. I will be attaching a cable loom to the wire and cable tie it at both ends to further protect the wire. The camera angle makes it look like the cable is pretty tight from the light to the connector, but in reality it has a nice loop to it.
View attachment 193425

With the LED light bar mounted, wire run through the roof connector and sealed, I was pleasantly rewarded with the fact that the cable was just long enough for me to connect the light to the connector in the A-pillar via a couple of two-wire Weather Pack connectors. I had previously installed a factory OEM working lights switch in the switch panel, plugged in the already-wired switch connector and installed a relay and a fuse in the fuse box in the engine compartment. In the next photo you can see how the light bar lies nice and low on the roof.
View attachment 193465

Time to hit the switch, the following pic was taken with a lower exposure setting to compensate for the LED roof light. But if you compare the luminance levels of the stock headlights, the PIAA Ion Black fog lights and the LED light bar, you can see the LED light bar is really bright!
View attachment 193473

Many thanks for the collected wisdom of all the other forum members in helping me make this installation. The forum archives are an absolutely invaluable resource for any FJ newbie like me to accomplish any mods.
How did you mount the lights to the tuffy mount, i see 3 points on the bottom... Did ur lights come with that or did you fab that up.. Thanks in advance, pics if you have them avail pls.. This looks great and plan on doing this after i sell my current setup. Thanks again!!
 
#3 ·
37" LED Roof light bar install followup

Just by chance after I did this installation it rained non-stop for two days. So far, no leaks!! :)

BTW, here is the 37" CREE 200W (20x10W CREE LED's) light bar I bought on eBay:

http://www.ebay.com/itm/111230512019?ssPageName=STRK:MEWNX:IT&_trksid=p3984.m1439.l2649

I made an offer of $225 (free shipping) and it was accepted by the seller. It was shipped via DHL Express from China and I received it in 4 business days. I was quite impressed by the quality of the construction. It mounts with three feet under the light bar, hence its low profile.

So far, I did not notice any increase in noise or vibrations from the installation.
 
#12 ·
Nice install. :cheers:
 
#17 ·
Look great man! And nice choice on light bar!
 

Attachments

#20 ·
Has anyone gotten moisture in the light? I did after less than 2 months and live in Arizona where it barely rains. I didn't park it outside in a storm so I don't know how it got in there. After 1 week of moisture then black mold started growing. Good news is that I got a free replacement and then I sold the new light. I'm going with a different design and don't want to risk it again.