Toyota FJ Cruiser Forum banner

oil pan bolts torque setting

22K views 15 replies 8 participants last post by  FJtest  
#1 ·
replacing the oil pan and gasket on my FJ a rock put a nice dent in it. No leaks from that but I have the replacement waiting to go on. tried to get the original one off with no luck, what's the trick? it's cemented on, at least it feels like that. Should I RTV both sides of the gasket and locktite the bolts? thanks
 
#2 ·
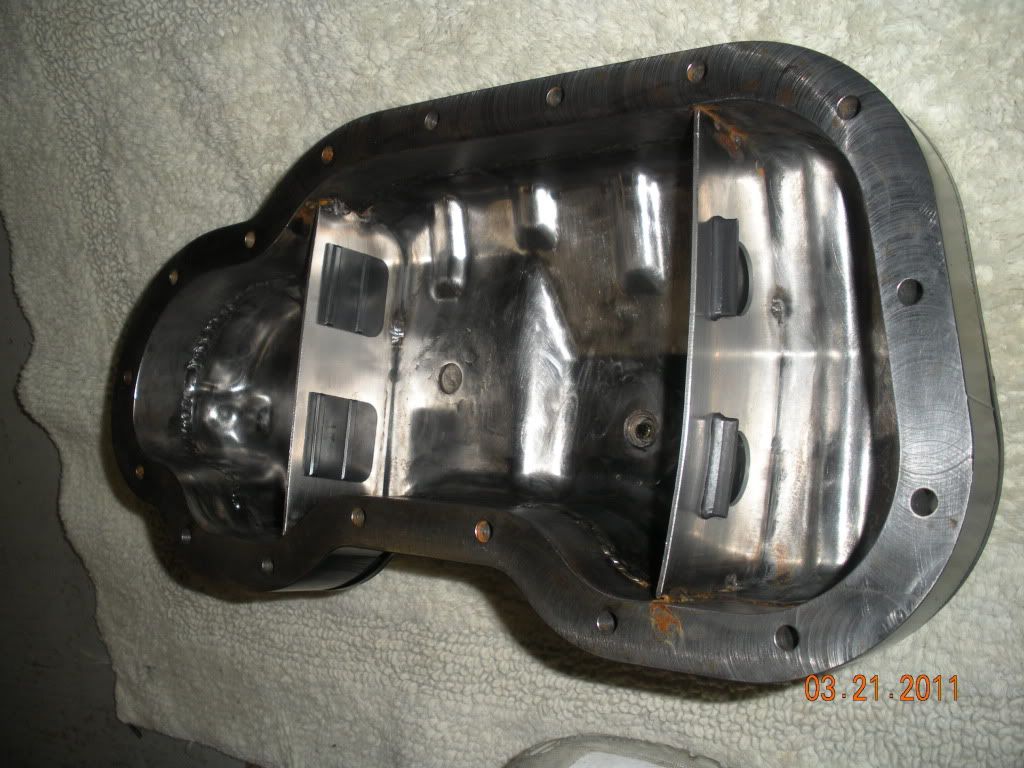
There are two oil pan sub-assemblies, the bigger main one and the smaller sump pan (with the drain plug in it) that bolts to the bottom of the main one. You pry them off with a pry bar or a big screwdriver, very carefully, so as not to gouge the gasket surface. They're glued on with Toyota FIPG black seal packing, the finest silicone sealer known to mankind. Use a chisel if you have to to open a space to get a wide pry bar in, but be very careful.

Clean off all the old FIPG seal packing surgically clean, finishing with brake cleaner.

there are no gaskets; use Toyota Genuine Seal Packing Black FIPG in a continuous bead. This stuff costs $25 for a small tube at the dealer. It's worth it, don't skimp and use cheap RTV from VatoZone unless you want to do this all over again when it leaks later.

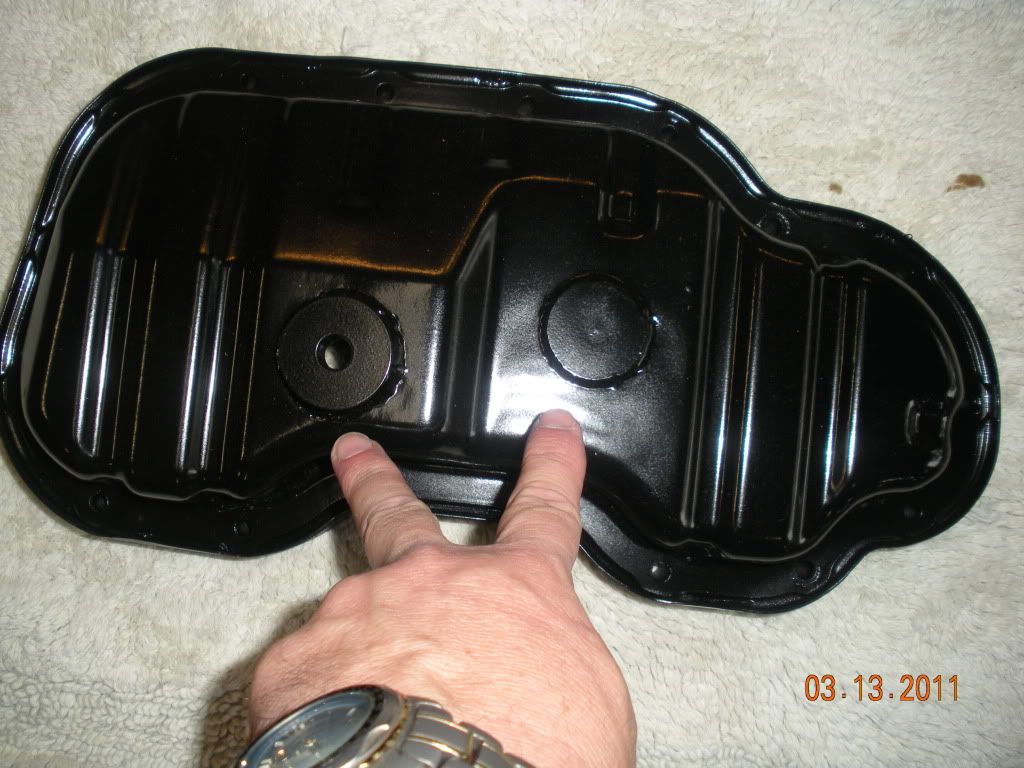
You will need a new o-ring for the oil pump and a gasket for the oil pump strainer.

No Loctite needed, since there is no cork gasket to crush as with older Land Cruisers and min-trucks. It's really a much better design, but a lot depends on the seal packing and getting everything on before it sets completely.

The main sub-assembly pan has 17 bolts and two nuts. The bolts have different lengths, so hopefully you paid attention which came from where when you took them off. Tighten them in several even stages, the 10mm bolts to 7.4 ft. lbs. (89 in. lbs.), the 12mm bolts to 16 ft. lbs., and the nuts to 16 ft. lbs. All the tightening to final torque has to be done within 15 minutes, before the seal packing FIPG completely sets.

The "No. 2" (smaller sump) pan goes on similarly; a bead of seal packing black FIPG on surgically sterile surfaces, there are ten bolts and two nuts. Again, tighten them evenly in several stages. Bolts go to 80 in. lbs., and the two nuts take 7.4 ft. lbs. (= 89 in. lbs.). As before, get all the stages done and final torque reached within 15 minutes.
 
#3 ·
I'm just replacing the small bottom pan. I did order/get a gasket when I ordered the pan. Should I not use it and use the Toyota sealant?
 
#5 ·
2007 also
 
#9 ·
I've always heard use either one or the other, the paper/ceramic gasket or the liquid Gasket. And to never use the two together. I've done a partial rebuild on a different motor and only used the liquid gasket on the oil pan. Works like a charm, you just need to make sure the surfaces are as clean as possible.

....my 2 cents.


:cheers:
 
#10 ·
The Toyota sealer works extremely well. I have used it in other places and have had exceptionally good luck with it.

Slightly off topic, but I have been working on a deeper, baffled oil pan for my X-Runner.

Here are a few pics.

Image

Image
Image
Image
Image


I have not installed this let, but, expect about a quart and a half extra capacity.

I also relocated the oil drain, that was not in the lowest part of the oil pan.

Image
 
#13 ·
I wouldn't say the Toyota seal is great - mine is leaking too and am in the middle of replacing it (lower small one). Owned lots of vehicles much older and longer never had an oil pan leak - this is a first for me, not impressed - it's not a big deal but its these little things that shouldn't happen. I would say a proper gasket is in order. Didn't know you could get one as the parts counter said there wasn't one, just silicon.:frown
 
#15 · (Edited)
Properly applied, FIPG is more reliable than any physical gasket; that's why automakers are using it.

It's easy to "properly apply" it when assembling a new engine and all surfaces are clean, dry, and oil free. It's considerably more difficult when installing an oil pan and oil is still creeping down onto the sealing surfaces.

The surfaces MUST be clean and oil-free, and that usually means wiping both sealing surfaces with acetone, brake cleaner, or other volatile solvent immediately prior to applying the FIPG.
 
#14 ·
Don't EVER try to separate the oil pan using a chisel, screwdriver, or any other tool wedged between the upper and lower pans.

These are sealed using FIPG (form-in-place-gasket) material, and you can easily damage the critical sealing surfaces if you don't CUT the sealant. There is absolutely no force required to separate the sump if you do it correctly. There is a Toyota tool (09032-00100) specifically made for cutting oil sump FIPG, but you can use a single-edge razor blade or Exacto knife if you are careful.