MY BACKGROUND
I always wanted an FJ since I saw a Voodoo Blue when they first came out. Just thought they were neat looking vehicles but I wasn’t aware of their off-road capabilities. Fast forward a few years and I was in a place financially to buy one. I had been lurking in and learning from this forum for a year during my search. I finally pulled the trigger and purchased my new to me FJ Cruiser on July 18, 2015. I ended up with an Iceberg because my wife liked this color the best. It's my first off road vehicle and it's been a blast to mod, daily drive and take it off the beaten path. Daily life takes up most of my time including work, my wife and my young daughter but as a weekend warrior I do all the modifications myself and get out there when I can. Thanks for following along.
STARTING POINT:
This was the day I bought it: July 2015
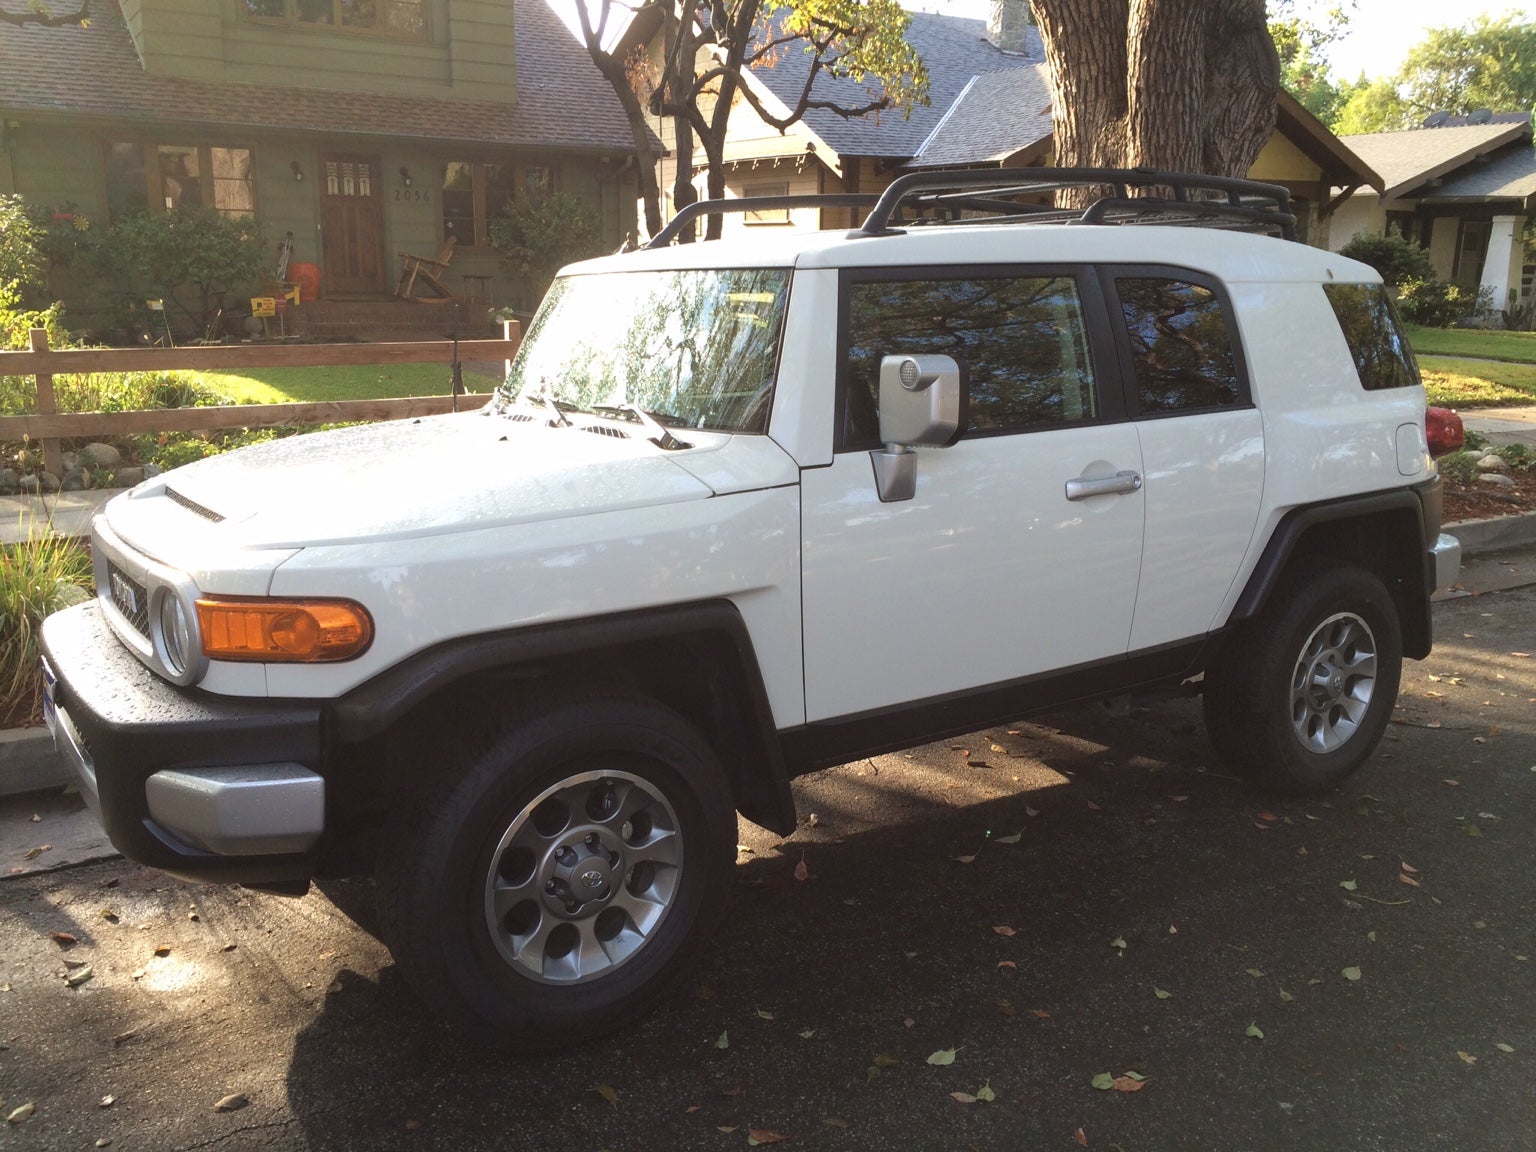
SPECS: 2013 Iceberg 4x4 AT stock, bought used from Carmax with about 20k on the odometer with the convenience package and most importantly the Rear diff locker. Originally a WA state vehicle.
BUILD TIMELINE PICS:
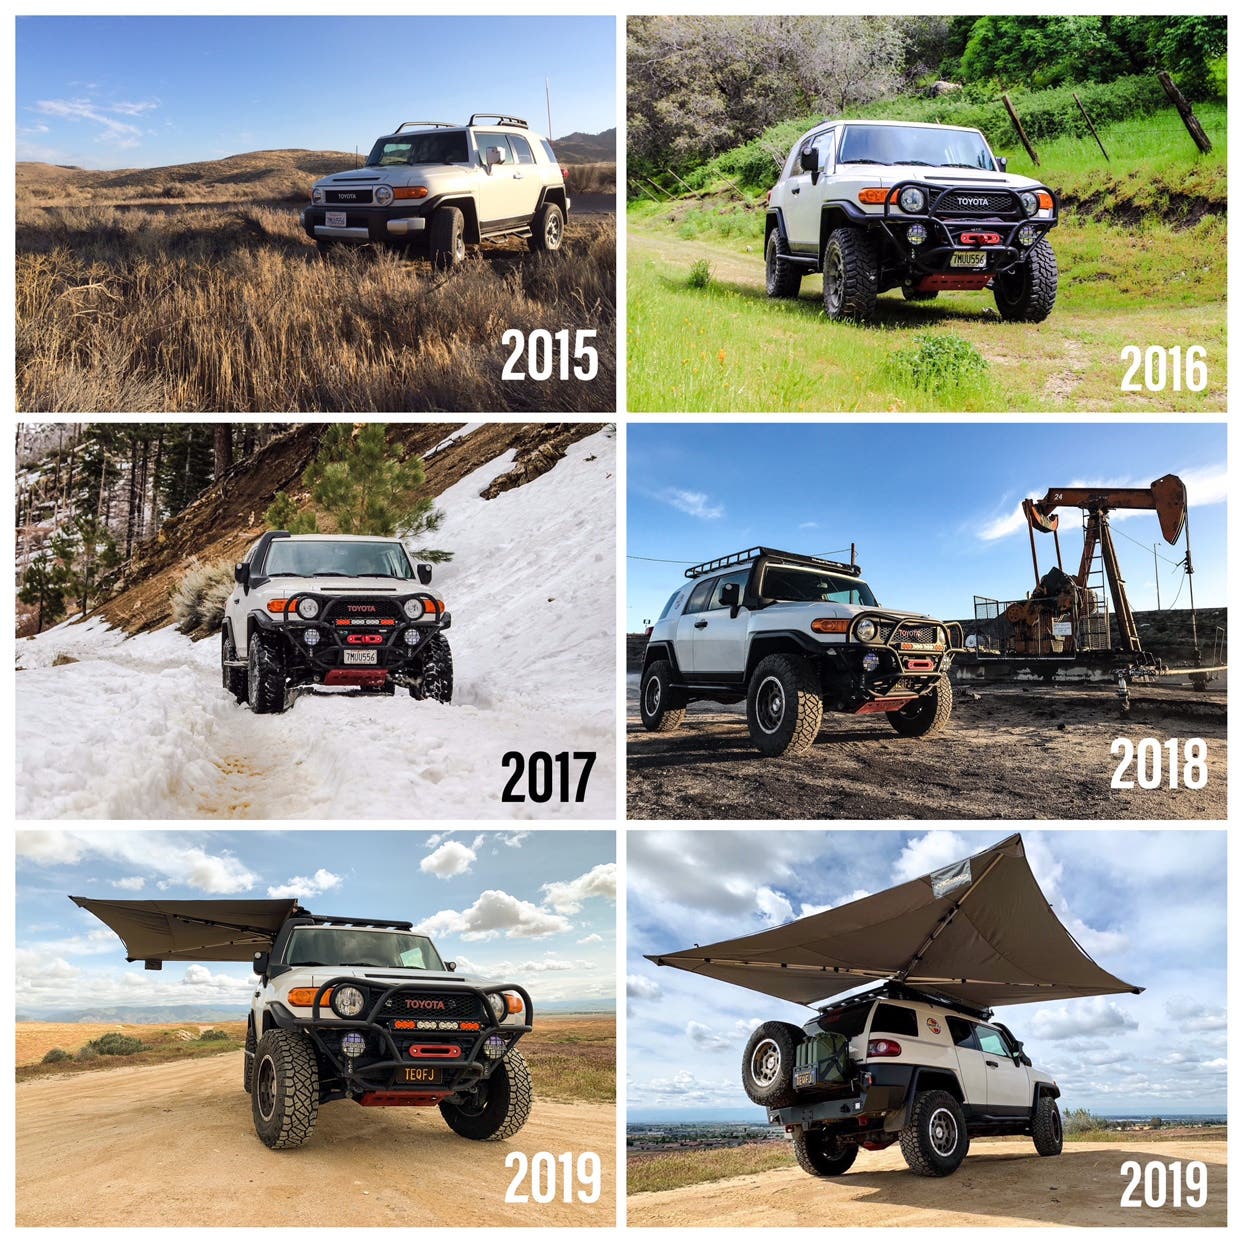
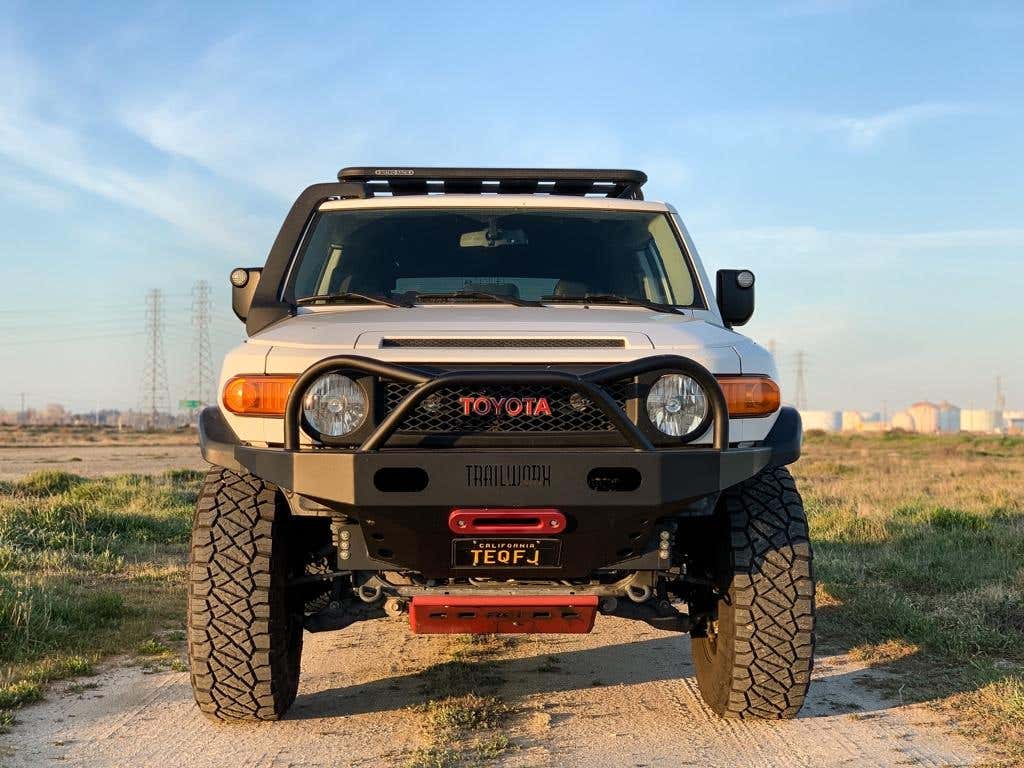
CURRENT:
I decided to name my FJ "Ghost" from Game of Thrones. "Ghost" is one of six direwolf pups that are found by the children of House Stark. He is adopted and raised by Jon Snow. Ghost is an albino with white fur and red eyes. Though he was the runt of the litter when he was born, he quickly grew to be as big as the rest of his siblings.
BUILD LIST
BUMPERS/ARMOR:
Trailworx front bumper
JTA Metalworks rear swingout bumper
RCI Metalworks steel skids- Front, transmission, transfer case, rear diff
OPOR Rear LCA front mount skid
FJ toyman rear lower shock skid
Pure FJ rock sliders
LIGHTS:
Baja Designs S1 (spot) x 2 in FJ grill
Baja Designs S1 (wide cornering amber) x 2 in front bumper
5" 18W EBay special CREE LED flood flush mount x 2 (rear bumper)
WINCH/RECOVERY:
Comeup Seal Gen2 9.5 winch-synthetic line
Factor 55 Prolink
Ellis Precision aluminum hawse fairlead
Krazy Beaver shovel
Iconic's rear recovery points
Maxtrax
Mean Mother exhaust/air jack
Southeast Overland Kinetic Recovery Rope: 7/8" x 30'
Adding the Dashpod...cutting this square with a dremel was nerve-racking. Measure twice cut once. Some think it's useless but I find myself using the temp and compass often.
GPS antenna placed here hidden under the dash pod cover. Strong GPS signal in this location.
Round 1 Suspension lift: Toytec Ultimate Lift and SPC light racing UCA and a set of used SAW 1.5” rear springs
Round 1 Tires: Mastercraft Courser MXT LT285/70/17 Load E tires mainly for the aggressive mud terrain tread pattern, good reviews and also they are one of the lighter MT’s on the market (56lbs each). Made in America by Cooper tires. Only draw back is the 2-ply sidewalls. I have had 18K miles on these now, with every 5k mile rotation. They are wearing well and I expect to get about 35-40K miles on them. Road noise was minimal at first but is more noticeable now. Soft, smooth ride on road and does pretty well offroad
Front Bumper: Decided to go with a tube winch bumper to save on front end weight. Went with Trailworx Fabrication which looks better in my opinion with the option of the 3 hoop evil eye design. It's light (60-70lbs), strong and provides very good approach angles. These are no longer being made.
DIY windshield washer fluid bottle relocation due to aftermarket bumper exposing the bottle. Decided on this $20 option.
Its very good quality, fits right into that slot without any modifications
Get a hole saw for the drill to make the holes for the 2 pumps, i drilled one on the bottom and one on the side
I got some galvanized steel wire at Home depot to make the bracket to hold it in place
Does not rattle at all, no issues offroad
For $20 there is your windshield fluid bottle relocation
Round 1 Winch: Went with the Vipermax 13K winch based on good reviews by many members on this forum. Added Ellis precision red aluminum hawse fairlead and Factor 55 prolink to the mix. It was at this point that I decided red was my accent color.
Winch solenoid control box was initially relocated to the top of the fuse box
The cables were too messy to me so I relocated the winch solenoid again to behind the grill. I have a remote and still have some space to plug the wire controller in.
An in-cabin winch kill switch was added with PAC 500 solenoid for safety.
RCI Metalworks steel skids (front, transmission and transfer case) were next and painted red to match the other accents. The small window for oil changes is key as these skids are heavy. A rear diff skid may be in the works in the near future.
Scuba mod for rear diff and E locker. Didn't do the front breathers due to 2013 ones being high enough under the hood already for me. SoCal terrain is mostly dry desert with rocks so not much in the way of water crossings but I anticipated some water crossings at FJ Summit X so went ahead with this relatively easy and cheap mod.
Round 2 Suspension Lift: After a few stories on Facebook of Bilstein 5100’s folding over at the lower stem, I decided to upgrade the front suspension with Fox 2.5 Factory Series Coil-Over IFP. The Toytecs were better than stock and while on road they were fine but washboard roads were rough. Fox's feel alot smoother offroad. Fox's for the rears are also on order to match the front. [/B]
Hayden aux transmission cooler installed and transmission fluid was flushed with 14qt of Toyota WS ATF at this point with 43K miles on odometer. I don't do any towing but climb 4000 ft mountains regularly. Will help protect the transmission with slow crawling off road as well. Easy enough mod and makes it super easy to flush the transmission now which i plan on doing every 50K miles
On Board CO2: I was using a VIAIR 88P air compressor which was relatively slow and gets hot with use so I pieced together an on board CO2 system with a Beverage Factory 10lb CO2 aluminum tank and The "Source" Hyperflo 150psi fixed regulator purchased from Wheeler's Offroad. Mounted it in the back with piece of wood and two super quick fists. Will mount the fire extinguisher next to it as well. Used it last week and was able to air up all four tires in about 2-3 minutes from 20 psi to 38 psi. Also aired up another SoCal forum member's tires in the same setting as well. There was a little bit of frost on the regulator after airing up 8 tires but no problems with flow. Using rubber hose made from recycled goodyear tires and a gas station style tire chuck. It impressed me.
Lol, thank you. it's been ongoing just decided to document it now. The wheels are good for the most part. No chips. But the rim will scratch if hit up against big rocks
I`ve had my FJ for almost 10 1/2 years now and its getting close to getting a rebuild. All my mods are pretty old now. I want to get it painted get the kings rebuilt and refurbish a few of the other mods I got. It just started snowing tonite so all this will have to wait until at least spring just because .....its cold
Thanks for taking the time to compile all of this! Well built and very informative. Nicely done. I've been meaning to do this for awhile now and you gave me some inspiration to start cataloging stuff before I forget!
I had this morning off so I took the FJ to stretch its legs. Drove through a stretch of whoop-de-doo's at speed and the fox suspension really soaked up the bumps. Can't wait for the rears to come.
Installed Coverking spacer mesh seat covers today to avoid wearing a hole in the stock seats. Fitment was extremely good. Looks almost OEM. Feels soft and cool. The spacer mesh looks like a breathable material. Don't mind the dirty interior. I need to clean it.
Very nice quality. He packaged it well. Hard to tell that it was handmade. I will probably document the install on this thread since there isn't one on this concealed inside the fender version. I have a second battery in the back corner and didn't want to drill a big hole in my fender. This is mainly for dust control for me.
Please share your experience with the quality and install of the snorkel. I am on the fence for this one. I am curious if you need to drill any holes on the A pillar or roof to mount. In addition, I plan to run my wires through the snorkel if it's possible.
Sure, I've been busy with a new house renovation so I haven't found the time to install it yet. There is no drilling of the A pillar. The top of the snorkel is secured to the roof with factory roof rack mounting holes so no drilling. From what I can tell there will be some cutting inside the fender but nothing that you can tell from the outside so it can be returned to the factory look.
Please share your experience with the quality and install of the snorkel. I am on the fence for this one. I am curious if you need to drill any holes on the A pillar or roof to mount. In addition, I plan to run my wires through the snorkel if it's possible.
Looking forward to your snorkel build thread. We know what you mean about being busy with a re-model. It took us two months to do our kitchen, but well worth the blood, sweat and tears. Good luck my friend.
Thanks Doug. It was a full gut job with new plumbing, electrical and ac install...one headache after another. Looking forward to trail riding with you guys soon.
Installed these last night but it looks like the bottom of the reservoir will hit the rear axle with any flexing. Thinking of rotating the reservoir to the front.
Looks like you might have to build a mount for the reservoir. Aluminum L bracket at Lowes/ Ace hardware. $15.99 :grin
This is an older thread, you may not receive a response, and could be reviving an old thread. Please consider creating a new thread.
Related Threads
?
?
?
?
?
Toyota FJ Cruiser Forum
3.7M posts
122.6K members
Since 2005
A forum community dedicated to Toyota FJ owners and enthusiasts. Come join the discussion about performance, accessories, mods, troubleshooting, maintenance, and more!