I'm back with more crazy antics this summer. No, I'm not chopping the top off, (yet)..... cutting the doors in half last summer was crazy enough for now.
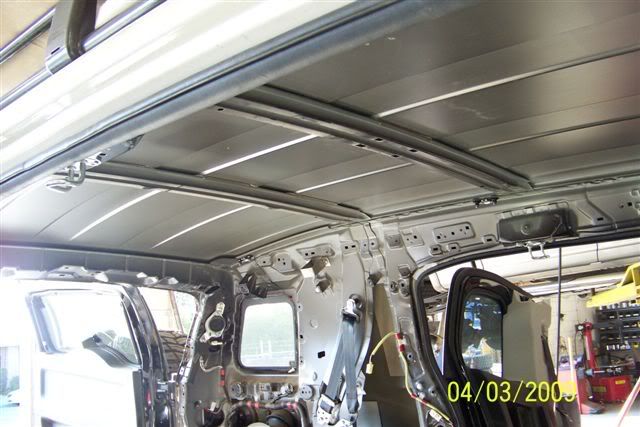
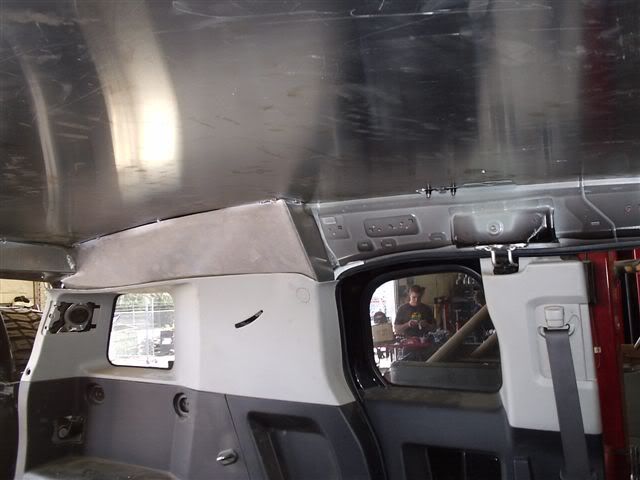
I'm pulling all my curtain airbags, lamps, and headliner and getting the inside roof portion linexed to deaden the sound and prepare for a custom roll cage. The drawings are sweet. I will start snapping some photos ASAP. You're gonna want to subscribe to this one.
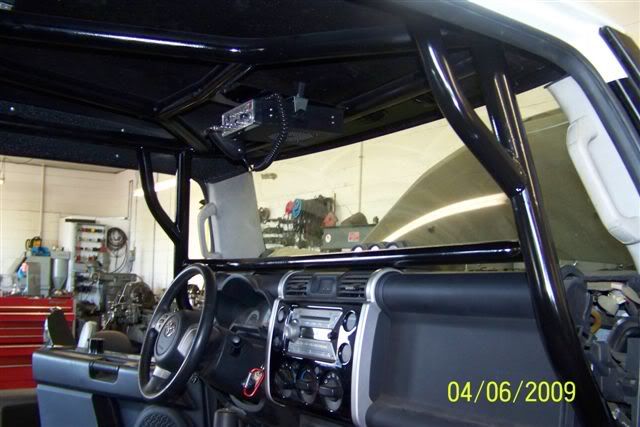
******NEW UPDATE 4/6/09 *********
I just stopped by EXORR today and all I can say is HOLY CRA*!*$#
I knew this project was going to turn out great because Dave was unbelieveable in making my half doors, but I have to say I was blown away with this roll cage.
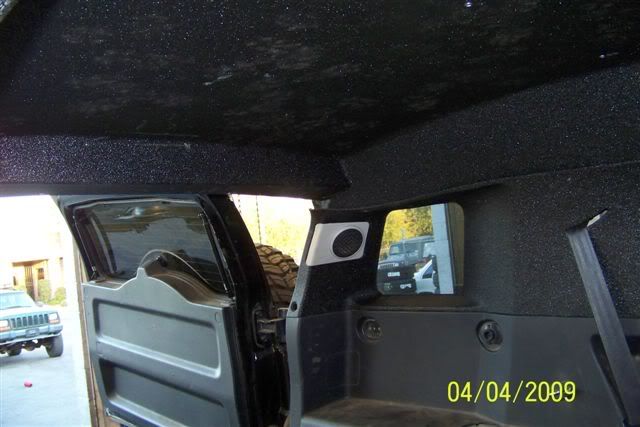
I will try to post pics tomorrow and will have em up no later than Wednesday for sure. The custom ceiling is AMAZING!! and the Linex was the perfect touch to give it that rugged look inside. The detail on this project is amazing; From the Sweet LED lighting system throughout, to the new ceiling, beutiful bends on the cage, and just amazing imagination and thought put in to the design on this puppy. I feel like I'm getting a project from some reality television show like a 4 wheel version on pimp my ride even though I had to pay for it!! :lol:
You think I'm hyping it up? Just wait till you see the newest pics. You be the judge!! Thanks for all your help Dave! Not only will I feel safe now, but I have hands down the coolest FJC interior on the planet!!!
******NEW UPDATE 4/14/09 *********
Stay tuned because I pick up my truck completely finished tomorrow!! I will be snapping from all angles and will have all the details up and loaded tomorrow night!! It looks so sic I can't even begin to explain how much detail went in to this project. Lot's of close ups coming.
![Image]()
![Image]()
![Image]()
![Image]()
![Image]()
![Image]()
![Image]()
![Image]()
![Image]()
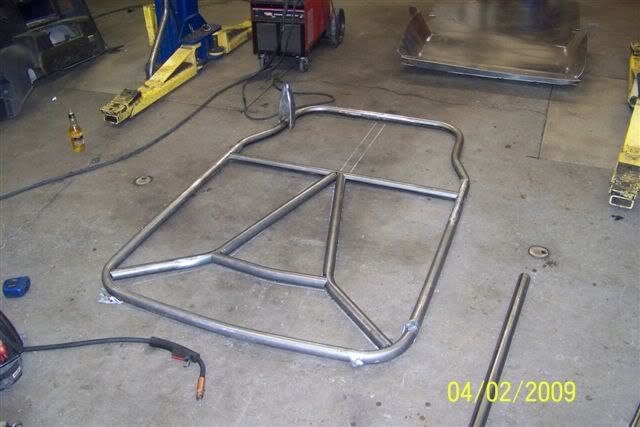
I'm pulling all my curtain airbags, lamps, and headliner and getting the inside roof portion linexed to deaden the sound and prepare for a custom roll cage. The drawings are sweet. I will start snapping some photos ASAP. You're gonna want to subscribe to this one.
******NEW UPDATE 4/6/09 *********
I just stopped by EXORR today and all I can say is HOLY CRA*!*$#
I knew this project was going to turn out great because Dave was unbelieveable in making my half doors, but I have to say I was blown away with this roll cage.
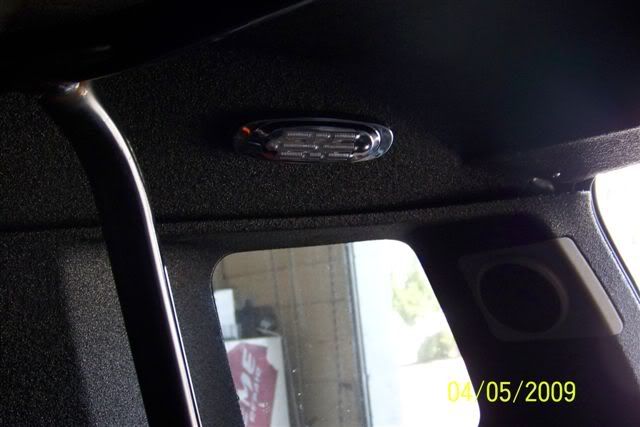
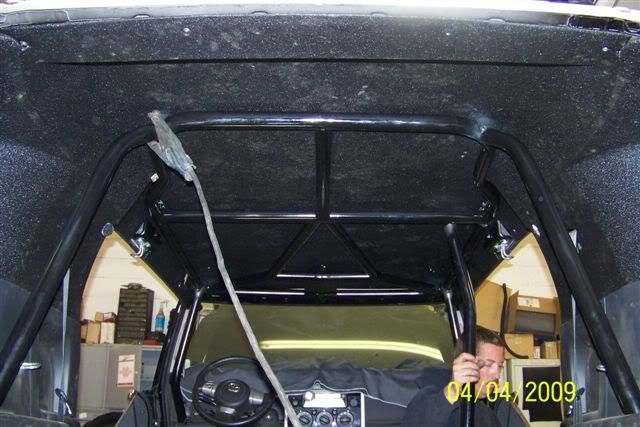
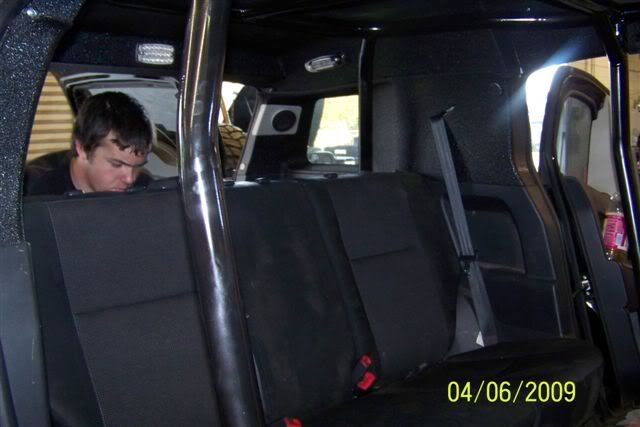
I will try to post pics tomorrow and will have em up no later than Wednesday for sure. The custom ceiling is AMAZING!! and the Linex was the perfect touch to give it that rugged look inside. The detail on this project is amazing; From the Sweet LED lighting system throughout, to the new ceiling, beutiful bends on the cage, and just amazing imagination and thought put in to the design on this puppy. I feel like I'm getting a project from some reality television show like a 4 wheel version on pimp my ride even though I had to pay for it!! :lol:
You think I'm hyping it up? Just wait till you see the newest pics. You be the judge!! Thanks for all your help Dave! Not only will I feel safe now, but I have hands down the coolest FJC interior on the planet!!!
******NEW UPDATE 4/14/09 *********
Stay tuned because I pick up my truck completely finished tomorrow!! I will be snapping from all angles and will have all the details up and loaded tomorrow night!! It looks so sic I can't even begin to explain how much detail went in to this project. Lot's of close ups coming.


")