Toyota FJ Cruiser Forum banner

Dana 60 Teardown - step by step

9.9K views 22 replies 10 participants last post by  MagsCruiser  
#1 ·
So, This probably isn't very applicable here but since I went through the effort to make it I thought I'd share for those interested, I'll show you how to breakdown a Chevrolet Dana 60 (or 1ton) front axle. Let the fun begin.

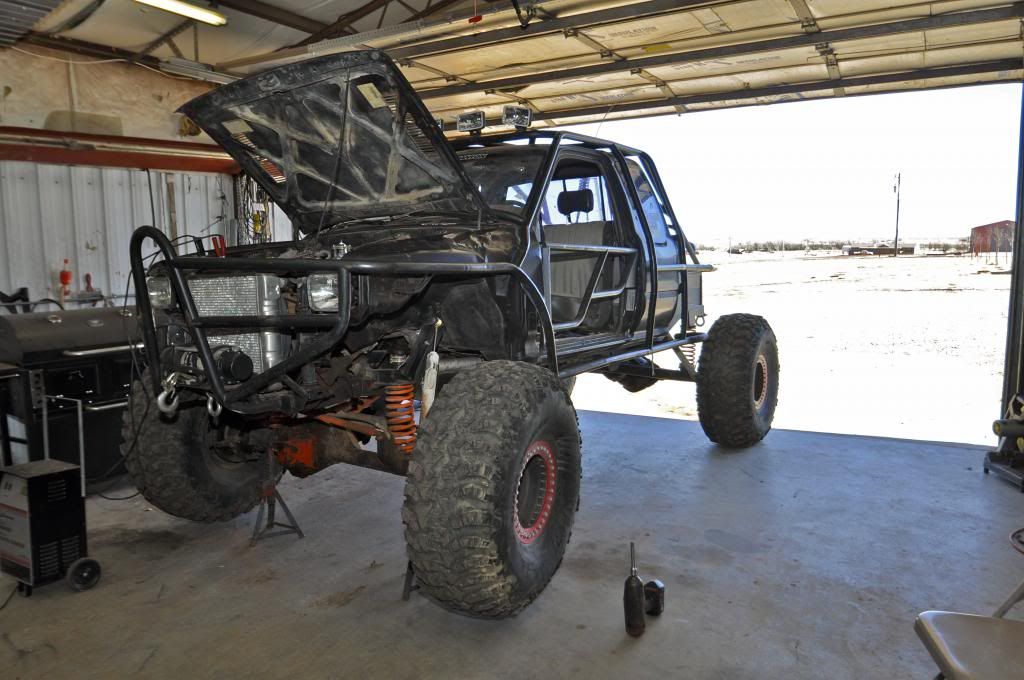
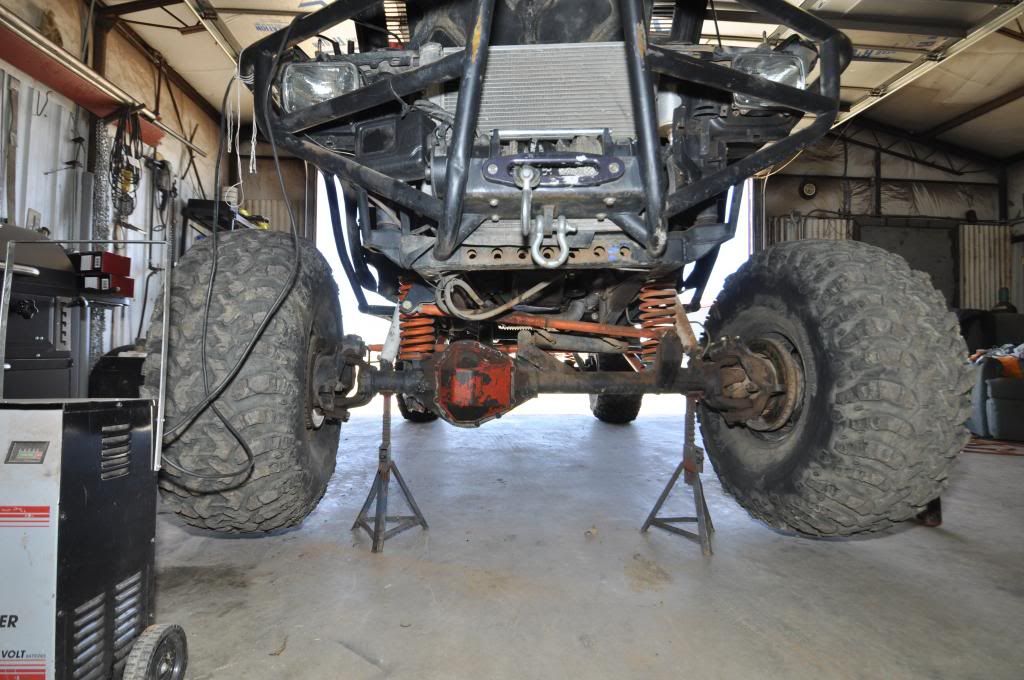
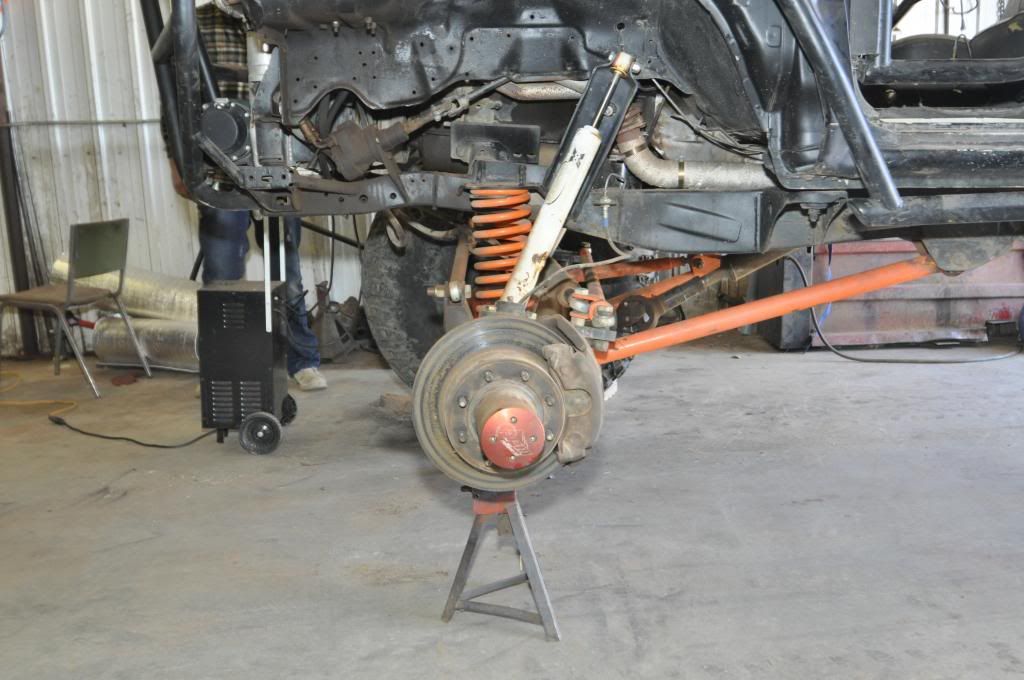
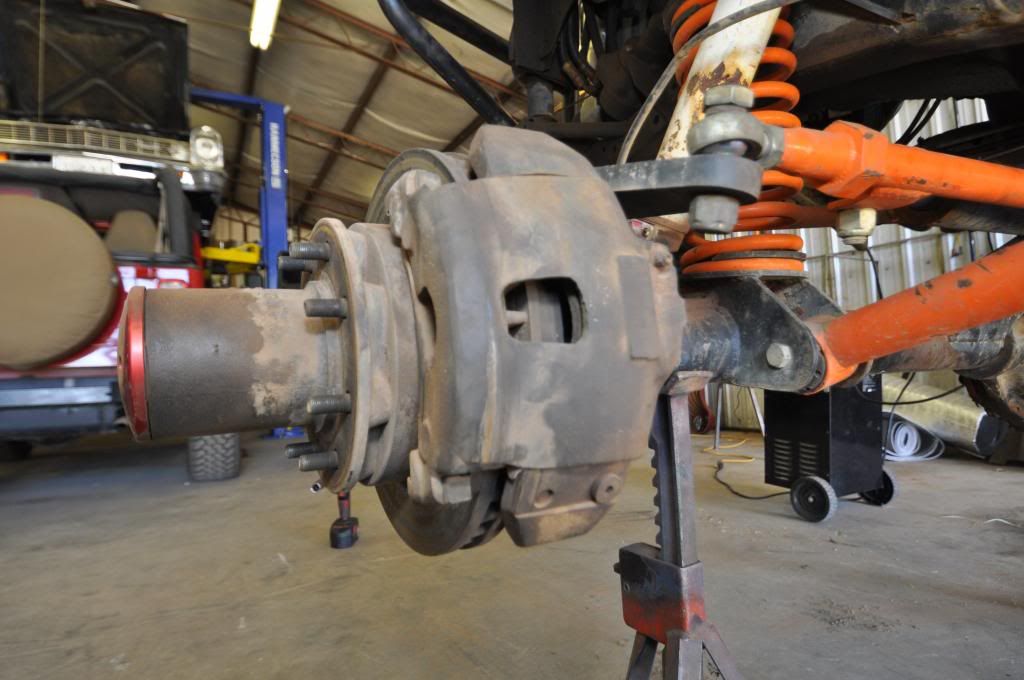
First step is getting your vehicle on a level surface, placing the axle on jack stands, and removing the tires.
Image

Image

Image


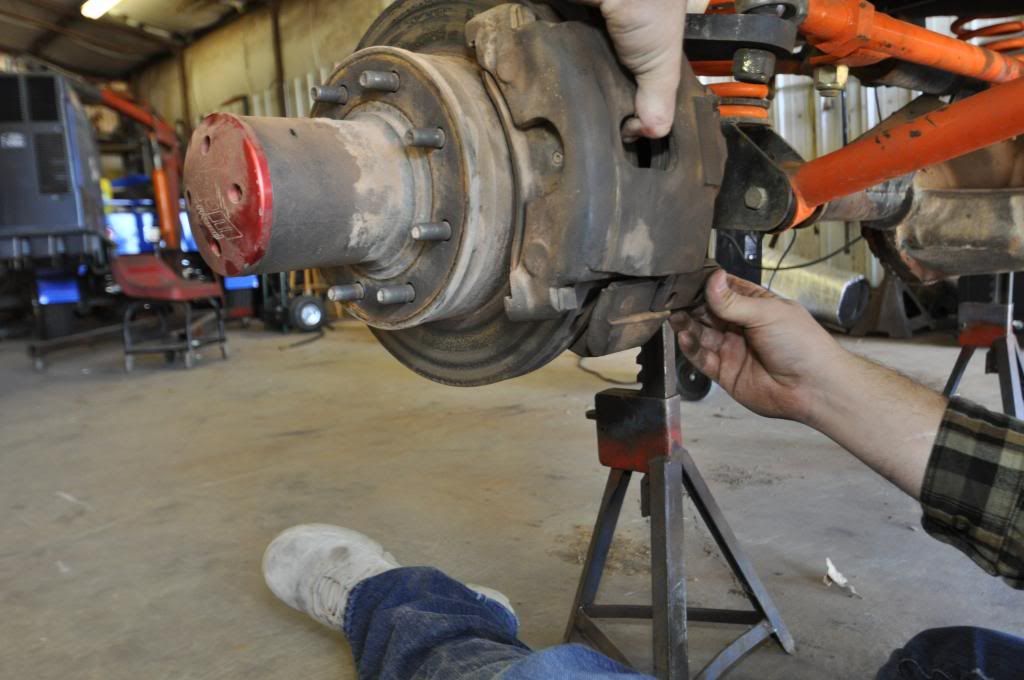
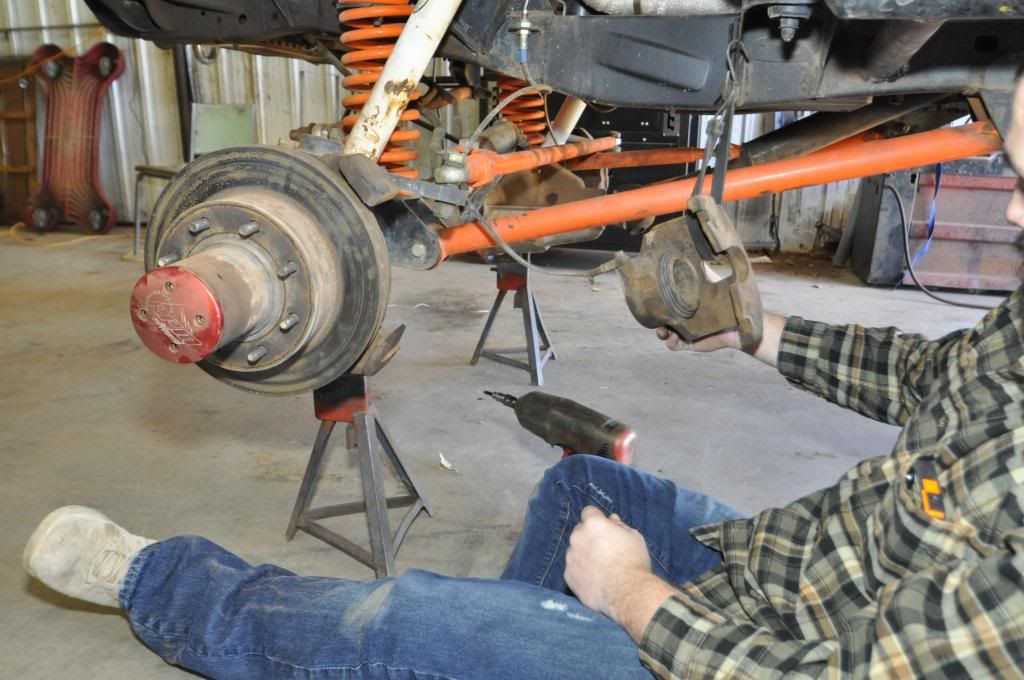
Now that your tires are pulled you'll move to the break calipers. The nut that holds the caliper together will be removed with a 1/4" allen wrench. Once it's free use a bungee to hang it out of the way with out over extending the brake lines.
Image

Image

Image


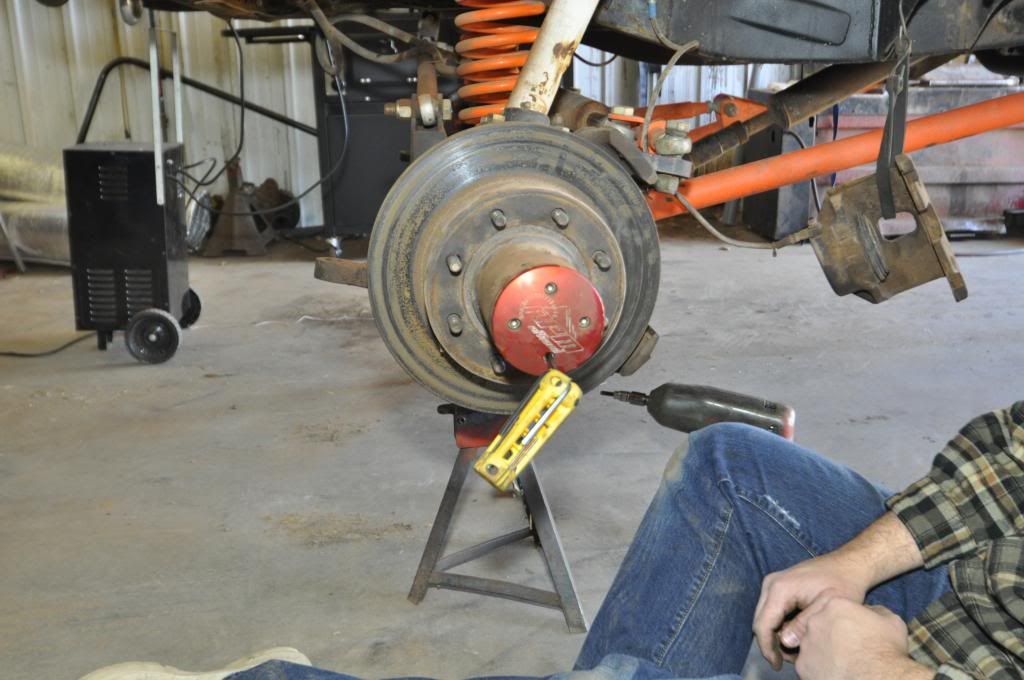
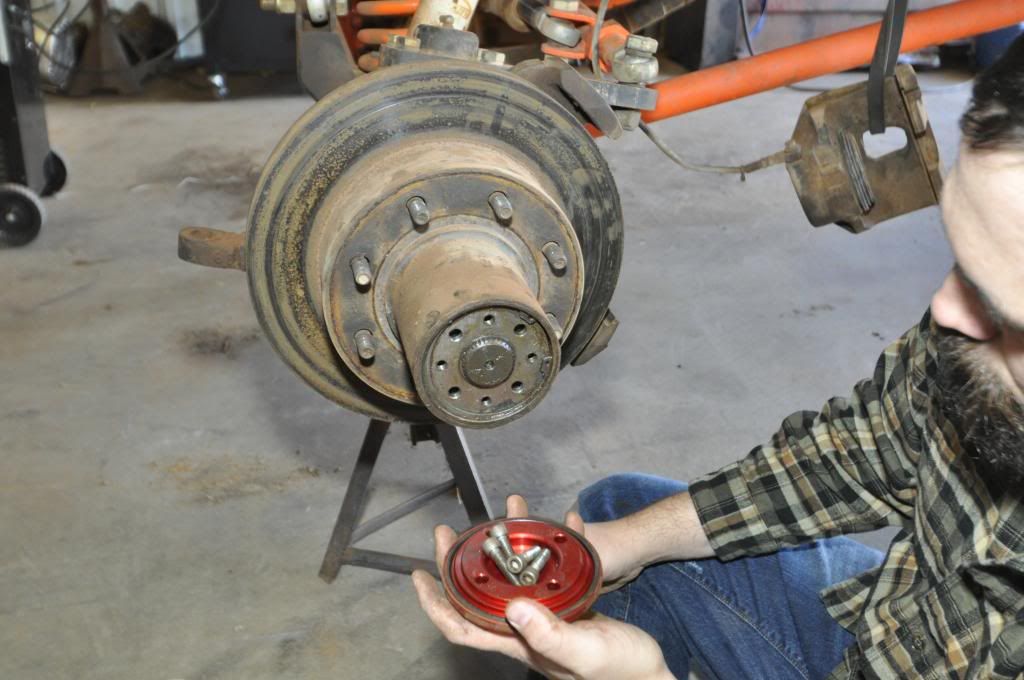
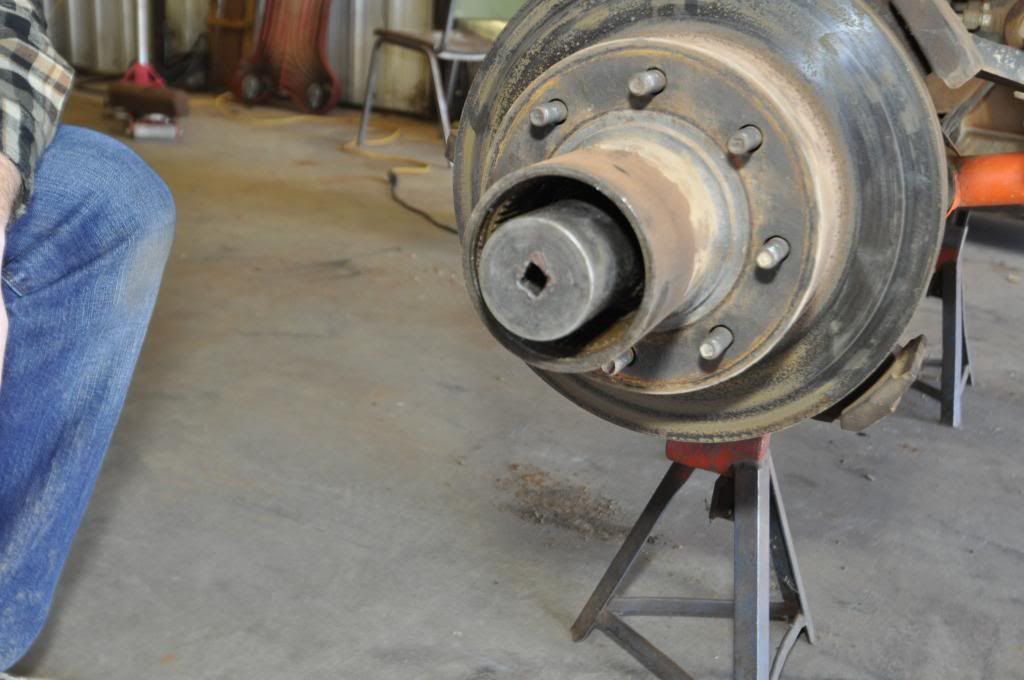
The drive cap will be removed with the same 1/4" allen wrench.
Image

Image


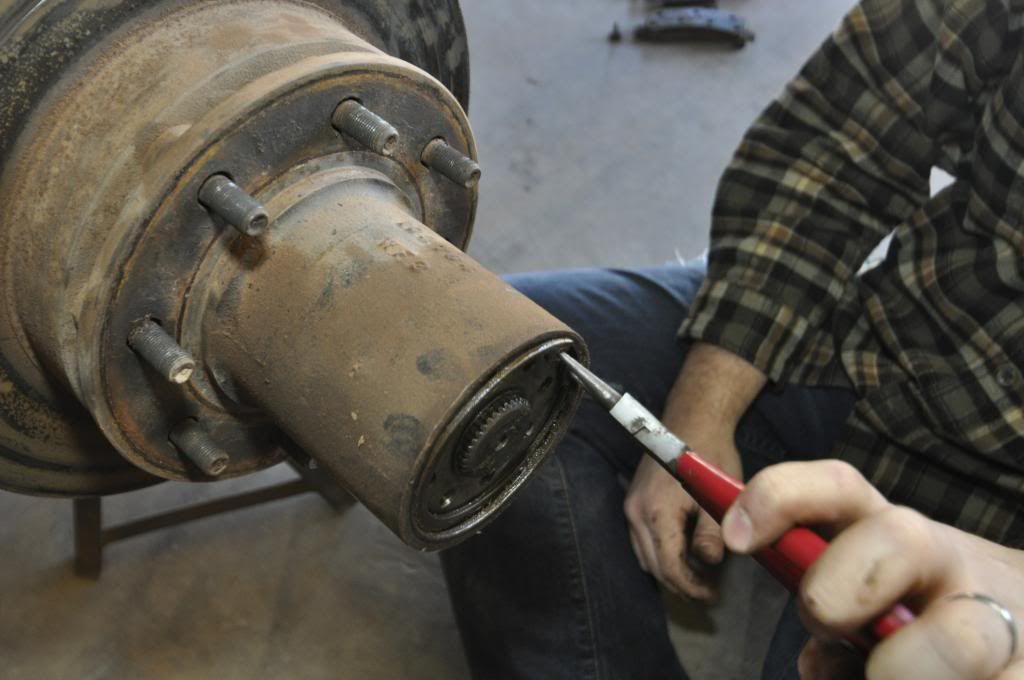
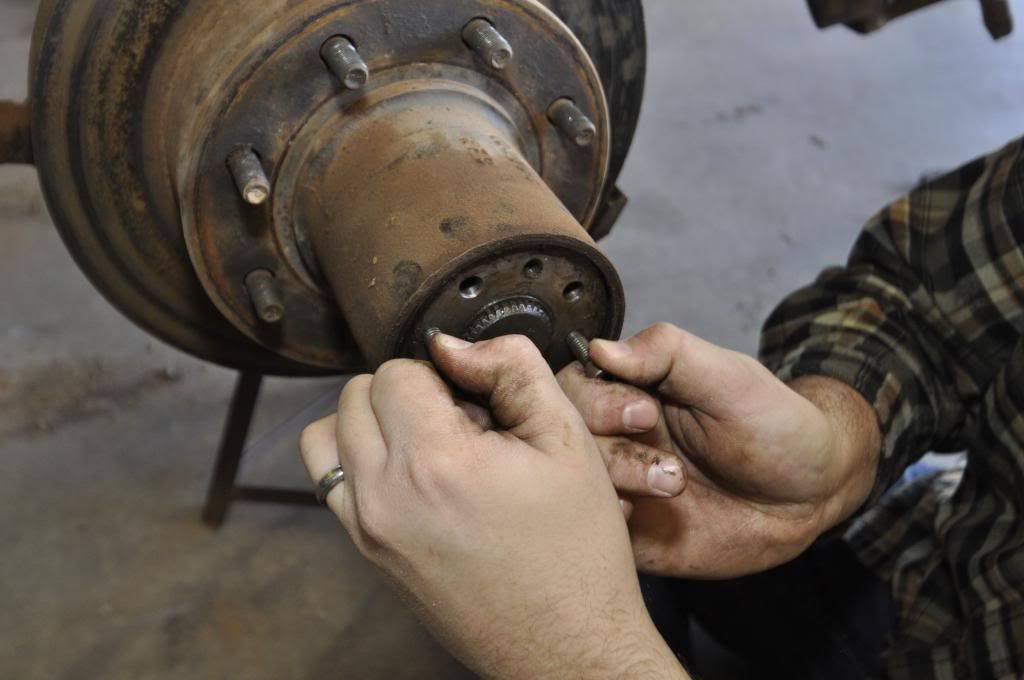
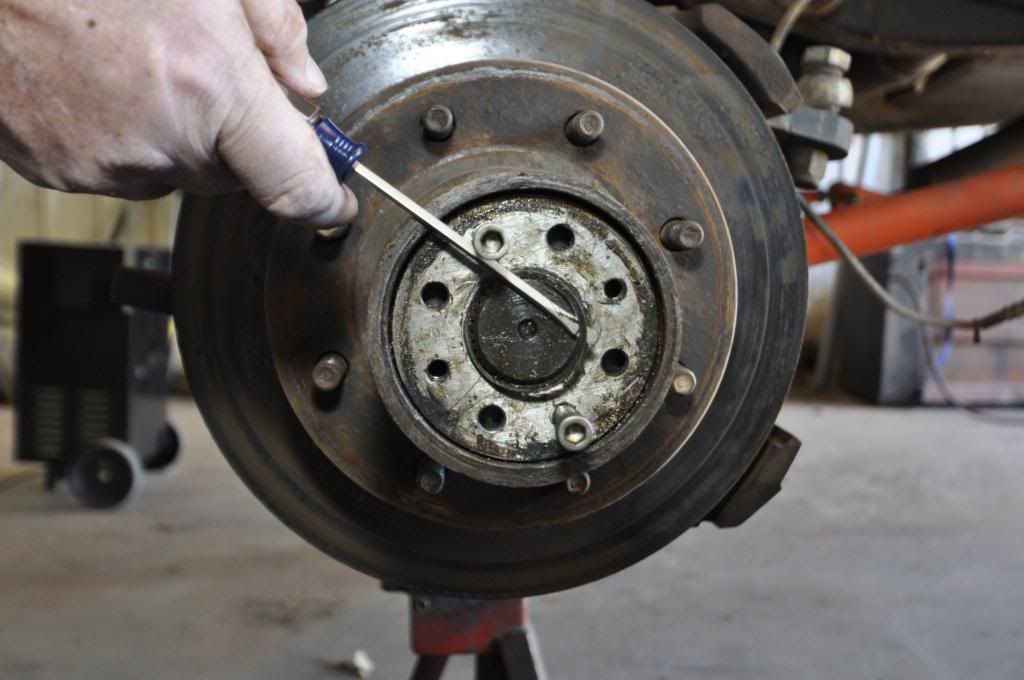
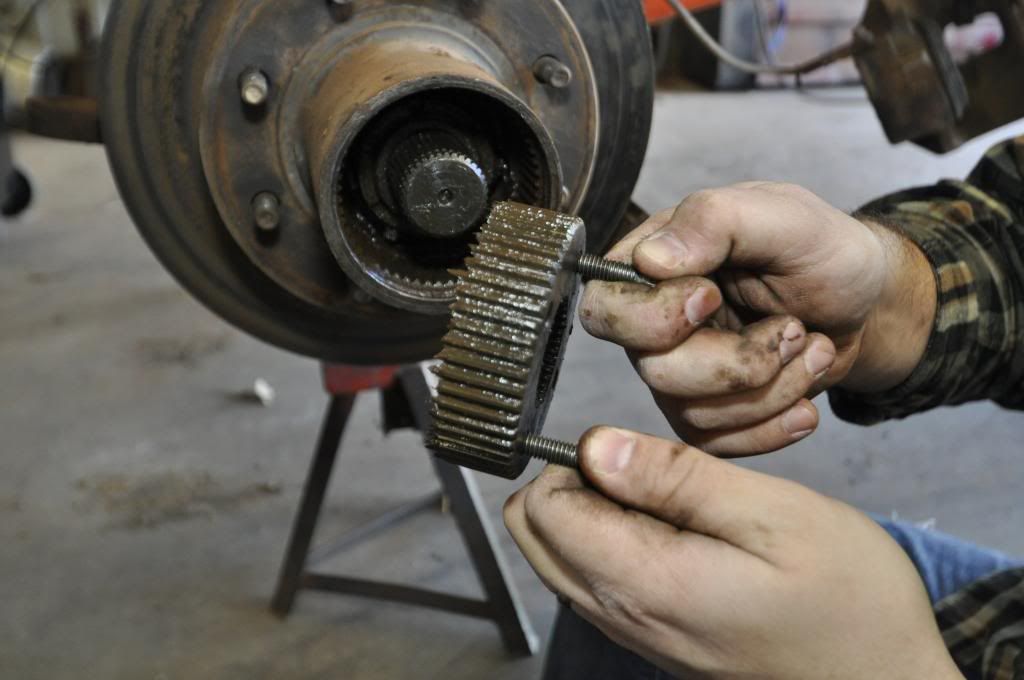
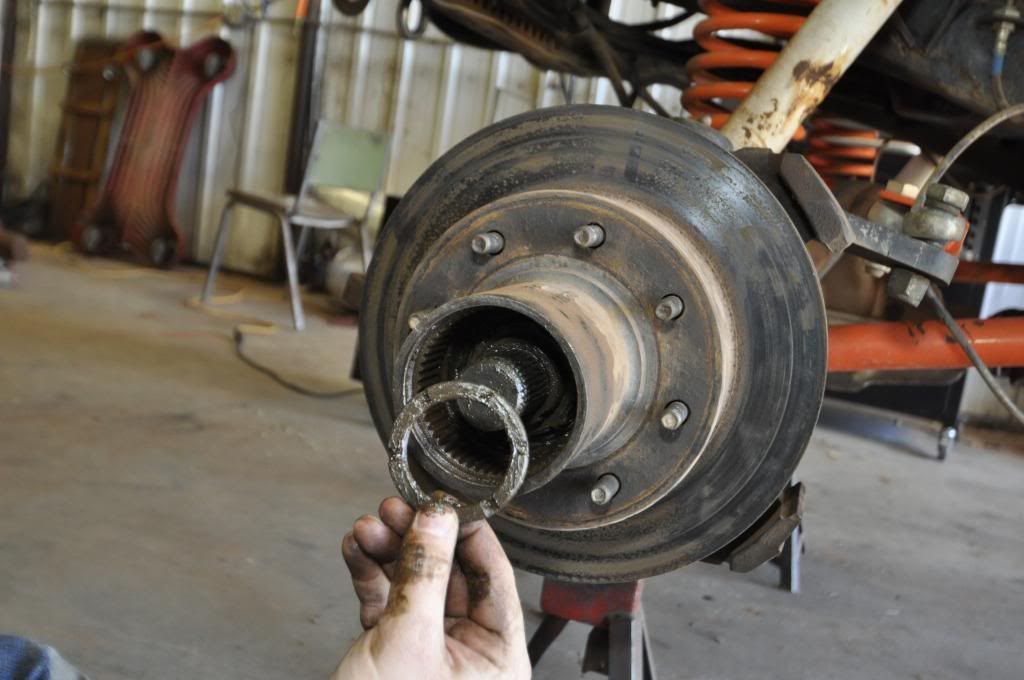
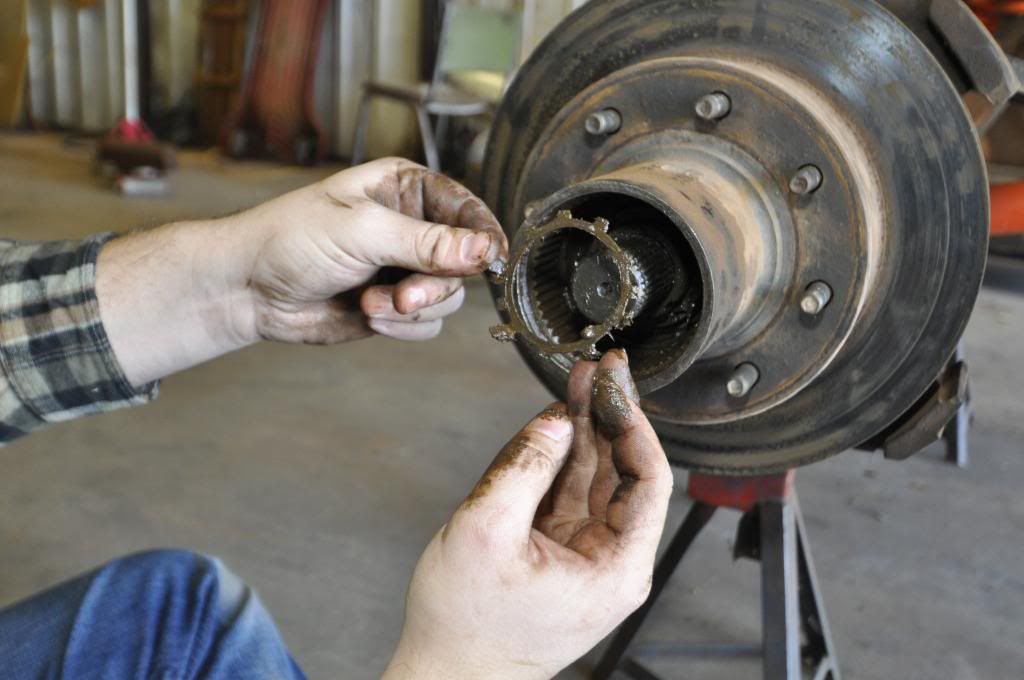
With the cap off just keep pulling the drive flange parts. Once the snap ring is off, you'll use the screws from the caps to pull the flanges.
Image

Image

Image

Image

Image

Image


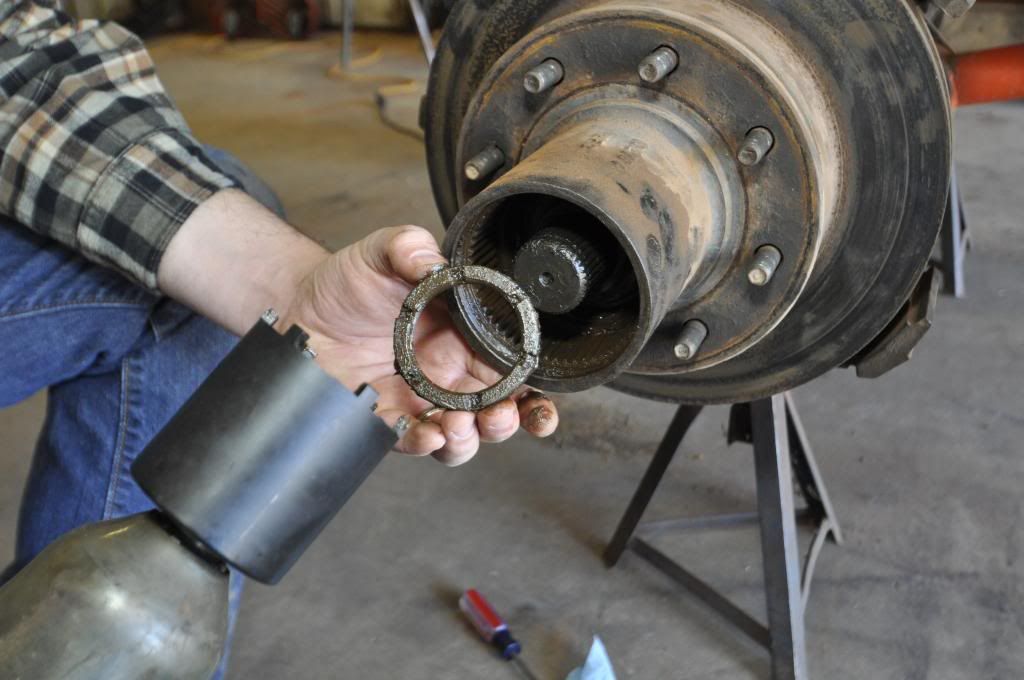
With the flanges out of the way, the next step is removing the hub. You'll need a 6pin 2.6" socket to pull the spindle nuts.
Image

Image

Image

Image

Image


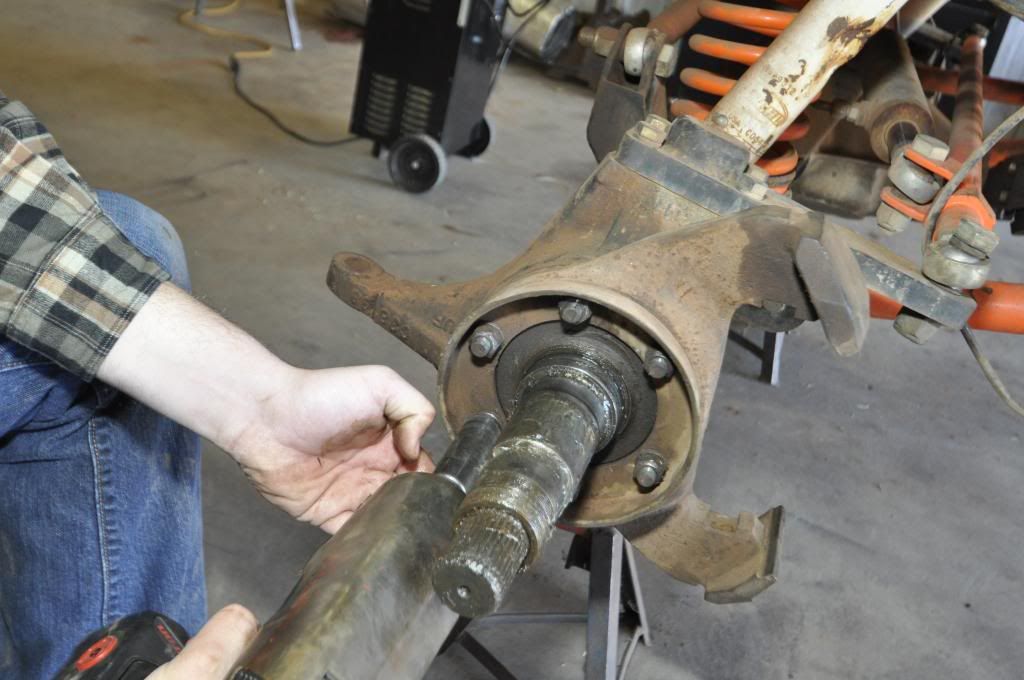
Now that the hub is off, you'll use a 3/4" socket to free the spindle.
Image

Image

Image


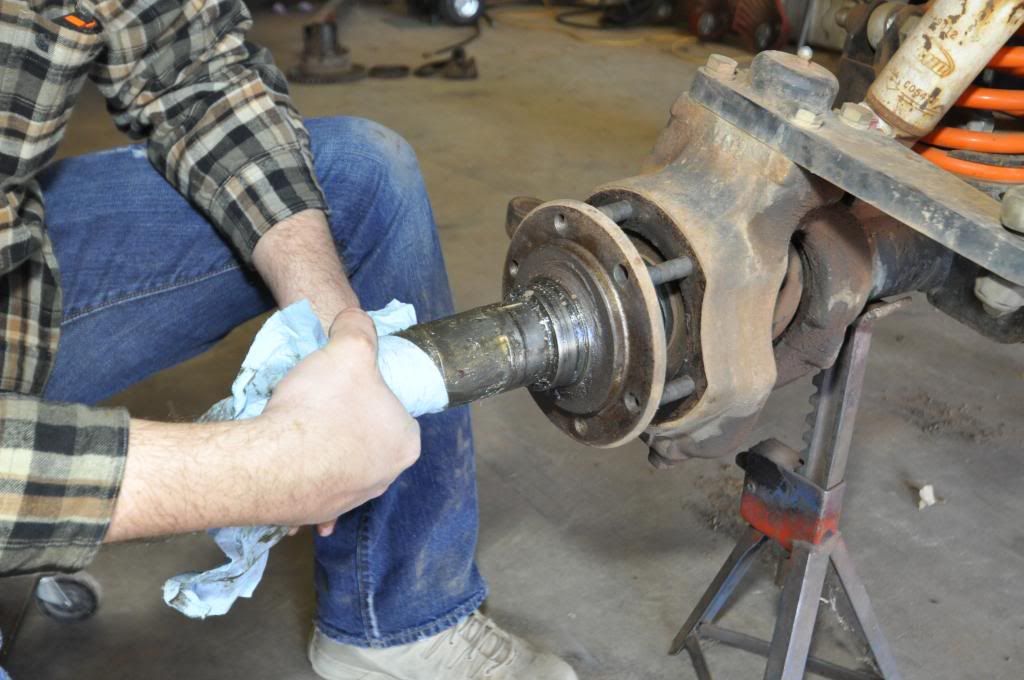
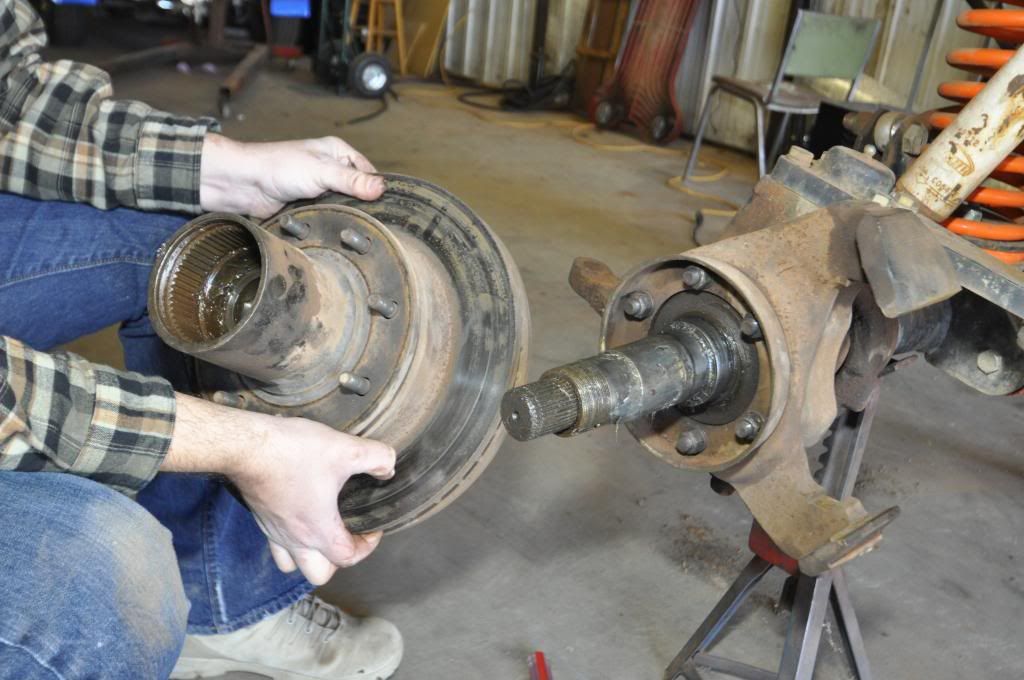
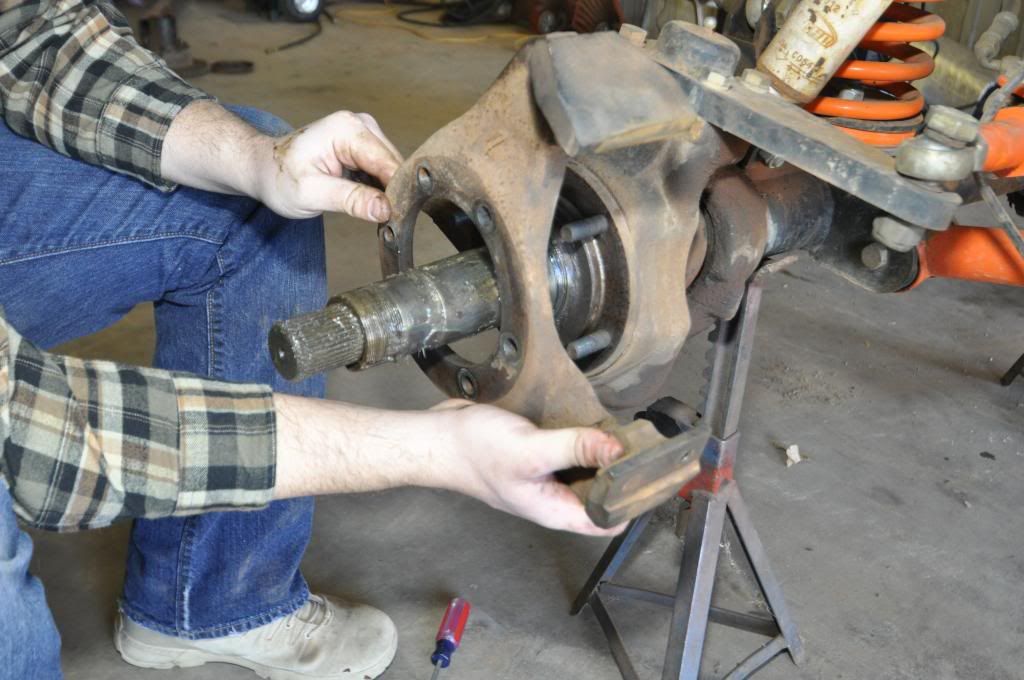
Now the spindle and seals will pull off.
Image

Image
 
#2 ·
Now the axles will slide right out.
Image

Image


Pieces, and empty.
Image

Image

Image


The other side will come apart exactly the same. Except you'll likely be doing this to remove or change a broken axle. In this case it tis the passenger inner axle that is broken. We will resume at that step from above.

Using a drop light you'll see your broken axle shaft. Clean debris.
Image

Image

Image


Pull the diff cover and check for debris. Diff cover will pull with the 1/4" allen wrench.
Image

Image


If you are running a Detroit locker you can use a 3/8" solid rod and drive the axle out from the opposite side.
Image

Image


With the broken shaft out, The spring for the inner seal was wrapped tightly around the end of the shaft. So I have to pull the ring, pinion, and locker. WHen you pull the carrier bolts BE SURE to keep them on their exact side and orientation. Meaning they are side and orientation specific. YOU DO NOT want to mix them up from side to side or flip them over. They need to be put back on in EXACTLY the same place and orientation.
Image

Image

Image


You will need a pry bar or slide hammer to get them out, and an extra set of hands as they are heavy.
Image

Image

Image

Image


Stay tuned next week for rebuild.
Image
 
#3 ·
You would think since Yukon makes the 4340's and the Super Joints that they would work flawlessly right out of the package. That is not the case so this post will be dedicated to the installation of Super Joints into the Yukon 4340 chromoly axle. There are several videos on this if you googled it so I won't get into too much detail. What you really need know is, the videos you see make this look like a little/ very minor filing to the axle and its simple. That is not the case. You will need to file the axle very good. I was told Yukon is aware of these issues and filing/grinding will not void the warranty on the axles.

Step one is to file the flanges on the axles very good every surface the joint will contact. While you need to do a lot of filing you want to be careful not to take the hole in the flange out of round or gouge it in places.
Image

Image

Image


Next step is installing the joint into your axle. Once it's in you'll need to put the clips on.
Image


Now the joint is in one axle: grease the caps, grease the O rings you'll install in the caps, and grease the hole in the axle flange.
Image

Image

Image


Now stick the caps on being careful the O ring stays seated. For this you'll need to make sure the joint is pushed out towards your cap as far as possible.
Image

Image


Keeping the cap level, hit the cap down onto the joint. Be sure you strike flush with the hammer. You don't want to damage the threads for the grease zerk, and clip caps to joint (pic below).
Image


Now repeat the process to combine your inner and outer axles.
Image

Image

Image


Clips
Image


Finish by installing grease zerks and greasing joints.
Image

Image


Now that it is all assembled, work the axle to ensure it moves freely on the joints. If it feels stiff give it a few taps with the hammer on the axle flanges and continue to work.
 
#4 ·
Now that your axles are assembled and ready for install you'll need to prep the housing. This includes replacing the seals and re-installing the ring/pinion/locker.

Inner Seals
Image


You'll need a hand this guy is heavy.
Image


This is important from the teardown. Hopefully you kept track of the carry bolts as I noted in the teardown above. Put them back on and torq them. I'm not sure what factory spec is but I did 90 lbs.
Image

Image

Image
 
#5 ·
Now that your axles are assembled I will dedicate this post to clearance for the knuckle. Again, you would think with Yukon being such a successful company this would not be an issue, but it is so I will address it here. (i'm not sure this is the case on all makes, and axles but the Chevy 60 will need this).

Slide the assemble axle into the knuckle and you will notice the axles will not fit.
Image


I chose to grind the ear on the axle down to resolve this (I understand some people grind out the knuckle to make it a "one time fix", keep any negative comments to your own DIY). All it takes is some light rounding of the edges on the axles.
Image

Image

Image


The ears of the axles will clear, but you will notice your grease zerk is now holding you up. You could put them in with no grease zerks, and install one at a time turning the axles later but at this point I decided to notch the knuckle.
Image

Image


Done axles will slide in
Image

Image


Now just repeat the steps from the tear down and you're rolling again.
Image
 
#6 ·
That is some great info. Thanks for posting it. Cheers


Sent from my iPhone using AutoGuide.com App
 
#9 ·
Thanks everyone. I would have finished it out but I couldn't find inner axle seals. I called all the parts stores in the 4 closest towns and only found one.... :boohoo:
I would have taken any seal but since I had to order one I went ahead and went with the Napa seal here over the national seal here. I like the guide on the napa seals better.

Anyway. Ordered them saturday and I picked them up today, but it'll be the weekend before I get back out to the shop and finish it.
 
#10 ·
Updated and done.

Big thanks to my mom for taking all the photos you see above. She did a great job. Also thanks to my dad and gene for the helping hands along the way.
Image
 
#11 ·
Terrific job documenting. Thank you.
 
#12 ·
Holy Crap! I wanna play in your garage! :D

Nicely done!

Awesome photos Mom!:rocker:

Now dont break the rear or youll have to repeat this and then be the...

Back to back axle champion:bigthumb:

:cheers:
 
#15 ·
Thanks everyone. I looked around on the various sites and it was hard to find a concise start to finish on the entire process so I thought I'd make it for anyone who may need it later.

The axles and joints were dana spicer before. This axle would have 35 spline inners and 30 spline outers from the factory. It was sold to me as having the 35 spline RPM drive flanges as well as 35 spline 4340 outers. That was not the case. The outers were 35 spline, but stil 3411 (or whatever). Regardless the inner that broke was stocky stock.

The super joints will be great. It's new to me not having needle bearings in the caps, but its nice to know I don't have to worry about the joint being the week link in the front end.

Yes 14 bolt rear. and to address OC, I'm not toooo worried about the back breaking as long as I don't do some rock bouncing. The skinny pedal is normally the rear breaker, not a binding issue like I had on the front. Back to Back Champ!

Brad, I've been working on the beard. I've had to trim it a little hear and there but for the most part I've been growing since the middle of October.
 
#16 ·
Very nice wright up!
 
#18 ·
Thanks Jimmiee.

Depends on the price chris. I've seen some one ton sets on CL that are 500 bucks for a 60 front and 70 rear. I've seen other people with them for 1200. It's tough to say. Even if you picked one up cheap just front for say 200, then you have to gear it and lock it at min. That's 1k, if you do axles you're lookin at 1k. Of course those prices can be a lot higher if you go with RCVs and different parts.

63.5 seems narrow for a 60. I'm not 100% since I've not pulled the tape on mine but I think most ford/chevy 60's will be 69-70 range.
 
#20 ·
63.5 seems narrow. if you find one that would set you up about the same as your stock width and hella stronger. Plus you could 4 link that bad boy in there.

It'd be sweet if you 1 ton'd your 80. You can get good flex from leafs, but I'd link it with coil over or ORI. My 3 link works pretty well, but I'd go 4 if I was building it again. One thing about mine that has worked surprisingly well is the steering. Notice anything different.

Image
 
#21 ·
Special thanks to Dumpintheg... For a detailed breakdown of the D60, since we had to take my brother's D60 apart for a rebuild, but need to say that was some insane amount of work, but it was worth doing it ourselfs and learned a lot in the process.

Cheers
 
#22 ·
No problem! Glad you found it useful. It's a bit tough on the first go if you've never done it, but after a little practice you'll be changing axles on the trail like a pro.
 
#23 ·
Darn nice write up........have done of few of these over the years. Not all that difficult, just slow, meticulous and rather dirty.

How about a pic of the Nova that is on the lift? '66 or '67 :rocker: